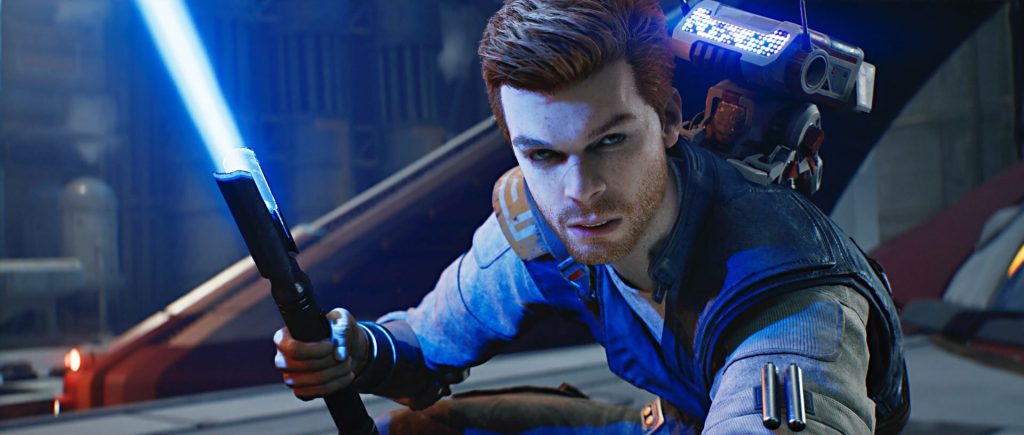
Scanning fallen foes is a returning mechanic in Star Wars Jedi: Survivor, and now has additional utility in a new minigame called Holotactics. The Tactical Guide is an oft-ignored but critically useful compendium of information on every single enemy that Cal Kestis has slain and subsequently scanned with BD-1, at least one time. A handful of enemies do not need to be scanned, bosses for example. Finding and scanning all 72 possible lore entries for the 69 distinct enemies in the codex will be a task and a half since very many unique enemies are locked away behind special activities that can only be properly accomplished post-game.
Star Wars Jedi: Survivor Enemy Scans
The listing in this guide will follow the same order as the one in-game to facilitate locating just the ones you are missing thus far. Exact enemy spawns are not set in stone across the board, but their general regional location can be relied upon to assist you in tracking them down. While some uniques and elites have fixed spawns, rank and file enemies can change or stop appearing entirely for whatever reason, possibly story-related in some way. Two enemies have multiple entries filed under their names.
Unique Outlier (1)
Bode Akuna
Both of Bode Akuna’s twin entries are part of the story and cannot be skipped.
The Galactic Empire (22)
Thirteen entries will already be filled out before you even begin, with the most iconic suspects from the Empire, and thus do not need to be scanned again during the course of the game.
- Scout Trooper
- Scout Trooper Commander
- Stormtrooper
- Stormtrooper Commander
- AT-ST
- Security Droid
- Flametrooper
- Heavy Assault Trooper
- Probe Droid
- Rocket Launcher Trooper
- Electrobaton Purge Trooper
- Electrostaff Purge Trooper
- Purge Trooper Commander
The Ninth Sister
Coruscant
The Ninth Sister’s entry is part of the story and cannot be skipped. Acquired upon beating her.
Shield Trooper
Basalt Rift in Basalt Forest
Scattered all around Basalt Rift in patrols. Rip away their shield with Force Pull and make quick work of them.
Jetpack Trooper
Halls of Ranvell in Ancient Ruins
At the apex of the Halls of Ranvell. Their jetpacks fire in pulses, and you can Force Push their own grenades right back in their faces.
Imperial Officer
Whistling Drop
An Imperial Officer’s corpse can easily be scanned by the fire in the vicinity of the Skriton versus Stormtroopers battle.
Viper Probe Droid
Alignment Control Center
A Chapter 6 encounter will introduce you to these Droids on the path to the Forest Array.
DT Sentry Droid
Trailhead Pantheon
The DT Sentry Droid’s entry is part of the story and cannot be missed.
Security Droid Enforcer
Hangar Bay in II-0810 Satellite Station on Nova Garon
The Security Droid Enforcer’s entry is part of the story and cannot be missed. A Chapter 6 encounter alongside an ISB Agent.
ISB Agent
Hangar Bay in II-0810 Satellite Station on Nova Garon
The ISB Agent’s entry is part of the story and cannot be missed. A Chapter 6 encounter alongside a Security Droid Enforcer.
Darth Vader
The Archive in Cere’s Base
Darth Vader’s entry is part of the story and cannot be skipped. Acquired upon the end of his battle with Cere Junda.
Bedlam Raiders (19)
B1 Battle Droid
Gorge Crash Site in Dredger Gorge
Your first run-in with the Bedlam Raider faction occurs with this Droid type at the very beginning.
B1 Melee Battle Droid
Swindler’s Wash in Rambler’s Reach
You will be introduced to these Droids on the path to the Forest Gate.
B2 Battle Droid
Gorge Crash Site in Dredger Gorge
Near a cave and wall run segment in the Gorge Crash Site location.
BX Droid
Derelict Dam in Dredger Gorge
This Droid can be found within the cave system, hanging out near a Roller Mine.
BX Droid (Hybrid)
Devastated Settlement in Stone Spires
After recruiting Caij Vanda, continue on Chapter 3’s path to encounter this Droid.
BX Droid (Rifle)
Loading Gantry in Viscid Bog
From the Loading Gantry Meditation Point, head through the two archways to the room at the end.
Dagan Gera
All three of Dagan Gera’s entries are part of the story and cannot be skipped.
Droideka
Loading Gantry in Viscid Bog
The Droideka’s entry is part of the story and cannot be missed. A Chapter 4 encounter.
E3-VE3
Untamed Downs in Rambler’s Reach
Legendary Adversary. From the Bygone Settlement Meditation Point in Rambler’s Reach, acquire a Nekko mount nearby, and then navigate to Untamed Downs using the map. Once there, hold to the left side of the canyon until you arrive at a large entrance carved into the side of the plateau guarded by several Roller Mines. Dash through the Green Laser Gate and bear left along the walkway until you arrive at a weathered yellow metal door on which you can use Force Lift. Within is a contingent of B1 Droids and a Legendary Droideka.
The Massiff
Yurt Barracks in Viscid Bog
Legendary Adversary. From the Lucrehulk Core Meditation Point in Viscid Bog, bear left downhill and into the entrance. Head straight through the double doors in the left wall of this corridor, and then diagonally across the next corridor into an open entryway. Clamber up and look behind you, in the direction you came from, for a door to rip open with Force Lift. Inside, a Legendary MagnaGuard awaits.
Urgost, Fist of Rayvis
Observatory Understructure in Mountain Observatory
Legendary Adversary. A Bedlam Smasher encountered in Chapter 5 during the course of the main questline as you ascend the Mountain Observatory.
Bedlam Raider Lieutenant (Single-Blade)
Observation Deck in Mountain Observatory
At the apex of the Observation Deck.
Bedlam Raider Lieutenant (Double-Blade)
Devastated Settlement in Stone Spires
From the Grand Courtyard Meditation Point go through the crevice in the vicinity to the apex of the Devastated Settlement.
Magnaguard
Automated Forge in Abandoned Foundry on Shattered Moon
The Magnaguard’s entry is part of the story and cannot be missed at the start of Shattered Moon.
Rayvis
Rayvis’ entry is part of the story and cannot be skipped at the start of Chapter 5.
Raider Veteran
Observatory
The Raider Veteran’s entry is part of the story and cannot be missed. A Chapter 5 encounter.
Raider Grunt
Observatory
The Raider Grunt’s entry is part of the story and cannot be missed. A Chapter 5 encounter.
Bedlam Smasher
Lucrehulk Core in Viscid Bog
A Chapter 5 encounter will introduce you to these Bedlam Raiders during the course of the story.
Beetu Deetu
Southern Reach in Rambler’s Reach
Legendary Adversary. Begin at the Southern Reach Meditation Point and simply bear left uphill. This Legendary B2 Droid will eventually be transported directly into your path by a dropship.
Haxion Brood (8)
If you choose to embark upon all of Caij Vanda’s Bounty Rumors, then the entire Haxion set of entries will be scannable over the course of completing this side quest.
Haxion Brood Commando
- Fogged Expanse in Prospector’s Folly
Bounty. Begin at the Fogged Expanse Meditation Point and head towards the lit path ahead of you, through the twisting passageway until you stumble upon Vaslyn lurking in the fog alongside other unnamed bounty hunters.
- Automated Forge on Shattered Moon
Bounty. Begin at the Automated Forge Meditation Point and simply head straight through the large doorway and past a droid where you will find the Haxion Brood Commando alongside the Haxion Brood Brawler Bounty Droid named Mash.
Haxion Brood Brawler Bounty Droid
Automated Forge on Shattered Moon
Bounty. Begin at the Automated Forge Meditation Point and simply head straight through the large doorway and past a droid where you will find the Haxion Brood Brawler Bounty Droid named Mash alongside the unnamed Haxion Brood Commando.
Haxion Brood Bounty Droid
Yurt Barracks in Viscid Bog
Bounty. Begin at the Loading Gantry Meditation Point and proceed on foot through the Lucrehulk Core, and on to the Yurt Barracks. Jo awaits alongside a Bedlam Raider and a Magnaguard Droid.
Haxion Brood Bounty Hunter
Hangar Bay in II-0810 Satellite Station on Nova Garon
Bounty. Waiting out in the open alongside two other bounties.
Caij Vanda
Bounty. Caij Vanda’s entry is part of the Bounty Rumor set and cannot be skipped if they are all completed.
Haxion Brood Shock Commando
Derelict Dam in Dredger Gorge
Bounty. Begin at the Derelict Dam Meditation Point and head in the direction of the Gorge Crash Site. Only a short distance in, turn the left corner into a derelict tunnel with a Roller Mine and proceed deeper inside to where Kip is lurking.
Haxion Brood Gunslinger
Boiling Bluff in Rambler’s Reach
Bounty. Begin at the Boiling Bluffs Meditation Point and head through the twisting canyon towards the Untamed Downs.
Haxion Brood Grenadier
- Devastated Settlement
Bounty. During the course of Chapter 3, at the Devastated Settlement in the Stone Spires, you will inevitably be confronted in combat by a mini boss–Korej Lim. Defeat him, your first bounty, then converse with the waiting Caij Vanda in the vicinity in order to bring her over to the Cantina. Scan his corpse after that.
- Observatory Understructure in Mountain Observatory
Bounty. Begin at the Observatory Understructure Meditation Point and grapple your way across the orange air buoys a short distance, until you catch a glimpse of Selfin Jook alongside two other unnamed bounty hunters in blue.
Flora and Fauna (17)
Gorocco
Derelict Dam in Dredger Gorge
Start at the Derelict Dam Meditation Point and get across the bridge to see an NPC battle between the Gorocco and B1 Battle Droids.
Gorger
Smuggler’s Tunnel in Rambler’s Reach
Found during the course of exploring the Smuggler’s Tunnel beneath Pyloon’s Saloon.
Vile Bilemaw
Fogged Expanse in Prospector’s Folly
Legendary Adversary. Begin at the Fogged Expanse Meditation Point and use the zipline ahead of you to its very end. Now bear left right off the edge onto another small ledge and once again onto a mudslide landing you feet first in the lair of a Legendary Bilemaw.
Gorocco Matriarch
Derelict Dam in Dredger Gorge
Legendary Adversary. Begin at the Derelict Dam Meditation Point and head in the direction of the Gorge Crash Site. Only a short distance in, turn the left corner into a derelict tunnel with a Roller Mine. Lure it out so that it follows you as you proceed on the slightly downward sloped path opposite the tunnel entrance. At the base of the path, wall run over to the other side and then Force Pull the Roller Mine over as well. Next, Force Push the Roller Mine, as it begins its detonation sequence, directly at the wall with bluish veins running through it, behind the three lights. Once inside, just keep going past the pair of B1 Droids and the Gorocco that comes crashing in, and shimmy up the rope. Atop this ridge bear left past the pair of Roller Mines, and over the land bridge towards another pair of B1 Droids guarding a weathered yellow metal door. Use Force Lift to enter it and head around the U-bend to arrive at the plateau with a Legendary Gorocco.
The Mire Terror
Viscid Bog
Legendary Adversary. Begin at the Viscid Bog Meditation Point and use the zipline ahead of you to its very end. Sprint for the grapple point before you sink too deep and launch yourself towards the weathered yellow structure on the left with another grapple point beneath it. Atop the plateau, move to the right edge where you can begin Force Lifting the three sunken stone mesas in succession as you traverse across them to another plateau. Straight ahead on a lower platform beneath it, you will encounter a pair of Mogus, one of which is Legendary, and the other an easter egg.
Rancor
There are at least two distinct encounters with Rancors to be had:
- Sodden Grotto in Rambler’s Reach
Legendary Adversary. You can embark on this pursuit either directly, or by speaking with a Prospector NPC in Rambler’s Reach Outpost to get a Rumor called “Find Missing Prospectors”. If you haven’t already unlocked the Sodden Grotto Meditation Point then begin at the Rambler’s Reach Outpost Meditation Point instead: clamber up the vines ahead. Bear left towards the mine entrance in the side of the mountain and head downward and deeper. The Sodden Grotto Meditation Point marks the end of your journey and just beyond it is the lair of a Legendary Rancor.
- Rooftops in Coruscant Undercity on Coruscant
Force Tear. Double back from the Rooftops Meditation Point to the very beginning of the area, by using the pipe to the right. Use Force Lift on the door there to access the Fractured Malice Force Tear and battle a pair of Rancors, which are one of the hardest opponents to face when solo, let alone as a duo.
Bilemaw
Forest Array in Basalt Forest .
The Bilemaw’s entry is part of the story and cannot be missed. A Chapter 2 encounter.
Rawka
Swindler’s Wash in Rambler’s Reach
From the Swindler’s Wash Meditation Point simply descend down to the waters beneath to find random Rawkas.
Spawn of Oggdo
There are at least two distinct encounters with Spawn of Oggdo to be had:
- Fort Kah’Lin in Rambler’s Reach
Legendary Adversary. From the Fort Kah’Lin Meditation Point, head towards the fort and up the grapple point. Once in the tower move along the ramparts until you arrive at the large open space with the patrolling B1 Droids. As this is the other most formidable Adversary, avoid stepping on the circular door as that will cause it to open instantly and unexpectedly, plunging you and everyone else without preparation into this Legendary beast’s lair.
- Rambler’s Reach Outpost in Rambler’s Reach
Force Tear. After besting the Legendary Adversary Spawn of Oggdo in Fort Kah’Lin in Rambler’s Reach , use Force Sense on the glowing Oggdo to the right of the door. Now return to Doma’s Outpost Commodities in Rambler’s Reach Outpost opposite Pyloon’s Saloon. Use Force Sense on the glowing Oggdo to the left of Doma herself, opening up a Force Tear right then and there. This one tasks you with defeating The Horrors Of Bogano, which are an Oggdo Bogdo and yet another Spawn of Oggdo, concurrently.
Bramlik
Devastated Settlement in Stone Spires
After recruiting Caij Vanda, ascend the vines in the vicinity to encounter this rare Bramlik.
Shiverpede
Gorge Crash Site in Dredger Gorge
From the Gorge Crash Site Meditation Point, head left a few paces past the Prospector and his campfire, towards the shoreline of a lake.
Mogu
Basalt Rift in Basalt Forest
After recruiting Toa to the Cantina, proceed toward the Jedi Meditation Chamber Of Reason. At the hill’s apex is a Mogu.
Hardshell
Ruins Landing Site in Ancient Ruins
At the very beginning, right by the Mantis, as you proceed uphill.
Golden Skriton
Desert Ridge in Narkis Desert
Legendary Adversary. Begin at the Anchorite Base Meditation Point and navigate to the Desert Ridge ideally using a convenient mount to make the trek there. Within a small arena off to the side, you will find a Legendary Skriton.
Skriton
Halls of Ranvell in Ancient Ruins
The Skriton’s entry is part of the story and cannot be missed.
Sutaban
Monastery Walls in Ancient Ruins
Bear left from the Monastery Walls Meditation Point while staying off the ground as far as possible. Jump and grapple from column to column, avoiding the creature under the sand. Head for the crumbling stone block entrance at the rear of the ruins. Once through, head right, slide down the slope and grapple when the opportunity provides. Get across the beam on the right to the platform on the other end. The Sutaban is prowling beneath.
Sutaban Alpha
Crypt of Uhrma
Legendary Adversary. From the Crypt of Uhrma Meditation Point, head right and past the statue into the doorway. Ascend the stairs on the right, go through the door and back out into the open. Hold to the right, cross the chasm, go past the pair of obelisks on the left, and turn the right corner straight into a cave with wind chimes and talismans suspended at the entrance. Continue right into the doorway. Inside the Crypt of Uhrma proper, use Force Pull to get through the door puzzle. Drop down, look left, and use Force Pull on the grate. Back in the open once more, you will have arrived at Trailhead Pantheon, and a Green Laser Gate to Dash through as you follow the beaten path. Pass through the small waterfall and then squeeze through the crevice into the lair of a Legendary Sutaban.
Droids (2)
Roller Mine
Derelict Dam in Dredger Gorge
Begin at the Derelict Dam Meditation Point and head in the direction of the Gorge Crash Site. Only a short distance in, turn the left corner into a derelict tunnel with a Roller Mine.
Scavenger Droid
Hangar 2046-C in Undercity Skylanes on Coruscant
Right besides the Mantis. If you missed that one, they can also be found in Southern Reach. In the event that those Scavenger Droids escape you too, by burrowing, simply return to a Meditation Point to force a respawn.
The Tactical Guide is a priceless resource for anyone wanting an edge against a given enemy. The lore is a nice touch, but the tactical tips are invaluable to gain insight into what Stances, Skills, and abilities would work best to counter each class of opponent. Once the Tactical Guide has been scanned to completion you will have unlocked the Intergalactic Achievement and Trophy in Star Wars Jedi: Survivor. Good hunting!


