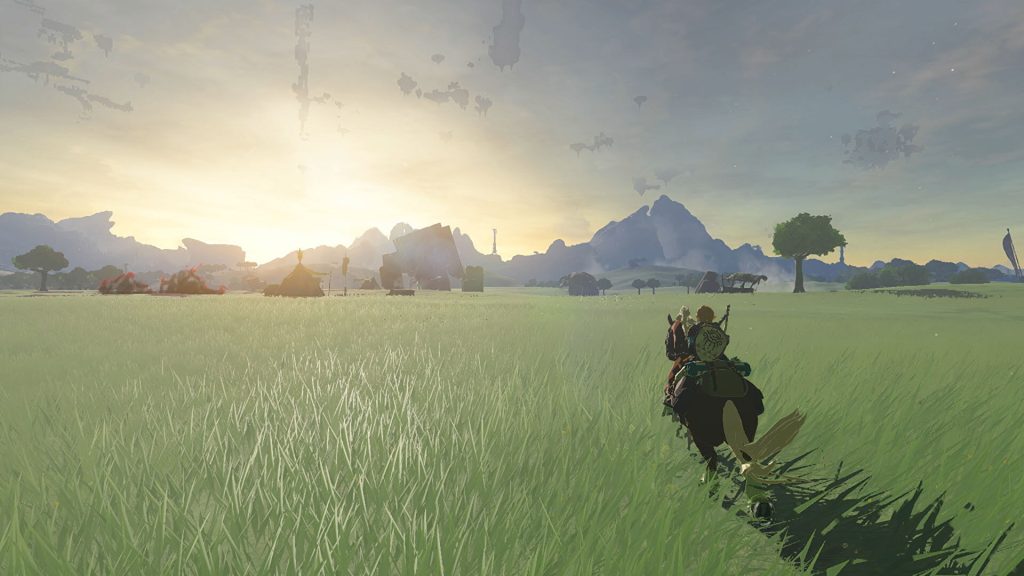
The Legend of Zelda: Tears of the Kingdom is available worldwide on Nintendo Switch, and it’s a massive new adventure for fans to undertake. The odds are stacked, but Link has new abilities to even the odds. Several of these are available early and provide game-changing ways to experience the open world.
Unlike the Runes in The Legend of Zelda: Breath of the Wild, you can’t upgrade the new abilities. It’s not the worst trade-off with how strong some of them can be. Let’s look at all of them and their locations. Spoilers follow for the story, so be warned.
All Abilities and Their Locations
How to Get Ultrahand
The first ability you’ll likely get is Ultrahand, located in the Ukouh Shrine on the Great Sky Island, where Link starts his journey. It can lift and combine different objects, manipulate environmental objects, create vehicles and solve puzzles. You can push, pull and rotate them accordingly. Any attached objects are detached by targeting them and shaking the right analog stick.
Of course, Ultrahand also comes in handy during battles – it’s essential to beat the Flux Constructs, and being able to lift and drop some explosive barrels on Bokoblins is underrated.
How to Get Fuse
Fuse is unlocked from the In-isa Shrine on Great Sky Island and is another one of the initial abilities that Link will get before returning to the surface. It allows the combination of melee weapons and shields with different materials or other weapons. You can attach a sword at the end of your current sword, a Flamer to a shield that acts as a flamethrower when held up, a boulder to a stick to break rocks and mine materials and much more.
Fuse even allows for combining items to arrows for a myriad of effects. Combine a Frost Chuchu with them for a freezing shot or a Keese Eyeball for a tracking shot. You can also attach Zonai Rockets for super-propelled arrows. It’s encouraged to experiment with the ability since you can also Fuse different materials to increase the overall damage of arrows and weapons.
But perhaps the best part about this ability is raising a weapon’s durability. Some fused materials, like a Bokoblin arm, can still break if you swing enough times, but they’ll often leave the base intact. Fuse stuff with your weapons as often as possible to gain an edge over some of the tougher challenges.
How to Get Ascend
Ascend is unlocked from the Guntanbac Shrine on Great Sky Island and adds a new dimension to platforming and exploration. It lets you ascend through a ceiling and emerge from the other side. While this sounds simple, positioning yourself directly below a surface or structure, traveling through and emerging at the top without consuming any stamina is incredible.
Ascend only seems to work on surfaces right above you, so don’t count on using it to drill through entire mountains from the side. You also need enough surface area, or you can’t Ascend through it. The indicator will be red if you can’t Ascend through something and turn blue when you can.
It’s also worth noting that you might need to be at a minimum distance from a ceiling to Ascend through it. Uneven surfaces also seem problematic, so keep that in mind when surmounting any Sky Islands.
How to Get Recall
Unlocked via Nachoyah Shrine on the Great Sky Island, Recall is an ability which can rewind an object’s path. It only works on inanimate objects, but its potential is pretty insane. If enemies send giant spiked balls down slopes or throw boulders, you can activate Recall and send them right back (time also slows down, making it easier to target). Recall is also used on the giant rocks that fall from the sky, sending you back up and either accessing their origin point or providing a vantage point to dive or paraglide.
If that weren’t enough, you can use Recall to rewind the path of the vehicles. For example, if you assemble a glider but don’t have wheels or a slope for momentum, use Ultrahand to lift it for a few seconds, drop it, and activate Recall. Jump on shortly after, and it will temporarily suspend you and the glider in mid-air. Hit the turbines, and you’re good to fly.
Of course, it’s also useful as an undo button, so if you mess up a puzzle step, activate Recall to bring a piece back to the previous point. Glider going off the edge? Don’t fumble for Ultrahand – just active Recall to rewind it, and then switch to Ultrahand for an easy catch.
How to Get Autobuild
Autobuild is in the Depths, accessible via the various chasms in Hyrule. Follow the quest with Robbie (which leads to getting the Camera function for the Purah Pad), and go to the Hyrule Field Chasm. Follow the statues until you reach the Great Abandoned Central Mine, where two “researchers” are trying to unlock an ancient power. This is Autobuild, and once obtained, you can test it out on the disassembled vehicle nearby.
Autobuild essentially creates a design based on your history. If you made it before and the relevant parts are present, use the ability near them to automatically assemble the vehicle (which takes Zonaite in some cases). You can favorite designs and thus create oft-used vehicles on the fly. Since you can carry Zonai Capsules containing the parts, all you need to do is drop them down, select a design with Autobuild, confirm, and it will assemble itself.
After obtaining Autobuild, Link will also receive a Schematic for a Glider with three Fans. Schematics are essentially designs for vehicles to auto-build, and there are several others to discover as you continue exploring the Depths.
All Sage Summons and Their Locations
Like the Champions in The Legend of Zelda: Breath of the Wild, Link can call upon the Sages, who will lend their powers. The main difference is that you’re not just using their abilities but summoning them to your location. They’ll fight by your side in combat, and interacting with them will unleash their special ability. However, they also have powers which are invaluable while exploring.
Let’s look at all the Sage Summons, what they do and where to find them. It’s worth noting that you can deactivate these abilities if you so prefer.
How to Summon Yunobo, the Sage of Fire
Found in Goron City on Death Mountain after completing his quest, Yunobo will roll into enemies and set them on fire during combat, even knocking them back when interacted with. While exploring, Yunobo breaks boulders and rocks containing ores, making it easier to mine Zonaite in the Depths.
How to Summon Tulin, the Sage of Wind
Found in Hebra, you’ll need to complete the quest to have Tulin on your side. When summoned and interacted with in combat, Tulin will blow enemies away with wind and fire arrows at range. While exploring, Tulin can send a powerful gust of wind forward based on your direction. It’s pretty great when gliding and helps traverse large distances.
How to Summon Riju, Sage of Lightning
Go to Gerudo and finish the town’s quest to gain Riju’s power. Interacting with her in combat will create a field and calls down a massive lightning bolt on a target shot with arrows. While exploring, Riju’s ability can also break rocks while powering various devices.
How to Summon Sidon, Sage of Water
Your old buddy Sidon returns and lends his power after finishing the Zora’s Domain quest in Lanayru. When summoned and interacted with in combat, he’ll encase Link in a water bubble, which prevents damage from a single hit. It can break when you attack with a melee weapon while firing a water projectile. While exploring, Sidon’s ability can help reduce your temperature in more scorching regions (or when fighting the Gleeok) and clean up sludge during his quest.
How to Summon the Sage of Spirit
The fifth Sage is special and has perhaps the longest questline. After defeating a familiar boss in Hyrule Castle, you’ll receive the quest to find the fifth Sage. First, you must find the ruins from the Age of Legends, which refers to Kakariko Village’s Ring Ruins. It plays a part in “A Trip Through History,” which involves finding stone tablets for Bugut in Kakariko, though it’s unknown whether you need to complete that quest first.
Go to the main area and use Ascend to get to the room. Take a picture and report back to Paya and Tauro. Go to the Skyview Tower in Popla Hills, then to Dracozu Lake, where Tauro is. After speaking to him, get the Charged Shirt from the chest. Follow the river, and find other chests with other pieces from the set. Once you reach the end, drop a Zonai Charge on the altar, and Thunderhead Isles opens up.
The Isles suffered from frequent thunderstorms, so don’t equip any metal armor or weapons. After solving puzzles and reaching the end, you encounter Mineru, Rauru’s sister. However, she’s a large Construct, and you must collect parts from the facility to make her whole.
Once done, she effectively serves as a mech that Link can ride. You’ll also face a boss, the Seized Construct while piloting Mineru. This allows for firing lasers, attaching weapons to her hands for melee strikes and jumping super high. If this doesn’t sell you on the game, nothing will.


