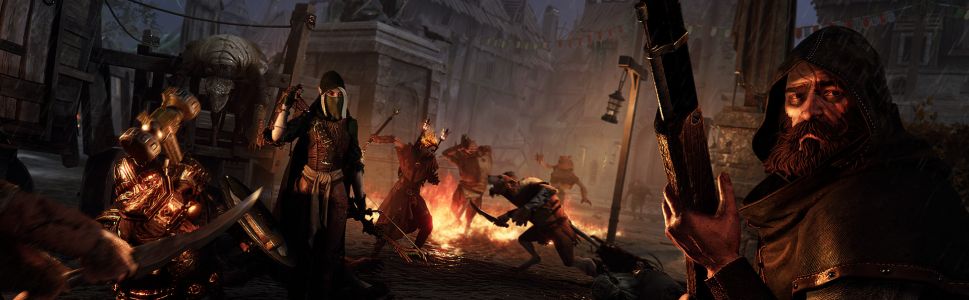
Warhammer: Vermintide 2 is a game where you’ll constantly be on the edge of your seat as you go about slaying hordes of enemies. The game is especially fun to play with friends if you all complement each others’ skills and abilities well. There are multiple classes in the game each with their own unique abilities and playstyles, so there’s a lot to learn in this game before you get really good at it. There’s also lots of loot to collect as you slowly upgrade your characters. If you would like to know more about any of these aspects of the game, then this guide is here to help you out!
If you’re ready, then let’s get started!
GENERAL TIPS AND TRICKS:
Use block when reviving teammates
Whenever your teammates loses health and goes into a downed state, and for a limited time, they can be revived by a friendly player. Instead of trying to eliminate all the nearby enemies first, just make sure you revive your teammate as soon as you can by holding block. This will keep you safe from harm for a short while until your stamina is depleted and will give you enough time to revive your teammate.
Work with the team
This is a game where teamwork is crucial. If you act greedy and hog all the resources, it will end up in defeat for your whole team. If you see any new characters tied up later on, be sure to release them as they are dead players from your team. If you want to help your team out, you can give them potions or medical supplies by equipping the item and right clicking the target ally. Keep in mind that using medical supplies in this way will actually heal this ally, which can be useful if a teammate is busy fending off enemies.
Be careful when picking tomes and grimoires
Picking up tomes and grimoires grant you access to better loot at the end of a match but they can be taken only at a cost. The tomes take up a healing potion slot when picked up. However, they can be dropped temporarily if you want to use a healing potion.
Grimoires have an even greater penalty as they cannot be dropped once picked up and picking one up decreases the entire team’s health. Be careful when you pick up these items so that you don’t end up losing a match.
Act cleverly in combat
When you see a horde of enemies approaching, position yourself well and don’t just hack away at them. Make sure you use block and push before attacking them yourself. Make sure you understand how your weapon works and use this to your advantage in a match. Different enemies also have different attack patterns so familiarize yourself with this so that you know how best to deal with a particular kind of enemy.
Leave crafting for later
While crafting can be useful in the game, this is true only towards the later stages in the game. In the beginning, the items you craft will be quickly replaced, so consider saving up resources so that you can use them at a later stage in the game.
CHARACTER CLASSES
There are a total of five character classes in the game and picking the right ones will ensure victory for a team. The five classes include the Mercenary, the Ranged Veteran, the Battle Wizard, the Waystalker, and the Witch Hunter Captain. To learn more about each of these classes and the associated unlockable classes, you can read more about them below.
The Waystalker
The Waystalker is otherwise known as Kerillian who specializes in ranged combat. She also has a quick short sword which can be used to take on enemies in melee range. This is one class you can select if you want to stay back and fight enemies from a ranged distance. At level 7, the first character class of the Waystalker is unlocked and is known as the Waystalker Handmaiden class. Along with other benefits, Kerillian also gains the ability to dash.
At level 12, the second character class, the Waystalker Shade is unlocked and allows Kerillian to use an infiltrate ability to pass through enemies for up to 10 seconds, or until Kerillian attacks.
Battle Wizard
The battle wizard makes use of a short sword in melee combat and can also use a pyre weapon to cast fireballs at enemies. Sienna, the battle wizard has skills such as Flame Walk that let her deal a lot of damage to multiple enemies. At level 7, the character class Battle Wizard Pyromancer is unlocked which grants the Homing Firespear ability which basically chases down multiple enemies when used.
At level 12, the Unchained class is unlocked grants a lot of Overcharge benefits. Additionally, the Living Bomb skill is granted which allows Sienna to explode without being harmed, and cause damage to all nearby enemies.
Mercenary
The mercenary is the character you are first introduced to in the prologue mission. The Mercenary is a good fighter all around and is quite versatile as well and he starts off with a blunderbuss and a two-handed axe. Marcus Kruber’s Paced Strikes ability also allows him to deal additional damage. He can also be used as a sturdy tank in some matches.
At level 7, the Huntsman class is unlocked which grants the ability to recover ammo and also to go invisible using the Hunter’s Prowl ability. At level 12, the Foot Knight class is unlocked which grants bonus stats to Marcus and also grants him the Valiant Charge ability which allows him to charge into enemies and push them back.
Ranged Veteran
Bardin Goreksson is the Ranged Veteran and as the name of the class suggests, he specializes in ranged combat. However, if the situation calls for it, he can also engage in melee combat by using his hammer. Bardin’s passive Ability Survivalist helps him collect ammo when enemies are killed. He can also use a smoke bomb to escape from hordes of enemies.
At level 7, the Ironbreaker class is unlocked which grants Bardin the ability to absorb damage while the Impenetrable ability is used to taunt enemies while also allowing him to block attacks. At level 12, the Slayer class is unlocked which grants Bardin increased attack speed and also the Leap ability which allows Bardin to leap at enemies while also increasing his attack speed.
Witch Hunter Captain
The Witch Hunter Captain is known as Victor Saltzpyre and he is adept at both ranged and melee combat. In melee combat, he uses a short sword to quickly attack enemies, and he uses his pistols to attack enemies from range. His abilities include Animosity which pushes enemies back, and Witch-Hunt which grants bonuses when going up against frontal attacks and more.
At level 7, the Bounty Hunter Class is unlocked which grants increased ammo capacity and reload speed. Additionally, he also gains the Locked and Loaded ability which lets the Bounty Hunter fire a bullet that passes through all enemies in its path. At level 12, the Zealot class is unlocked which grants a number of benefits such as increased power by 5% for every 25 HP that is lost. Additionally, Victor can use the Holy Fervor skill to charge at enemies and to gain increased attack speed for a short duration.
WHERE TO FIND GRIMOIRES
There are a number of Grimoires to find in the game and though these are difficult to collect, they may be worth the extra effort for some extra loot. Listed below are the various Grimoires along with where to find them.
- Grimoire No. 1: This Grimoire can be found in the Righteous Stand area. Once you’re done with the fight in the arena, take the elevator and find the door to the Watch Barracks. Once inside, keep going around corners and you’ll eventually come across a highlighted barrel. Now, you’ll have to use this barrel to jump onto the nearby crates. Following this, jump to the crates you see in the distance. You should see a shelf here so just walk along it and you’ll find the Grimoire on top of some boxes.
- Grimoire No. 2: This Grimoire can be found at the North Axe Bite Bastion which is located in Righteous Stand area. Basically, unless you’re of the Slayer class, you’ll have to solve a jumping puzzle here by jumping across wooden blocks and you’ll eventually find yourself near a windowsill near the third wooden block. You’ll now find a lever near the second window and if you press it, a ladder comes up. Just climb up the ladder to collect the Grimoire.
- Grimoire No. 3: This Grimoire is located in the Athel Yenlui area. To find this, just keep walking towards higher ground and look out for some rocks. The Grimoire will be found atop some rocks here.
- Grimoire No. 4: To get this Grimoire from Athel Yenlui area, you’ll need to first activate three buttons. The first button is in the form of a suspicious brick in the area. You’ll find the second button nearby some ruined structures. As for the third button, you’ll find it under a pile of leaves in an area with giant stairs. Once you’ve pressed the button, go down the stairs and look for a small passage. Just go inside this passage and then turn right to get the Grimoire.
- Grimoire No. 5: This is located in the Against The Grain area. Firstly, just find a building with an explosive barrel in it. To the left of this building is another building with a broken front door, so look out for that in case you can’t find the first building. Anyway,go into the building with the broken door and head down the stairs to the left. Eventually, you’ll reach a room with a wooden wall which has a hole in it. Just place the barrel here and light it up and then wait for the explosion. You’ll now see a new path which will lead you to the Grimoire.
- Grimoire No. 6: This is found in the Against The Grain area. Just keep moving down the path after you found the previous grimoire and you’ll reach a place where you’ll see a hanging platform. To your left, there is a ladder you need to climb onto and then jump onto the hanging platform. Next, jump onto the nearby wooden plank and keep moving along the wall and you’ll come across the grimoire safely tucked away behind some planks.
- Grimoire No. 7: This can be found in the Empire In The Flames area. You should be able to see a seven-pointed star symbol in this area. Next to this is a charred building. If you look inside the building from a window, you can see a grimoire next to a barrel. Just blow up the barrel to reveal a path and then go down the path until you find the grimoire.
- Grimoire No. 8: This one can also be found in the Empire In The Flames area. You should be able to see a mansion-like building soon enough as you wander the area. If you go left when you see the building, you can see the grimoire atop a ledge. Just jump onto the cart nearby and then keeping jumping onto whatever ledge you can grab a hold of until you reach the place where the grimoire is.
- Grimoire No. 9: In the Festering Ground area, go underground until you find a skeleton near a pillar of rock. You can find a key on this skeleton, so take it and then make your way to the open field area. From the right of this place, jump onto a ledge where you’ll find a locked chest. Using the key you have, you can open the chest and collect the grimoire.
- Grimoire No. 10: At one point during the ‘Follow Nurgle Trail’ mission, you will find yourself going up a wooden ramp. Halfway through, you’ll be able to see a ledge to your right onto which you should jump. Next, walk along the ledge and then jump into the stream below and you’ll see an underwater cave. You’ll be able to find the grimoire here.
- Grimoire No. 11: This can be found in the War Camp area. When you’re going up a ramp made of stone, you should see a destroyed house nearby, so enter it. Once you enter the house, go down using a ledge and you’ll be able to find the grimoire hidden underneath some wooden pieces.
- Grimoire No. 12: When you’re pursuing the objective ‘Find the Rotblood Camp’,you should be able to see a swampy area into which you should jump. You’ll see three candles here in small spaces in the walls. Just interact with these three candles so that you can access the grimoire. Now, go grab the grimoire from a rock in an area covered with water. Its location is towards the center of the map.
WHERE TO FIND TOMES
Collecting tomes adds to your XP gain and also grants you better loot at the end of a match. However, taking a tome occupies a healing potion slot, so be careful when picking a tome up. However, you can drop the tome if you need to quickly use a healing potion, so it’s not too much of a risk.
- Tome No. 1: This can be found in the Righteous Stand area, in the first mission of your campaign. After reaching the ‘Franz Erikson Platz’, just keep going forward until you come across an overturned cart. To the left of this, you’ll see a cart nearby, so just hop onto it and there on top you will find your first grimoire.
- Tome No. 2: This can also be found in the Righteous Stand area. Your objective will state “Move along the wall” when you find yourself near the right one, just get into the building next to that wall and go on up the stairs. Once there, turn right and continue till you get to the back of the room. Tome # 2 can be found in a hole in the wooden platform there.
- Tome No. 3: Another Righteous Stand Tome, this one can be found near the end of the first mission where you will come upon a grassy area. When your objective reads “Enter the temple”, walk forwards and you will eventually drop down into some bushes. Walk bravely into said bushes and you will come across a small alcove wherein you can find your 3rd Tome.
- Tome No. 4: When you reach the Wilds of AthelYenlui, you can find your 4th Tome inside a wooden crate. Your objective once you come upon this place will be to “Proceed through the Wilds”. When you get this message, keep walking forwards until you see a fallen tree next to a pillar. Turn right at this juncture and keep walking till your find your wooden crate. Need we mention you must open the crate?
- Tome No. 5: The 5th Tome can be found in the AthelYenlui region, in the same area where the first tome is located. Continue along the right side of that wall and jump down when you can spot a small rock on the ground. Walk a few steps right and there to the left you will find a wooden crate, inside of which rests Tome # 5.
- Tome No. 6: Another AthelYenlui Tome, this one can be found much later in the mission, once you get inside the ruins of the woods. Once there, you will see a ramp, walk along it and you can drop down its edge, once again you will be on forest ground. Walk forwards then a little to the right and right through some foliage. Using the rocks that are there, jump up onto a platform and there you will find your 6th Tome.
- Tome No. 7: While doing the “Against the Grain” mission, you will find your 7th tome. When near the Mill, turn left when you see a fallen hay wagon. Jump onto that and from there, jump across the fence and walk towards the Mill. Find the wooden platform on top of which lies your first Tome of this mission.
- Tome No. 8: In the same mission, you can find your another Tome. After defeating the Rate Ogre, you can finally head inside the barn. Once inside, use the ladder to get to the upper part. There, turn right and keep going straight ahead till you reach the Wall. There you need to turn right and prepare to jump towards an open wooden window. Head on through this to the platform on the other side and congratulations you found your next Tome!
- Tome No. 9: Same mission, keep going till you find yourself in a swamp. Here your objective will read “Reach the farm”. Once you get that message turn to your left and keep walking till you find yourself in dry land, above the water level. Here, turn left again and jump into the water, swim down until you reach a dead tree and the Tome will be next to it. Your first underwater Tome!
- Tome No. 10: When you are on the mission “Empire on flames”, you can find another Tome. When your Objective reads “Reach the Baron’s manor” on the ground at your feet look for the symbol of the seven-pointed star. At the star, you will need to make a right turn, jump over some broken bricks and a wooden fence and there will be the 10th
- Tome No. 11: Same mission, inside the Baron’s house. Head out of the wine cellar and turn left to proceed down a corridor. At the end of that corridor, make another left and jump up and you will be able to see the location of the next Tome, inside lying next to a skeleton.
- Tome No. 12: When you’re on the “Escape to Ussingen” mission, you will eventually find yourself near a burning building. Enter this building and climb the ramp that you see directly. Use this ramp to jump onto the next building and jump down from there to the ground and you will find your 12th Tome here.
- Tome No. 13: The 13th Tome can be found when you attempt the mission “Festering Ground”. Once you are underground, with the help of the map make your way to the lowest floor and locate a skeleton lying next to a rock pillar. Near this skeleton, there is a key, grab this and head back outside. Turn right at the rope bridge and climb up a ladder. From there you will have to make quite a high jump indeed to find your 13th Tome across the fissure.
- Tome No. 14: Go back to the same unsteady rope bridge and walk across it to get to the other side. Right turn to jump down onto a ledge and right there is the 14th Tome.
- Tome No. 15: In the same mission, when your Objective reads “Locate Old Ruins”, you will find yourself in front of a stone walkway. Next to this is a wooden ramp that you will need to jump on to and then continue along until you can jump safely towards some heavy stone blocks. Look for the Tome next to the tree nearby.
- Tome No. 16: In the “War Camp” mission, you will get an objective that states “Head into the swamp”. Go back to the swamp land, head into the first house you see and there on some shelfs is your next Tome.
- Tome No. 17: In the same mission, get out of the village and walk towards a building sunken into the swamp but with some wooden planks to walk on around it. Find your way to the back of this building to locate your 17th Tome.
- Tome No. 18: The last Tome you can find is one of the more readily available ones and can be found in the War Camp mission. To find this you need to walk around till you can find another one of those seven point stars and to its right you will find a wooden plank sticking out of the water with the Tome on top, waiting for you to pick it up. Happy collecting!
CRAFTING
Crafting is quite straightforward in this game. You’ll have a forge available to you at the home base so you salvage different items for scrap material and you can also use the forge to craft new weapons. While you start off being able to craft only a few things, as your Power Level grows, you’ll be able to craft a wide variety of items.
In the crafting menu, you can choose to salvage weapons so as to get resources. This is where you can also upgrade weapons. Make sure you upgrade your weapons so that you can go up against tougher and tougher enemies.
In the crafting menu, you can also extract Weapon Illusions which are basically skins that you can use to modify the appearance of a weapon. this is purely cosmetic in nature but it’s always cool to have a good-looking weapon at hand.
HOW TO INCREASE HEROIC POWER
You’ll notice when trying to get into a quick play match that you can choose from three difficulties: Recruit, Veteran, and Champion difficulty levels. You’ll notice that the higher difficulty levels require some specific number of Heroic Power, 120 for veteran, and 220 for Champion. You’ll eventually want to move to these higher difficulties since they offer better XP, so it’s best to try and increase Heroic Power as soon as you can.
Basically, Heroic Power is determined by the gear you have equipped. However, you should also keep in mind that each of the five classes have their own distinct Heroic Power level. Every piece of equipment in the game has a specific Power Level associated to it. Your Heroic Power then is determined by the combined Power Levels of all of your equipment. In general, items with higher Power Levels are better anyway, so keep such items equipped.