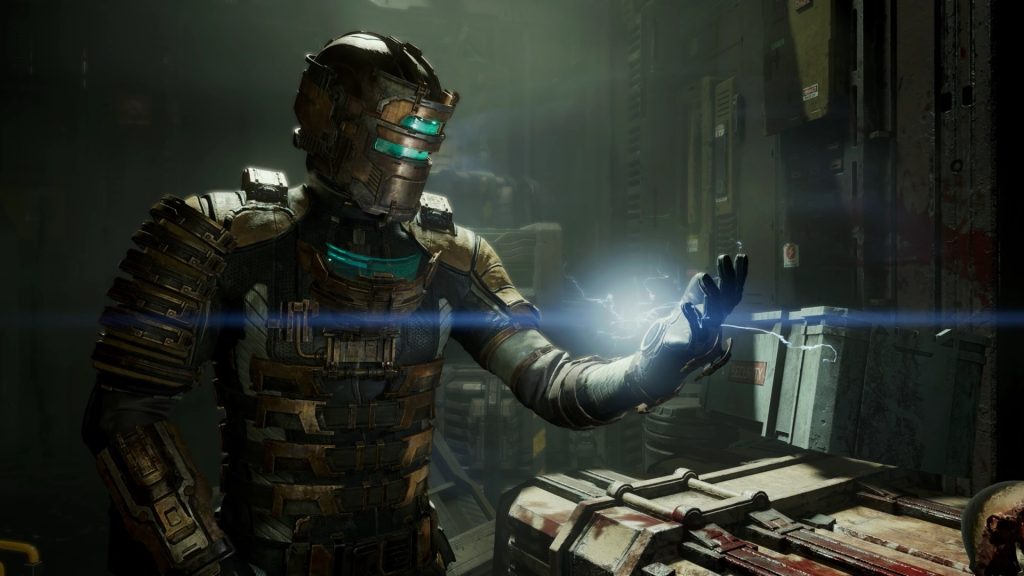
Logs don’t offer any gameplay advantages in Dead Space Remake, but they are essential if you want to enjoy the story in all its glory. Sure, you can blaze through the entire game in 12–14 hours, but taking the time to read every log will help you better understand the ambiance of the game. It’ll help you empathize with the victims who succumbed to the space monstrosities. This guide reveals the locations of all logs and explains how to easily access them.
All Dead Space Logs Locations
Chapter 1 (New Arrivals)
- Background Request – Located on the ground towards the inner right side of the alcove. You can get it after gaining control of Isaac.
- Sponsored Article: The USG Ishimura – Once inside the USG Ishimura, look towards the left side of the First Lounge.
- Run – It’s a story-related log that you get automatically as you run away from the Necromorphs.
- Send Help – Go through the hallway after defeating your first Necromorph and open the next door. There should be a security phone contacting the log directly in front of you.
- Repair the Tram System – It’s a story-related log that you get automatically as you enter the Tram Control Room.
- Stasis Door – This is a missable log. Avoid using Stasis on the door after collecting the Stasis Module. Stand in front of the door for some times and wait for Daniels to call you.
- Dismemberment – It’s a story-related log that you get automatically as you enter the Tram Repair room.
- Stasis Module Request – Beside the Claw Control panel on the bench.
- Autoloader – This is a missable log. Daniels won’t call you if you correctly connect the claw arms and use stasis. To get the log, first attach the left claw arm to the tram. Next, attempt to attach the right claw a few times but avoid using stasis. Wait for Daniels to call and instruct you on how to do it properly.
- Replaced the Tram Car – It’s a story-related log that you automatically receive after replacing the tram.
- Repair Novice – Reroute power to the Maintenance Bay by returning to the circuit breaker at the end of the hallway. Enter the bay and head upstairs using the elevator where the log should be located atop a chair just beside the circuit breaker.
- Poker Invitation – Use the elevator to descend to the lower floor after rerouting power to the Maintenance Bay Office. There should be an office straight ahead after you exit the elevator. The log should be on a shelf inside the office.
- Found the Data Board – It’s a story related log that you get automatically after collecting the Data Board.
- En Route to the Bridge – It’s a story related log that you automatically get after calling the tram.
- Arrived on the Bridge – It’s a story related log that you automatically get after entering the First Lounge.
- Go to Medical – It’s a story related log that you automatically get after returning to the Kellion.
Chapter 2 (Intensive Care)
- Destroy the Barricade – It’s a story related log that you automatically get after entering Security Station.
- Patient Harris – Use the left circuit breaker in Imaging Diagnostic to open the doors. Now go to the Consultation Room on the other side of the room and the log will be present on the desk.
- Calculated Risks – Use the same circuit breaker in Image DIagnostics to activate the elevators and head upstairs. Travel through the hallway and enter the Observation Room where the log will appear on a medical bed.
- Found a Hydrazine Tank – It’s a story related log that you automatically get after collecting the Hydrazone Tank.
- Shook the Whole Ship – It’s a story related log that you automatically get after re-entering the vacuum.
- Almost Got Me – It’s a story related log that you automatically get after using the elevator shaft to descend.
- Nicole’s Log – Go to Dr. N. Brennan’s Office after clearing the quarantine in the Main Lab, and you’ll find the log on her desk.
- Anonymized Transcript – On a shelf inside Dr. N. Brennan’s Office.
- Marker Discovery – Across Dr. N Brennan’s Office you’ll find Dr. T. Kyne’s office. The log can be found atop a bench by the door.
- They Defy Death Itself – On the floor of a bathroom cubicle, right behind Dr. T. Kyne’s office.
- Vital Personnel – When you’re first introduced to the Lurker Necromorph you can find the log on a desk of the Biological Prosthetics Center.
- Found a Shock Pad – It’s a story related log that you automatically get after obtaining the Shock Pad in Limb Stimulation Therapy.
- Find the Captain’s Rig – It’s a story related log that you automatically get after blowing up the barricade.
- Patient Observations – Sitting on a medical bed inside the Emergency Room.
- Nicole’s Study – Activate the left breaker for the showers and use kinesis to move the wall, which reveals a hidden room containing the log.
- Rats in the Walls – Return to the circuit breaker and disable both fuses to reveal the battery. Use kinesis to take out the battery and place it at the door leading to the ER Hallway A. Defeat the enemies and travel through ER Hallway A. Once you’re halfway through ER Hallway B you can see the log on the wall right next to the Intensive Care Unit’s entrance.
- Colony’s Problems – At the end of the hallway of the same floor as the Intensive Care Unit.
- Autopsy Report – Enter the morgue after using the elevator. The log is located on the right wall.
- Transmitting Codes – It’s a story related log that you automatically get after collecting the Captain’s Rig.
- Go to Engineering – It’s a story related log that you automatically get after ascending the elevator.
Chapter 3 (Course Correction)
- It’s Mine – Within the Main Hangar Bay, the log can be found in between the two catwalks. You can grab it with kinesis.
- Growth – After reaching Engineering you’ll encounter a necromorph at the end of the first hallway. The log is located on the hallway floor.
- Temple’s Log 1 – Next to the shop in the Control Room. The log can be found lying over a seat.
- Engine Diagnostics – It’s a story related log that you automatically get after interacting with the Diagnostic Report.
- His Own Teeth – In a bathroom adjacent to the Ripper. It’ll be laying in front of you as soon as you walk in.
- Temple’s Log 2 – Using the moving platform to cross over to the southern part of the Refueling Control Stations. Battle the incoming Necromorph waves and head over to the locked room close to the knocked-over locker. The log will be lying on the floor.
- Kendra is Alive – It’s a story related log that you automatically get after collecting the Fuel Station Keycard.
- Engines are Refueled – It’s a story related log that you automatically get after refueling both engines.
- Chaos – Head over to the Decontamination room after using the elevator but don’t enter it. Just before entering the room, you can find the log at the end of the hallway, next to an upgrade bench, inside an open locker.
- Rig Transcript – Go through the Decontamination Room and take a left. Just before entering the Centrifuge, the log is placed in front of a bloody hole on the floor.
- Centrifuge is Online – It’s a story related log that you automatically get after turning on the Centrifuge.
- They Found an Artifact – It’s a story related log that you automatically get after returning to the Control Room.
- Temple’s Log 3 – At Fuel Storage, inside a small room just next to an elevator.
- Go to the Bridge – It’s a story related log that you automatically get after powering up the engine.
- Nicole – It’s a story related log that you automatically get after approaching the Control Room.
Chapter 4 (Obliteration Imminent)
- The Marker – It’s a story related log that you automatically get after at the Bridge Tram Station.
- Bridge Attack – Following the hull breach in the Main Atrium, head right towards to find the long near the damaged ground.
- Eckhardt’s Clearance – Located inside and to the right of the Captain’s Nest.
- More Time – To the left of Log 55 (Eckhardt’s Clearance).
- Shoot It In the Black – You’ll encounter a Brute after entering the Main Atrium. Flee from the monstrosity for some time instead of attacking it, and wait for Hammond to call you. This is a highly missable log and attacking the Brute before you get the call will make you miss it.
- Captain’s Fate – Within the Armory of the Security Room next to a workbench. It’s in the direction where the Brute first appeared.
- Electrical Fault – It’s a story related log that you automatically get as you get closer to Mining Administration.
- Tracking Infection – You’ll need Security Clearance level 2 for this log. Travel to Floor 2 and turn right after entering the Mining Administration to enter Admins Server Maintenance. You’ll have to travel south and shoot the fuse in order to unlock the door.
- Mining Admin Rerouted – It’s a story related log that you automatically get after rerouting power to the Mining Administration.
- Believers – Head to the elevator and go to Floor 3. The log appears automatically once you look at the orange screen inside the Break Room near Electrical Systems.
- Unitology Article – Lying on a bench in the corner of the same room as Log 61 (Believers).
- Watch the Outlets – It’s a story related log that you automatically get after rerouting power to Electrical Systems.
- Med-Sci Reports – It’s a story related log that you automatically get after heading back to the elevator.
- Looking for Elizabeth – From the Main Atrium take the second elevator to Water Purification. After exiting the elevator you can find the log in the first room on that floor.
- Manual Targeting – It’s a story related log that you automatically get after completing all power rerouting objectives.
- Water Purification – It’s a story related log that you automatically get after rerouting power to Water Purification. (Requires Game New Game Plus mode).
- Sync the ADS Cannons – It’s a story related log that you automatically get after heading up the elevator.
- Hold On – Can be found immediately after Log 68 (Sync the ADS Cannons). Located on the wall next to the save station.
Chapter 5 (Lethal Devotion)
- Follow Nicole’s Signal – It’s a story related log that you automatically get after arriving at Medical Tram Station.
- Locked In – It’s a story related log that you automatically get after entering Security Station.
- Mercer’s Volunteer – Head upstairs from Image Diagnostics where the log is located inside the Observation Room.
- Open the Door – It’s a story related log that you automatically get after being locked inside the Chemical Lab.
- Hunted – It’s a story related log that you automatically get after escaping the creature.
- Kyne’s Dementia – Escape the red creature a second time. After that head towards ER Hallway A where the log is located on a hospital bed outside Emergency Equipment Storage.
- Sterile Instruments – Go to ER Hallway B and head towards the outside door leading back to the EMergency Room where you can find the log on a hospital bed.
- Harrie’s Choice – At the back of the Intensive Care Unit, lying on a desk.
- Mercer’s Journal – Inside Dr. C. Mercer’s office on a desk.
- Our Air Supply – It’s a story related log that you automatically get after speaking to the individual in Dr. C. Mercer’s Office.
- Get to Cryogenics – It’s a story related log that you automatically get after re-enabling life support.
- Go to Hydroponics – It’s a story related log that you automatically get after cryogenically freezing the hunter.
Chapter 6 (Environmental Hazard)
- Hydroponic Access – It’s a story related log that you automatically get at the beginning of the chapter.
- A Tissue Sample – Get the tissue sample from within the Cryogenic Chamber.
- Find a Workstation – It’s a story related log that you automatically get after reaching the Hydroponics Tram Station.
- Cross’s Log 1 – Appears in front of you as soon as you enter Hydroponics Tram Station.
- Go to Food Storage – You get this via a call in the Hydroponics Central Hub. To obtain it, do not enter Food Storage and craft the Enzyme Syringe first after entering the Hydroponics Central Hub.
- Inject the Wheezers – Do not craft the Enzyme Syringes and head directly into Food Storage first. Get to the end of Food Storage until you come across a locked door. You receive a lengthy video call which is log 88. After the call, return to the Hydroponics Central Hub and then craft the Enzyme Syringes to get the log.
- The Leviathan – It’s a story related log that you automatically get as you reach Food Storage.
- Cross’s Log 2 – Outside West Seedling Room B, on the surface of the wall of West Grow Chamber.
- Use the Enzyme – Before injecting Wheezer 01 inside West Seeding Roob B, shoot it. You’ll receive a call which is the log.
- Jacob and Nicole – It’s a story related log that you automatically get after injecting Wheezer 01 and defeating all the Necrmorphs.
- Corruption – Use the lift to travel to Floor 3 (appears as Floor 3 on the lift and Floor 4 on the in-game map). Once there, the log will appear inside Dr. E. Cross’s desk, just beside Wheezer 02.
- Help Me – It’s a story related log that you automatically get after entering Hydroponics Control. It’s located beside Wheezer 04.
- Ghosts on the Monitor – It’s a story related log that you automatically get upon entering the East Grow Chamber.
- Cross’s Log 3 – Near Wheezer 06, at the top of East Grow Chamber on the gantry.
- Corporate A****s – It’s a story related log that you automatically get after exiting the Air Filtration Hall, where you eventually get grabbed by a tentacle.
- Technical Manual – After completing the fire puzzle, use the lift to reach the Annex Control Room, where you’ll find the log.
- I Need You – It’s a story related log that you automatically get after returning to East Seedling Room B in search of Wheezer 08.
- Space the Leviathan – It’s a story related log that you automatically get after injecting all Wheezers.
- Bad Ideas – It’s a story related log that you automatically get after entering Food Storage airlock.
- Finish It Off – It’s a story related log that you automatically get mid-way through the Leviathan fight.
- Head Back Inside – It’s a story related log that you automatically get after defeating the Leviathan.
- The SOS Beacon – It’s a story related log that you automatically get after you re-enter the Food Storage airlock.
- Go to the Mining Deck – It’s a story related log that you automatically get once you re-enter the Food Storage airlock.
Chapter 7 (Into the Void)
- Hammond’s Return – It’s a story related log that you automatically get after entering the Mining Dock.
- Weird Malfunction – It’s a story related log that you automatically get after going down the elevator.
- Ore Storage Report – Block the crates with kinesis once you arrive at the laser traps on Deck C. Now enter the Ore Storage instead of heading up the first path. Finally, move the crates located in the corner to get the log on the wall.
- Miner’s Log – Sitting on a table next to a workbench within the Extraction area.
- Mining Progress – Sitting on a desk just after entering Mining Control,
- Launch Tubes Sealed – It’s a story related log that you automatically get after trying to launch the tube.
- Kyne’s Hostage – Defeat the Necromorph in the first area after entering Deck: B Processing. There should be a log next to the save point on the opposite side of the wall.
- Fail-Safes – It’s a story related log that you automatically get after stepping into the Processing Chamber.
- Supervisor’s Choice – Travel towards Mineral Processing after defeating the four anomalies and returning gravity. There should be a log on a desk near Dallas’s Rig.
- Found the Admin’s Rig – It’s a story related log that you automatically get after exiting Mineral Processing Control.
- Through the Vents – It’s a story related log that you automatically get after riding the elevator to Deck D: Maintenance.
- Nicole and Dr. Kyne – Go to Equipment Supply and set the circuit breaker to Storage 2. Enter Storage 2 and the lg will be lying on the floor.
- Thank You, Isaac – Within the same on a desk.
- Found the SOS Beacon – It’s a story related log that you automatically get after finding the SOS Beacon.
- Launch the Asteroid – It’s a story related log that you automatically get after loading the SOS Beacon.
- Gravity Tethers – It’s a story related log that you automatically get once you’ve entered the Mining Bay.
- Beacon is Away – It’s a story related log that you automatically get after launching the asteroid.
- Manual Override – It’s a story related log that you automatically get after getting attacked by the Hunter.
- G to Communications – It’s a story related log that you automatically get once you’ve boarded the mining elevator.
Chapter 8 (Search and Rescue)
- Chief Engineer’s Log – Go to Fuel Storage through Engineering and head over to the top floor. Enter the locked room where you’ll come across a rig. The log is located behind that rig.
- Chance for Rescue – It’s a story related log that you automatically get after arriving at the Bridge Tram Station.
- Eavesdropper – It’s a story related log that you automatically get after exiting the quarantine in Main Atrium.
- CommArray Error – Daniels calls you once you enter the Comms Control Room.
- Mayday – The log appears on the desk of E. Bailey’s office once you reach the next station after the Comms Control Room.
- Open a Channel – It’s a story related log that you automatically get after once you’ve completed the Communication Array Puzzle.
- First Contact – It’s a story related log that you automatically get after you’ve interacted with Communication Control.
- Hit the Manual Release – It’s a story related log that you automatically get also after interacting with Communication Control.
- The Comms Relay Crew – Lying on a bench at the end of the gondola ride.
- Big Problems – It’s a story related log that you automatically get after deploying the antenna.
- Deploy the Antenna – It’s a story related log that you automatically get once you’ve defeated the Leviathan Remnant.
- Collision Imminent, No survivors & Go to Valor– These are story related logs that you automatically get once you’ve deployed the antenna.
- Hammond on the Bridge – It’s a story related log that you automatically get as you advance onwards the USM Valor.
Chapter 9 (Dead on Arrival)
- Eject the Warhead – It’s a story related log that you automatically get after once you’ve entered the Barracks on the USM Valor.
- Transformed Soldiers – It’s a story related log that you automatically get after once you’ve defeated the Sasis Necromorph.
- Orders – It’s sitting on a table in the middle of the Briefing Room right at the end of the hall.
- Alien Boarders– By the second door on a corpse within the Briefing Room.
- Dr Kyne – It’s a story related log that you automatically get as you go up the elevator.
- Why Bring a Nuke – It’s a story related log that you automatically get once you’ve ejected the warhead.
- He’s Alive – It’s a story related log that you automatically get after exiting the Infirmary.
- Dead on Arrival – It’s a story related log that you automatically get after exiting the Cargo Bay.
- Go! Go! – It’s a story related log that you automatically get after collecting the Singularity core.
- Go to the Crew Deck – It’s a story related log that you automatically get after once you’ve escaped the USM Valor.
Chapter 10 (End of Days)
- Working Discreetly – On a desk through the Diagnostic Lab.
- The Marker is Active – It’s a story related log that you automatically get once you’ve arrived at the Crew Deck Tram Station.
- Z-Ball Rules – On a chair in the cafeteria which is next to the Standard Bathrooms of Crew Quarters
- Thank you Doctor – In Standard Quarters, to the right side on one of the beds.
- Get to the Shuttle – It’s a story related log that you automatically get after as you approach Deluxe Quarters.
- More than Sacrifices – In the first room in Executive Quarters, the log will be there under some chairs.
- Planetary Mining – An Investor’s Guide – Next to a dead corpse on the floor of Executive Quarters.
- Eternal Rest – In Lt. Commander V. Holt’s room, there is a shelf in the corner where the log is located.
- White’s List – As you enter Second Officer J. Chic’s room, look towards the left.
- Nexus Organism – Following a conversion, head inside the Inquiry Desks.
- Merce is Close – It’s a story related log that you automatically get after once you’ve unloaded the Marker.
- Retrieve the Marker – It’s a story related log that you automatically get after defeating the Hunter.
Chapter 11 (Alternate Solutions)
- Get to Cargo – It’s a story related log that you automatically get after boarding the tram.
- Last Word – Past the chest that’s lodged in corruption.
- Wish Me Luck – It’s a story related log that you automatically get once you’ve moved the marker through the Cargo Bay.
- He’s Here – It’s a story related log that you automatically get after reaching the Flight Deck via the elevator.
- Arrival & Loading Procedure – It’s a story related log that you automatically get after entering the Main Hangar Bay.
- Safety First – It’s a story related log that you automatically get once you’ve moved the Marker under the shuttle.
- Let Him In – It’s a story related log that you automatically get after once you’ve restored gravity.
- Betrayal & Nicole’s Return – It’s a story related log that you automatically get after visiting the shuttle.
- We Lost Her – It’s a story related log that you automatically get once you’ve recalled the shuttle.
Chapter 12 (Dead Space)
- Retrieval Order – In front of the shop on the same floor as the Living Quarters.
- They Left Us – In the corner of the Landing Pad Arium lying on the floor.
- There’s A Dead Space – It’s a story related log that you automatically get after defeating all the Necromorphs within the Server Room.
- Did You Miss Them – It’s a story related log that you automatically get after defeating all the Necromorphs within the Supply Depot.
- Groundside Tether – It’s a story related log that you automatically get after moving the Marker to Transfer Junction.
- Powered is Restored – It’s a story related log that you automatically get once you’ve restarted the Tether Control.
- Return the Marker – It’s a story related log that you automatically get after you’ve arrived at the Extraction Site.
- Recombination Study – On the floor, where you previously destroyed the third tendril.
- Nicole’s Farewell – It’s a story related log that you automatically get once you’ve placed the marker on the pedestal.

