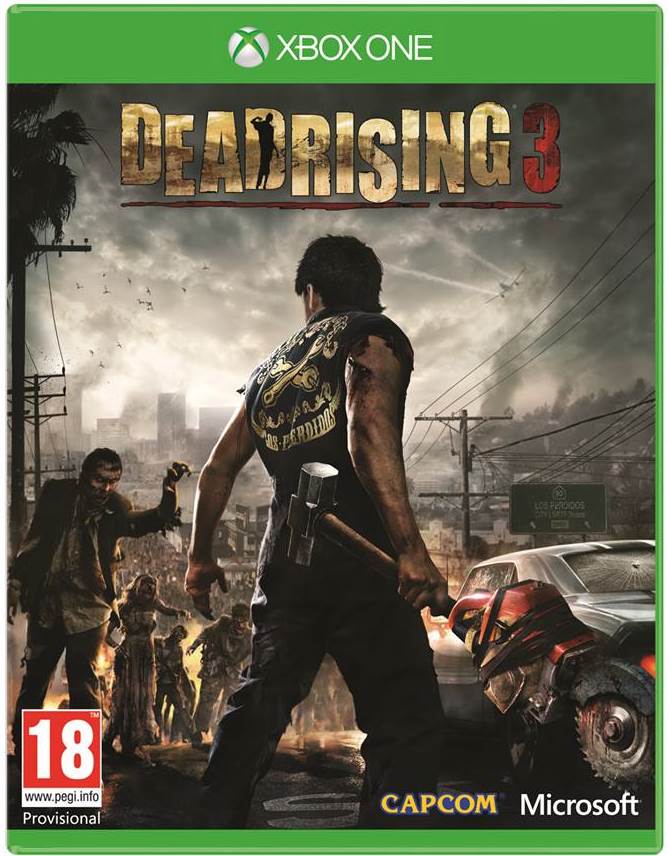
This is a complete guide for Dead Rising 3. Find and craft super combos, combo weapons, combo vehicles, find their blue prints, level up faster, earn PP and XP [experience points] faster, upgrade attributes by earning attribute points, learn new skills, unlock achievements, save survivors , find Frank West Statues, ZDC Speakers, Tragic Endings, Books and more.
Dead Rising 3 features a massive world so we recommend exploring every corner of the area you are in. Let us know if you have any questions in the comments section below.
Crafting Super Combos and Combo Weapons – Recipes & Blueprints Locations
Weapons and super quick moves are the order of day in Dead Rising 3. Below you will find the complete guide for Super Combos and Combo weapons requirements and blueprint locations.
Boom Cannon – Grenade + Shotgun
Location: Illegals Hideout at Sunset Hills
Flaming Sword – Katana Sword + Motor Oil
Location: Inside a locker in Sunset Hills High School.
Iron Edge – Broadsword + Machete
Location: Near the cold storage in Memorial Grounds.
Sledge Saw – Cement Saw + Sledgehammer
Location: Found in The Dilly Diner
Tactical Handgun – Flashlight + Handgun
Location: This is a completion reward during Chapter 00.
Chop N Talk – Battleaxe + Game Console
Location: Rooftop in the Lee-Amies Estates.
Dragon Punch – Motorcycle Engine + Boxing Gloves
Location: Southern Ingleton, Sunny Luck Fortune
Grim Reaper – Scythe + Katana Sword.
Location: Inside of Shanks in Ingleton.
Pole Weapon – Hat Rack + Spear
Location: In the Ingleton Motel and can be picked up after completing the side mission Signs of Safety.
Tenderizers – Car Exhaust + MMA Gloves
Location: Boxing Gymnasium in Ingleton
Spiked Bat – Baseball Bat + Box of Nails
Location: Upper-left corner on the porch of the house in Ingleton.
Heavy Metal – Lead Pipe + 2×4
Location: Top of the black police bus near Rhonda’s garage in Ingleton.
Jack in the Box – Cardboard Box + Toy Robot
Location: In Rhonda’s garage, Ingleton.
Flaming Helmet – Dragon Head + Motor Oil
Location: Courtyard, Ingleton.
Spiked Bucket – Meat Cleaver + Bucket
Location: Kitchen of the Big Bulls Butchery, Ingleton.
Acid Jar – Chemicals + Household Cleaner
Location: Almuda Farms Cold Storage after you defeat a real Albert.
Defiler – Fire Axe + Sledgehammer
Location: House Construction Site, Sunset Hills.
DynaMeat – Dynamite + Hunk of Meat
Location: Workbench at the Plane Hangar
Fire Reaper – Scythe + Gasoline Canister
Location: On the roof near of the building next to Package Forge, Ingleton.
Glove Gun – Cardboard Cutout + Pogo Stick
Location: Bus depot during the Blood Barter side mission.
Helmet Bomb – Afro Wig + Dynamite
Location: Near the police station in Felicia.
Super Crossbow
Location: Central Storage during Chapter 4.
Weapon Cart – Shopping Cart + Pitchfork
Location: Access Tunnel , Sunset Hills
Z.A.R. – Shotgun + Assault Rifle
Location: During Chapter 3, next to the locker in Central Police Station
Laser Sword – Flashlight + Gems
Location: In Chapter 4, inside central storage.
Knife Gloves
Location: The hotel where you meet Red and Annie.
Mauler
Location: In the Museum during Chapter 5.
Mini Chainsaw – Metal Cleaver + Chainsaw
Location: This will be rewarded when you complete Craven Consultant which is a side mission.
Party Gloves – Spear + Hat Rack
Location: Motel Hideout in Ingleton.
Pummel Blast
Location: Rhoda’s garage during Chapter 5.
Roaring Thunder – Battery + Blanka Mask
Location: Food Fun Shack at South Sunset Hills.
Remote Detonator – Dynamite + Laptop
Location: Central Illegals Hideout at South Sunset Hills.
Napalm Bomb – Motor Oil + Propane Tank
Location: Random
Sabre Shot – Sawed-Off Shotgun + Machete
Location: Not Applicable.
Acid Toy – Chemicals + Toy Robot
Location: Not Applicable.
Blambow – Crossbow + Fireworks
Location: Not Applicable.
Bomb Toy
Location: Not Applicable.
Slapper – Broom + Boxing Gloves
Location: Not Applicable.
Zombie Raker – Katana Sword + Leaf Rake
Location: Not Applicable.
Car Bomb – RC Car + Grenade
Location: Not Applicable.
Electric Crusher – Sledgehammer + Battery
Location: Not Applicable.
Fighting Gloves – Game Console + Toy Gun
Location: Not Applicable.
Fire Arrows – Motor Oil + Crossbow
Location: Not Applicable.
I.E.D. – Propane Tank + Gasoline Canister
Location: Not Applicable.
Mecha Dragon – Parasol + Dragon Head
Location: Zen Dragon, Ingleton
Boom Bear – Freedom Bear + Dynamite
Location: During Chapter 3, Tennis Court
Cuddly Bear – Freedom Bear + Portable Stereo
Location: Toy Store Roof, Sunset Hills
Death Mask Reaper – Grim Reap + Reaper Mask
Location: Shack Roof, Ingleton
Ultimate Grim Reaper – Death Mask Reaper + Gasoline Canister
Location: Playground, Ingleton
Mecha Dragon Blade – Mecha Dragon + Katana
Location: Shack Roof, Ingleton
Freedom Bear – Robot Bear + LMG
Location: Sunset Ties, Sunset Hills
Flame Mecha Dragon – Mecha Dragon + Firecrackers
Location: Northwestern Houses, Ingleton
Decoy Bear – Cuddly Bear + Wheelchair
During Chapter 3. Rooftop, Sunset Hills
Tactical RC – RC Helicopter + Machete
Location: Chapter 3
Grisly Bear – Freedom Bear + Mini Bike
Grenade Launcher – Grenade + Shotgun
Gun Blade – Machete + Sawed-off Shotgun
Mauler – Grenade + Sledgehammer
Powershout – Steering wheel + Pylon Cone
Pummel Blast – Sledgehammer + Grenade
Zombie Slugger – Spiked Bat + Barb Wire
Split Shot – Light Machine Gun + Iron Pipe
Electro Ice Staff – Traffic Light + Battery
Chuck Axe – Leaf Blower + Fireaxe
Crafting Combo Vehicles Blueprints Location Guide
Customization is the name of the game on Dead Rising 3. You can craft crazy vehicles in the game, with the help of which you can take down a ton of zombies in fashion. The guide below will help you find combo vehicles blueprints in Dead Rising 3.
Fork Work – You will unlock it during Chapter 4 as a Completion Reward.
Junk Bike – You need to combine Motorcycle + Sedan. Blueprint is located at Illegals Hideout at Sunset Hills during Chapter 3.
Junk Car – You need to combine Muscle Car + Sedan. This will happen during Chapter 2 as a completion reward.
Junk Truck – You need to combine Van + SUV Diamond. Blueprint is located at Ingleton.
Mini Bike – You need to combine Sports Bike + Motorcycle. Blueprint is located at Motorcycle Store, Sunset Hills.
Party Slapper – You need to combine Street Cleaner + Party Van. Blueprint is located at Gas Station, Sunset Hills.
Rollerhawg – You need to combine Steamroller + Motorcycle. This will get unlocked as a completion award during Chapter 1.
Turret Rig – You need to combine Steamroller + Sedan. Blueprint is located at the beginning of Chapter 1.
Shockdozer – You need to combine Bulldozer + Ambulance. Blueprint is located inside SE Central City Hospital.
Mobile Locker – You need to combine Van + Van
How To Level Up Faster:
If you need to survive this zombie infestation and fight against some of the tougher enemies in the game then you need to level up fast. The video guide will help you level up faster in Dead Rising 3.
Infinite PP/Experience:
This is actually pretty simple. You can earn 100,000PP every 2 minutes by just finding a zone which have a ton of zombies.
Dead Rising 3 Attributes:
As soon as the player level ups, players can add attribute points to the following categories:
- Life [from tier 1-2, 1 Attribute Point (AP) is required, for tier 3, 2 Attribute Point (AP) is required, for tier 4-5, 3 Attribute Point (AP) is required, for tier 6-7, 4 Attribute Point (AP) is required]
- Inventory [for tier 1, 2 Attribute Point (AP) is required, for tier 2, 3 Attribute Point (AP) is required, for tier 3, 4 Attribute Point (AP) is required, for tier 4-5, 5 Attribute Point (AP) is required]
- Melee [for tier 1, 1 Attribute Point (AP) is required, for tier 2, 2 Attribute Point (AP) is required, for tier 3, 3 Attribute Point (AP) is required, for tier 4-6, 5 Attribute Point (AP) is required]
- Ranged Combat [for tier 1, 2 Attribute Point (AP) is required, for tier 2, 3 Attribute Point (AP) is required, for tier 3, 4 Attribute Point (AP) is required, for tier 4-5, 5 Attribute Point (AP) is required]
- Mechanic [for tier 1, 1 Attribute Point (AP) is required, for tier 2, 2 Attribute Point (AP) is required, for tier 3, 3 Attribute Point (AP) is required, for tier 4-6, 5 Attribute Point (AP) is required]
- Agility [for tier 1-2, 1 Attribute Point (AP) is required, for tier 3, 2 Attribute Point (AP) is required, for tier 4-5, 3 Attribute Point (AP) is required, for tier 6-7, 4 Attribute Point (AP) is required]
- Smarts[for tier 1-2, 1 Attribute Point (AP) is required, for tier 3, 2 Attribute Point (AP) is required, for tier 4-5, 3 Attribute Point (AP) is required, for tier 6-7, 4 Attribute Point (AP) is required]
- Combo Categories
The number of attribute points you can earn is based on your level:
- 1 – 10: 1 point
- 2 – 20: 2 points
- 20 and above: 3 points
Skills:
You can unlock new skills by completing story missions, upgrading your Melee attribute or by leveling up.
The player will have the following skills from the beginning:
- Body Slam
- Jump Kick
- Curb Stomp
- Sprint
- Dodge Roll
As you progress you will be able to unlock Chin Check, Knew Drop, Shoulder Charge, Wrecking Ball, Wheel Kick and Side Kick.
Collectibles:
Find all Blueprints, Frank West Statues, ZDC Speakers, Tragic Endings & Books using the video playlist below.
There are 101 Weapon Blueprints [67 (BLUE) combo weapons and 34 (GOLD) super combo weapons], 70 Limited Edition Frank West Statues, 30 Tragic Endings, 30 ZDC Speakers and 10 books. So there is a ton to find out in the city of Los Perdidos.
Achievements Guide:
The achievements in Dead Rising 3 are simple and straight forward. Check them out below:
Planner (15G) — Collect 5 blueprints.
Journeyman (20G) — Collect 25 blueprints.
Collector (5G) — Pick up 250 different weapons.
Fashion Plate (5G) — Collect 100 different clothing items.
Engineer (25G) — Collect 50 blueprints.
T.I.O.D. Disciple (5G) — Create 50 combo weapons.
Local Hero (5G) — Save 1 survivor.
Man of the People (10G) — Save 15 stranded survivors.
Help Wanted (10G) — Add 5 survivors to the survivor bulletin board.
Driven (5G) — Drive 20 different vehicles.
Sideswiped (10G) — Complete 20 side missions.
Master Builder (30G) — Collect 100 blueprints.
Certified Survivalist (5G) — Win 25 Survival Training Bronze medals.
Zombie Killer (5G) — Kill 100 zombies.
Zombie Slayer (15G) — Kill 10,000 zombies.
Master of Massacre (20G) — Kill 53,597 zombies.
Zombie Butcher (10G) — Kill 1,000 zombies.
Morgue-ified (10G) — Complete Chapter 2.
Happy Camper (20G) — Complete Chapter 4.
Wrathful (25G) — Defeat Zhi.
Greedy (25G) — Defeat Albert.
Slothful (25G) — Defeat Theodore.
Prideful (25G) — Defeat Jherii.
Gluttonous (25G) — Defeat Darlene.
Envious (25G) — Defeat the envious survivor.
Apprentice (5G) — Reach level 5.
Expert (15G) — Reach level 25.
Maxed! (50G) — Reach level 50.
Specialist (50G) — Max out a single attribute.
Duct Tape Master (20G) — Create every combo weapon.
Customizer (5G) — Create 5 combo vehicles.
Master Mechanic (10G) — Create every combo vehicle.
A Little Ambition (5G) — Purchase 1 Attribute
Ladder Climber (10G) — Purchase 10 Attributes.
Left 100,004 Dead (30G) — Kill 100,004 zombies.
Prestigious (10G) — Complete 10 PP Trials.
Almost Famous (25G) — Complete 25 PP Trials.
Prestige Hound (50G) — Complete all PP Trials.
Genius of Zombie Slaying (25G) — Kill 72,000 zombies.
Starter (10G) — Complete Chapter 0.
Quarantined (10G) — Complete Chapter 1.
Family Man (20G) — Complete Chapter 3.
Day at the Museum (20G) — Complete Chapter 5.
The Doctor is Out (30G) — Complete Chapter 6.
Them’s the Facts (30G) — Complete the Facts.
Complete the Package (50G) — Complete Overtime.
Gang Banger (5G) — Lead a full posse of 5 survivors.
Nightmare Master (75G) — Complete chapter 7 in Nightmare Mode.
Survival Training Silver (10G) — Win 25 Survival Training Silver medals.
Survival Training Master (20G) — Win 25 Survival Training Gold medals.
Note: This guide will updated once we have more information about the game. You can also check out the complete video walk-through of Dead Rising 3 here.


