Artifacts might be the most precious God of War Ragnarok collectible but the most sought after are definitely Legendary Chests. These are Chests are golden in color and can give you various special items in the game like attachment of weapons, runic attacks, amulet enchantments, and other resources.
As easy as it might sound, getting to them is the most difficult part. However, do not worry! In this guide, we will go through their location one by one in each Realm.
All Legendary Chests Locations in God of War Ragnarok
Legendary Chests in Svartalfheim Realm
Aurvangar Wetlands – Chest 1
When you put the barrier down and then move forward sailing your way, you need to go left. A tunnel will appear and afterward, you will reach a beach. From there you need to find a point of grapple on your left and go there. There, you will find this Chest but with some enemies as well.
Modvitnir’s Rig – Chest 2
Go left in the Bay of Bounty where you will find this area. Onwards, you need to go right and up the path till a wooden structure appears. Jump over that and again go top. There will be some enemies and behind them you will find Legendary Chest.
Althjof’s Rig – Chest 3
When you get the stack of chimneys in this area, you need to clear the barrels. At the corner, you will find a way of going down through the chains. Use the grapple after interacting with the mechanism to go top. Take the chain again to go up this time and from there you need to go left. Jump and then suddenly use grapple. You will pass from the wall and towards your opposite side, you will find this Chest on the right.
Lyngbakr Island – Chest 4
In this Island when you break down the binding to third, you can simply take the path down by using the zipline. The Chest is on the other side.
Jarnsmida Pitmines – Chest 5
When Sindri gives you the lanterns in this location you need to look out for the stream of water typically going right from there on. You can pull that stream and with that, a crane will appear. Use a grapple and freeze the water. Go down by grappling and riding back and there you will find a Chest on your right
The Applecore – Chest 6
When you fight with Hateful, the Chest is actually there in the back of the room after getting rid of the mini-boss.
The Applecore – Chest 7
Go right towards the door when you pass from the Mystic Gateway to this location. From there onwards, go left and down till you pass through a tunnel. On the other side you need to go right and from there left you will find this Chest.
Mykr Tunnels – Chest 8
Go from the tunnel till you come to a specific interactive point to push a cart. From there onwards, you need to go left and you will notice that there are some vines of red color on your right. Burn them and the Chest is behind.
The Forge – Chest 9
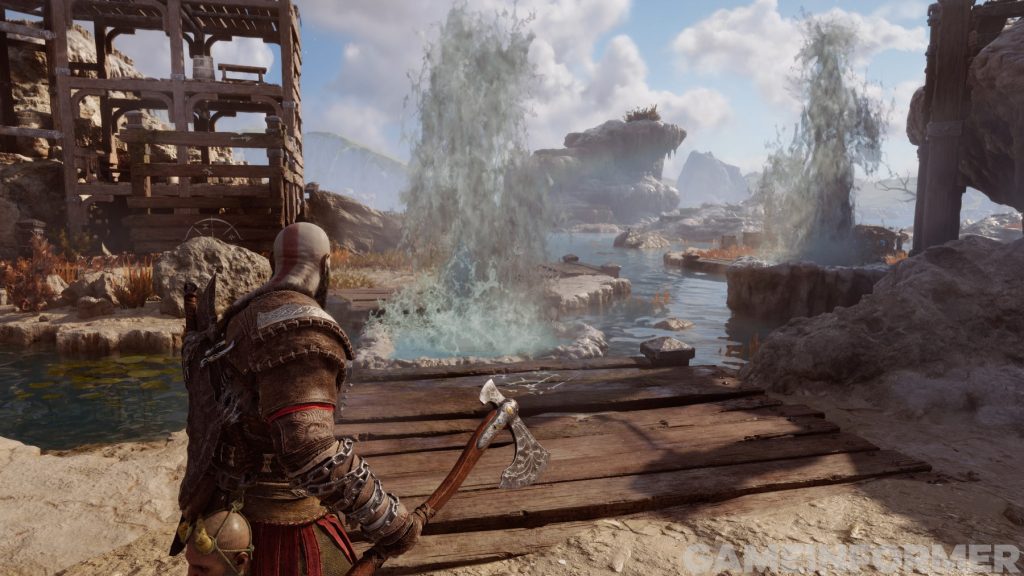
Here, you will find a puzzle that requires interaction with the water wheel and also some geysers. In return, you will open the game, and on the right side to the main path you will find your Chest here.
Alberich Hollow – Chest 10
When you pass through the Dragon Beach to get towards his area, there will be a small cave with some enemies. You will find the Chest exactly on the right of this Chest. There is debris and you need bombs to destroy it.
Alberich Hollow – Chest 11
In this area, when you are near done with the debris which you found on the main path, you will get the Chest upfront.
Alberich Island – Chest 12
In the main area, you will find a rock that you can break with your spear. There is a chain onward that allows you to go down. Freeze the gear and use the point of the grapple to get towards the deck back. Keep the lift down by freezing it and use the grapple again to get toward the Chest.
Nidavellir – Chest 13
On your way back to this area through the Mystic Gateway, you need to take the route of the southeast. Follow the path till you pass a pub and go left from the bridge which is found on the other side. You will find a spear point on the path up. Climb up the ledge and you will find the Chest.
Legendary Chests in Niflheim Realm
Here in Niflheim, you will find the Legendary Chests mostly at the Raven Tree, six of them. But, to actually use them you need to take care of Odin’s Ravens.
For the first Chest you need 6 Ravens, for the second Chest you need 12 Ravens, for the third Chest you need 18 Ravens, for the fourth you would need 28, for the fifth you would need 38, and for the sixth Chest, you need the whole 48 Ravens.
Frozen Caverns – Chest 7
When you are going in the typical path of Frozen Caverns, you will find a room with ice everywhere and a platform above. All around you can see frozen points for grapple and onwards to your left ledge you will find the Chest.
Aesir Prison Wreckage – Chest 8
In the Raven Tree, you will come across a Mystic Gateway. Go for the tree and from there go left. Follow the path towards this area and in the Broken Prison Favor, you will find this Chest.
Legendary Chests in Alfheim Realm
The Strond – Chest 1
When your first Twilight Stone introduction takes place, there will be some enemies that you need to kill. From there you have to go left and take the path that goes down. Again watch your left and go down from there. You will find some pets and behind them, you will see the Chest.
Temple of Light – Chest 2
In the area, you will find stairs that go up on the right side. Take them and on your left, you will find a dropping spot. Go down and take the path, sticking to the left, and again go down. On your left, you will find this Chest.
Temple of Light – Chest 3
There will be a second light door as you proceed here. You can go down from there using the point towards your left. Go around and through the door while interacting with the chains. When you interact, use your axe at the Stone (twilight) and then stop interacting. Again go down and you will find the Chest.
Temple of Light – Chest 4
In the area, you will come across some Warriors of Light elf. The interaction is first the first time and afterward, you will find a point of the grapple. Take that to go across, but you need to turn left instead of going forward using the grapple. Swing Twilight stone and use the Grapple point to get the Chest.
The Barrens – Chest 5
In this area, you have to go towards the northwest side and you will find Dark Elves protecting a specific building. On the left, through these Elves, you will find the Chest.
The Barrens – Chest 6
In this area, you have to go towards the northeast side where you will find the skeleton of a giant structure. Go in the mouth of this giant and take the point for the grapple. Finishing with the enemies, you can jump over a wall to find the Chest in the back of the room.
The Barrens – Chest 7
You can get it only after Secret of Sands Favor. In this area, you have to go towards the south side and there you will find a wall with a small opening. Pass through there and on the room’s back you will find a Chest behind the vines of hives.
The Below – Chest 8
At the deepest area Below, there is a creature named Hafgufa (jellyfish-like creature). Passing on from there, you need to clear the Hive and a passageway will be formed. Go from there and continue till the ceiling spot appears. Beak the ceiling and will find the Chest upfront.
The Burrows – Chest 9
In the Burrows, you will come across a room called the combat room. You can wall climb out of there and the next location would be an archway. Go up and then turn around again. There is a Hive below which you can get rid of by interacting with Twilight Stone. Again take a turn back and there will be a point of the grapple. Take that point and you will reach the Chest.
The Burrows – Chest 10
When you are done with the Hafgufa’s Binds, you will find a new passage. Taking that passage you can come back to the top of the surface. From there you can drop down, fight some enemies, and at the back, you will find this Chest.
The Forbidden Sands – Chest 11
After the Song of Sands Favor, you need to take the route toward the South of this area. From the side, you will be able to see this Chest, but to get it you will have to go from the ledge, get rid of some enemies, clear vines (hive), again clear vines of blue color from twilight stone and you will be able to get the Chest. Make sure to bounce your axe from those Twilight stones.
The Forbidden Sands – Chest 12
After getting inside the Elven Library, mainly for the Elven Sanctum Favor, you will find a room but on both of its sides a point of the grapple. Take the one you like because the Chest is at the room’s back.
Legendary Chests in Jotunheim Realm
Ironwood – Chest 1
When you find the second gap here in Ironwood and across there are some enemies, you will see the Chest on your right. Fight the enemies and finish them, and you will find a Chest behind.
Vimur River – Chest 2
In this area there will be a period when Angrboda and you will be playing together, tossing stones in the river. After that time there will be Draugr attacking you. Kill them and move onwards. Look for a point to go up from your left and then grapple around to see the Chest.
Idi’s Sinkhole – Chest 3
You will find a big red plant of a big structure in the central part of this area. From there take the right-down path and you need to stay on the right side. Keep yourself right and jump from some rocks. Keep yourself right till you come across a bridge. Pass onwards from there and again go right at the end path. From there you will have to go left and on a lower platform you will find this Chest.
Legendary Chests in Vanaheim Realm
The Southern Wilds – Chest 1
Here in this area, you will find a marketplace that is quite old. A wall with a hole can be seen on your left and after passing you will find the Chest here.
The Abandoned Village – Chest 2
When entering, you will find a crane to grapple. Go towards the next spot and don’t go down, rather go left. You will find a wall with a hole to pass from. Use the crane again and then go down from there. You will see a bridge on your left which you have to cross. The Hateful fight will start here and after dealing with the Draugr Hole you can go down the tunnel to the other side where you will find the Chest.
The Abandoned Village – Chest 3
In the typical path of Abandoned Village, you will come across some vines of blue color that you have to burn in order to reveal chains. Use them to go down and after that, you have to come back up and after that, on your right, you have to freeze plants to access this Chest. Keep in mind that the Chest is on your left.
The Abandoned Village – Chest 4
When you get rid of Fiske, there will be a new area revealed that has some kind of crane. From there go down and then go onwards till you find a Chest in a small room. From there go left and you will find an unusual pillar. Pull that pillar down and then go back to the ledge upper side from the area you initially started from. Interact with the crane till you find a grapple. Use it to go around the other path and again use the crane to get the grapple. Take it to reach the Chest.
Noatun’s Garden – Chest 5
There is a hall in this area and inside it, you will find the Chest. Keep in mind that you will have to first get the vines of red color and then you can see the Chest. To actually get the Chest you will have to leave the area and go back towards the bridge that is broken. Take the left bank and stay on that side till you land. Take a few steps and you will reach the top of the bridge. From there you have to jump across the gap and use the arrows to get the vines. Break the chain and you will get inside the Chest hall.
Pilgrim’s Landing – Chest 6
When you first reach the landing, you will find some enemies here. You will find Cure for Dead Favor behind. Follow onwards where you will pull the bridge down and find some ingredients. When you reach the end, you will find this Chest.
Cliffside Ruins – Chest 7
In the Conscience for Dead Favor, you will find some caves. Go down from there and then go onwards. You will find some debris locking this Chest down. On your left, interact to lower the bridge and use the pots to blow the debris. Clear vines of red color and behind you will have your Chest.
Vanir Shrine – Chest 8
At the entrance, you need to stick right till you find a bridge. Interact with it and cross the bridge by burning down the vines of red color. You will find the Chest in the room next to yours. It is behind a large door and following the path will lead you to some enemies. From there stick right and burn the vines of blue color. Afterward, you will find a spot, through which you can open the door and go back to get the Chest.
Freyr’s Camp – Chest 9
In this area, after some time you will find Stalkers to fight. Pass on from there and you will find some baddies. To your left, you can see a wall andl on that you can use a spear. Go top and take a higher platform, on your right you will find the Chest.
Freyr’s Camp – Chest 10
In the central area of the camp where you see a campfire, you need to go west. You will soon reach the start of this chapter and on your right, you can see the Chest. Spot the river and cross it to find the Chest towards the right.
The Plains – Chest 11
You can spot the Chest on the lower side to your left when you reach the west side of Plains coming from the Mystic Gateway. Use the spear on a rock on your right side. Don’t break it, rather go onwards, and from there go left. Drop down the spot and kill some enemies you find in your way. Take the left and you will find the rock with weak points. Use a spear and this time you can destroy it with three points.
The Jungle – Chest 12
When you take the Return of River Favor you will find this Chest here in the Jungle. At the entrance coming from the Gateway, you need to get into the boat. From there take the boat towards the south and take left till you drop on a beach. From there run left till you find vines of red color. Burn these vines up and you need to again go back to the boat. From there go left till you find another beach. Run left, following the steps and on your right, you will find a point of the grapple. Take the path till you come across various points of the grapple. On the right side, you can find the Chest afterward.
The Jungle – Chest 13
Same as before when going after Chest 12. Here you need to make sure it’s daytime and after coming from the Mystic Gateway you need to go east. There will be a dock there somewhere where you can pass from a gap. Use grapple, go right, and jump left. A wall will be on your right side which you can pass onward from through the gap. Drop when you see a hole and after getting out of the cage you will see the Chest upfront.
Legendary Chests in Asgard Realm
Plains of Ida – Chest 1
When you are doing the Runaway, you need to simply take the way that takes you to a wall. On your left, you will see this Chest in vines of blue color. Use grapple towards your right where you will again come across some vines. Burn the vines by chaining them, placing Runes on them, and getting them to the fire on the left of the campfire. You will find the Chest.
The Rift – Chest 2
With Thor, you will come back to the Realm at the time of Into the Fire. There will be a cutscene and you can go towards the back of this area where you will get this Chest.
Legendary Chests in Midgard Realm
Shores of Nine – Chest 1
When you are doing the Old Friend, you will meet with Freya, and on your left, you will find Chest. You do have to climb up the chain in order to get it.
Raider Stronghold – Chest 2
Take the path of the northeast at the position of Tyr Temple. You can find a special path that can get you to Raider Stronghold and from there you need to take out enemies to find the Chest at the back of the room.
Raider Hideout – Chest 3
To the northeast of Tyr’s Temple, you will find Raider Hideout. Go past some enemies and on the right side room’s back end you will find this Chest.
The Derelict Outpost – Chest 4
When you are doing the word of Fate and are in a Hole to get out of, you will find a grapple point. To the left of that point, you will find the Chest.
The Oarsmen – Chest 5
When you are doing the area of Oarsmen, you will find it on the right side of the Staircase. These stairs can be revealed after interaction with the giant chains.
The Lost Treasury – Chest 6
From the doorway onwards, you can see this Chest but for you to obtain it, you will need two frozen gears to let the door stay open. Climb the shield to your right and there you will find some pots. Destroy the pillar using the pot near debris and go down from there. From the left, you will see a shield that you can use to climb up and do the same for another pillar till you can actually pull it.
From there again go down and on your right, you will see a shield. Pull it and you can land it in the center. Use the gear and freeze it, making a passage for you to get the Rune.
Well of Urd – Chest 7
In the World of Fate, you need to move onward till you will find some wolves. They will take you towards the northeast. Here you will have to look at cliffs where you will find the point of the grapple. Use it, break the wall of ice and climb the rocks. At the absolute top, you will find right and left paths. You will have to take the left passage, get onto the ridge and go down by grappling. On the opposite, you will find a wall that you need to smash and then you will find the Chest forward.
Lake of Nine – Chest 8
Go back to the Lake of Nine when you deal with the Reunion. From here you have to take the path from Tyr’s Temple towards the west area. Here you will come across an ice path destroyable with your spear. Afterward, you can find this cheat behind Frost Phantom.
Legendary Chests in Helheim Realm
Docs of Vedgelmir – Chest 1
At the time of your first steps in this area, go onwards with this area and you will reach the end. From there go back to the area you actually came from, but on your way back you will fight enemies. Get rid of them and you will find a crate of a large structure. Jump on that and when you get to the top, you will find the Chest on your left.
Docks of Vedgelmir – Chest 2
In the area, as you are going onwards, you will come to a point where a chain can lead you downwards. On the left corner, you will find this Chest.
The Gleaming Bale – Chest 3
When you come across a gate in the Gleaming Bale during the Reunion, you will find that the path divides into two sides. Onwards, you will find the Chest but you will have to go right-down and on your left, you will see a spear point. Use it and come back to the area on top and jump across the gap. On your left, you will find this Chest.
Shipyard of Fallen – Chest 4
In the Reunion, you will find a gap that you can cross by utilizing your spear point on the right angle over the wall. Afterward, on the main path onwards, you will find this Chest.
The Silent Clearing – Chest 5
When you get rid of Garm, you have to look right and there you will find the Chest.
Legendary Chests in Muspelheim Realm
Burning Cliffs – Chest 1
When you reach Burning Cliffs from Mystic Gateway in the Summoning, you can go right after going down. Onwards, you will find this Chest.

