


Even if you’re only in it for the story, Square Enix’s Final Fantasy 16 is a lengthy experience. There are all kinds of battles, and that includes bosses. Each fight feels incredibly unique, whether hacking and slashing enemies as Clive or partaking in Eikon battles. Some bosses can be tougher than others, so let’s look at each and how to beat them.
Before all that, remember that you have Timely Accessories for auto-dodging, slow-mo for dodges, auto-combos, and even regulating Torgal’s commands. If you’re having trouble with a boss, especially with screen-wide area-of-effect attacks, it may be worth using the auto dodge or slow-mo. Without further ado, here’s how to best each boss.
All Bosses and How to Defeat Them
How to Beat Gigas
The first “boss” fought – in so far as it has a boss-style health bar – is Gigas. This hulking troll-like monster has easily readable attacks, like winding up to smash its club or swinging it from the side. Perhaps its most intricate attack is when The Gigas spins its club in a circular motion towards you. Tap dodge multiple times to avoid taking damage or get some distance. Since Clive doesn’t have many Skills, it can take some time to defeat Gigas. Use this opportunity to practice dodging and parrying, especially since the latter requires some timing. Remember to unleash Rising Flames and Scarlet Cyclone when it’s partially or fully staggered to deal more damage.
How to Beat Morbol
Morbol is a proper boss and has a wider array of attacks. It can fire a stream of poison from its mouth that sweeps the field and swipe with its tentacles (usually following up one with another, so dodge accordingly). If you get behind, it may charge up and release poison mist around it, so keep your distance, spamming ranged magic all the while. The Morbol has two cinematic moments – the first being a Cinematic Attack, so press Square at the right time. The second is a Cinematic Evasion, so press R1 to dodge.
Both instances will cause the Morbol to become staggered, so save your Skills when that happens. When its health drops below 50 percent, it starts charging at you. Avoid the first charge and follow up with a ranged counter-attack, then avoid the second. All of its other attacks should remain roughly the same.
How to Beat Knight of the Blinding Dawn
The famous Dragoon appears as an enemy and is the first of many you’ll fight throughout the story. He uses a stabbing attack and a round slash; the latter is somewhat tough to follow. Ensure that you’re not dodging when he starts spinning the lance. The attack has two hits, but you should be fine after dodging once. He’ll also leap in the air and slam down, following up with another strike or two, so dodge those.
The main attack to watch for is Jump, with the Knight jumping into the sky and stabbing down shortly after. Move out of the indicator’s path and keep piling on the damage. The Knight will then leap some distance and throw its spear, which Clive automatically deflects – press Square to follow up with a Cinematic Attack and stagger the Knight for free damage.
After its HP drops below 50 percent, it starts using Double Jump. It’s the same as Jump but executed twice. Dodge both accordingly, and beware of the follow-up three-hit combo, which ends in a jumping strike. Keep up the damage – the fight should be over before you know it.
How to Beat the Eikon of Fire
A rail shooter segment where the Phoenix fights Ifrit, the other Eikon of Fire. Ifrit will move around, so reposition your cursor manually to keep firing. It’s very straightforward, but when Ifrit’s body is on fire, ensure you dodge it a second later to avoid its strike.
How to Beat Shiva’s Dominant
Jill Warrick, Clive’s childhood friend, is your first encounter in the present day. First, dispatch the Iron Kingdom troops and focus on Jill. She tends to wind up before performing a melee attack and can cover large distances, so get ready to dodge.
When in melee range, she raises her right hand to perform an Ice attack around her. Dodge at the last moment and follow up. Avoid her projectiles, especially when she starts charging three at a time – counter-attack with ranged magic to deal more Stagger damage.
After dropping to 50 percent HP, Jill will cast Blizzaga. Several snowy indicators are visible on the ground – avoid standing in those as the Ice shards fall and keep moving. She’ll then add a new attack – a row of falling icicles. These are easy enough to see coming from afar, but shards from Blizzaga will continue falling, so mind your footing.
How to Beat Tiamat
Immediately following the battle with Jill, Clive will have to battle Tiamat, the surviving member of his squad. Along with standard melee attacks, he can block strikes, knocking back Clive. He also tends to follow up a slash with a magical burst, but these are easy enough to dodge if you avoid the initial strike.
Once he loses 50 percent of his health, Tiamat will fall back and fire two magic projectiles from afar before closing in for another melee strike. He’ll also enchant his sword with magic and execute a three-hit melee combo. Even if the first two strikes can miss, the third can suddenly see him turn on you, so get ready to dodge. Keep up the pressure, and he should eventually fall.
How to Beat Fafnir of the North
Fafnir is encountered in the Greatwood with Cid and Torgal assisting. Fafnir will first attack with its head, and if near its tail, it will follow up with a sweep. Stick close to its head since it takes more damage, and pummel it with melee attacks while avoiding its claw slams and charges. Fafnir also tends to roll to one side – you’ll see it coming from a mile away when he tilts to one side, so dodge and counter-attack. It will also jump into the air and land on its back in a splash, so take care.
After losing enough health, Fafnir will use Spin Cycle, rolling into a ball and careening towards Clive before scaling the wall. Following some sick wall-riding, it rolls into you once more and then finishes with a huge splash. All of this is easy enough to avoid – keep an eye on its wall-riding and get ready to dodge before it barrels towards you.
How to Beat Midnight Raven
Like the Dragoon-type enemy encountered earlier, the Midnight Raven is a boss that will show up several times in the story, often as a regular foe. Take out the Royal Sigfreyr enemies first to focus on the boss.
His attacks often deal with multiple hits and can slightly throw Clive off balance. Wait for him to teleport and then dodge out of the way once he appears – the window where his attack misses allows for unleashing Skills for more damage. While his acrobatics can be a little tough to keep track of, they become more obvious with time.
After losing half his health, the Midnight Raven will pounce on Clive, initiating a Cinematic Clash. Rapidly mash Square at the opportune moments to survive. He’ll then introduce a new attack, Raiton, which sees a few bolts cast nearby. It’s immediately followed up with a charging melee strike, so get ready to dodge. Perhaps the deadliest attack is Assassinate.
Once you see Midnight Raven disappear in a small tornado, turn around and dodge at the last second, lest he launches you into a death drop that chunks almost half your health. He’ll attempt another Assassinate at 10 percent health, which initiates another Cinematic Clash. Succeed, and you’ll finally slay him.
How to Beat Chirada
One of Benedikta’s “sisters,” Chirada, moves fast and relies on Wind to attack from a distance. She’ll charge intermittently, slam down with a giant axe kick (which is pretty telegraphed) and slice with her wings. At times, she’ll also spin around, attacking with both wings in a fluid motion.
If you see wings curl back and Wind begins to collect near them, get ready to dodge. Once down to half health, Chirada will create Wind “bombs” on the ground that explode after some time. There are usually only three, but they’re close to where you stand, so be cautious.
How to Beat Suparna and Chirada
With Cid out of commission, you must battle Chirada and another sister, Suparna. Chirada’s move set remains the same, so you’re dealing with charges, wing slashes and spinning attacks. Suparna prefers to fire a blast of Wind in a straight line – check the telegraphed path on the ground to dodge it. She also stays stationary during this, so you can deal some damage. Suparna can also fire Wind blasts in multiple rows – stand between them to avoid harm.
A Cinematic Evasion will occur – press R1 and Square to stagger both sisters. Focus on one at a time, and when they’re defeated, the surviving sister will use Inheritance, becoming powered up and gaining the other’s moves.
If it’s Suparna, she casts rows of Wind blasts horizontally and vertically while also charging and casting the same Wind “bombs” as Chirada. She’ll occasionally pull back and fire Wind projectiles one after the other, but keep up the pressure, and Suparna will go down quickly.
How to Beat Benedikta
Benedikta is a two-phase fight, and since she likes to shoot magic projectiles, Heatwave works very well here. She’ll start by launching multiple projectiles at once – either close in and dodge or activate Heatwave to destroy them and deal some decent stagger damage. Benedikta can cast Aeroga, which creates a tornado that will keep Clive off balance, and follow up with melee strikes and charges.
In the second phase, Benedikta will semi-prime, sprouting wings and using more of Garuda’s powers. Torgal will be out of commission during this, so be mindful of your health. She’ll use Nosedive, which functions like Jump but has a wider area, and fly around the battlefield, firing Wind projectiles, usually followed by a slash and a slam with Garuda’s claw.
Be careful of Aero Rain, which sends multiple projectiles with slight tracking at once as she flies around. She lands with Nosedive and probably uses Wind Slash, which sends slicing waves of magic at you (horizontally and vertically). Her Will gauge should be nearly depleted, so use Heatwave to stagger her. Alternatively, dodge each attack while closing the distance and use melee attacks.
A Cinematic Evasion will trigger, which sees Benedikta attacking with Rammelfall. Once it’s over, press Square for the Cinematic Attack and stagger. Upon recovering, she unleashes Tornado, which is massive and should be avoided. Benedikta will also start attacking with claws more, using rapid melee combos to build damage.
Beware of Gathering Clouds since she starts casting Rammelfall again. If it catches Clive, he’ll suffer massive damage, so get out of range of the swirling winds beneath your feet and dodge the ensuing rock sent towards you.
Upon losing enough health, Benedikta will use Deadly Embrace to slam Clive down. Fortunately, Torgal is back in the fray, and by completing the ensuing Cinematic Clash, you can stagger her once more. She’ll unleash the same attacks seen till now, so the rest of the fight should be straightforward enough.
How to Beat Garuda
Your first real Eikon battle sees you controlling Ifrit against Garuda. Before that, you’ll have to fight her as Clive. Don’t worry – you have Deadly Embrace, which can bring the Eikon (and other Elites and bosses) down to the ground when their Will gauge is half-depleted. Garuda attacks with her wings first, slamming them down, sweeping across and more. Targeting her head is key, but she’ll often position it out of reach. Time your Skills to land when she’s kneeling for maximum damage.
After using Deadly Embrace, attack her head. It won’t be long before her health drops below 50 percent, after which she casts Aerial Blast, creating two massive tornadoes (don’t bother with melee attacks, since she also has a shield around her while casting) and then exploding Wind bombs which generate black tornadoes.
Once the spell finishes, she’ll sweep with her leg, sending a massive Windslash depending on the direction. The rest of the fight features Wind bombs, tornadoes, wing attacks and more leg sweeps, so beware. A Cinematic Attack and Clash will start once she’s weak and end in her defeat.
How to Beat Garuda (as Ifrit)
Before she rises back up again, healing her wounds. At this point, Clive will awaken and become Ifrit. Garuda will keep her distance and fire Wind projectiles – evade those with R1 while using Lunge with Circle to close the distance. Deal three melee attacks, and you’ll proceed to do a Punish for massive damage. When Garuda uses Tornado, use Lunge to jump through that and then attack for the Punish.
The rest of the fight has Cinematic Strikes and Clashes throughout. They’re well-telegraphed, so you should be able to anticipate them. Garuda will fire several projectiles and cast Aerial Blast around her for massive damage. Stay out of range of the latter, but even if hit, Ifrit can tank the damage without much consequence. Eventually, Garuda is vanquished in a spread of Hellfire.
How to Beat Minotaur
Minotaur is somewhat reminiscent of Gigas, with massive swings and an overhead smash attack. The difference is that it will also charge at Clive, sending him flying if the hit lands. Thanks to Garuda’s Skills in your kit, it’s easy to reduce an enemy’s Will gauge. Dodge the charges and use Deadly Embrace to bring him down once his Will is half-depleted, then use Wicked Wheel or Gouge to fully stagger it.
How to Beat Knight of the Dying Sun
Don’t worry about the Imperial War Aevis accompanying the Knight of the Dying Sun – Cid will have it hand, and you can leave him to his devices. The Knight of the Dying Sun is akin to the Blinding Dawn, using Jump, Double Jump and spinning slashes (with the same delays for the latter that can throw you off).
New attacks include leaping back and performing a lunging stab with his lance and Mirage Dive. The latter sees the Knight diving continuously all over the battlefield, with the same indicators as Jump. You can’t attack it, so stay out of harm’s way and wait for Cid to electrocute the real one. The Knight will be staggered and should be weak enough by this point, so take him down quickly.
How to Beat Iron Giant
The Iron Giant looks imposing but isn’t too much of a headache if you’re careful. Avoid its giant overhead swing and sweeping strikes, especially the latter, since it tends to follow up a shield thrust. Its movements are slow and telegraphed enough that dodging should be easy (Rook’s Gambit works well for the counterattack). However, upon taking too much damage, feel free to hang back and pelt it with ranged magic. Be careful when it leaps back and charges up its shield since a ranged attack is coming.
Upon falling below 50 percent of health, the Iron Giant will initiate Atomic Ray. It’ll stand in one place, so attack continuously to stop it. Unleash any remaining skills, and avoid the line of flames that detonates in a straight line on the ground. Upon stopping its cast, the Iron Giant will be partially staggered, so inflict some more damage before it recovers.
One new attack it adds is dragging its sword along the ground and charging forward (it’ll position its right arm to the left in a stance to signal this). The attack tends to sweep and attack behind the Iron Giant, so counterattack with magic rather than a melee strike after dodging.
How to Beat Infernal Eikon
Clive will confront the Infernal Eikon face to face in a battle of wills, which is a nice way of saying that you have to take on Ifrit in human form. It starts the fight with Crimson Rush, charging straight and slashing with its claws. Vulcan Burst sees Ifrit crouching down and unleashing an explosive burst in its vicinity. You could move away, but if you dodge at the last second, it’s possible to deal some damage and avoid the blast.
Like Gardua, its head will take more damage, so take advantage of its position during Vulcan Burst to attack it. Ifrit will then follow up with Scorched Earth, a flame attack that travels in a straight line. Take advantage of its stomps and claw swipes with Rook’s Gambit to deal damage and deplete its Will gauge more, and don’t forget to use Deadly Embrace to bring it down when it’s partially staggered.
Unlike many bosses, Ifrit doesn’t use a new attack or two after losing half its health. Hurray! Unfortunately, the fight isn’t over yet.
How to Beat Infernal Shadow
Clive must now confront his biggest threat on the road to acceptance – himself, or at least a shadowy version. The Infernal Shadow will use many of the same moves, from the forward thrusting stinger to Magic Burst and Phoenix Shift. It can also unleash Charged Magic shots and projectiles and enchant its thrust attack with fire for Molten Thrust. Avoid the latter’s charge and take care when it’s partially staggered since it doesn’t take long to recover. You can still use Deadly Embrace if you’re quick enough, so keep that in mind.
Eventually, the Infernal Shadow will semi-prime, which is a preview of the Limit Break that Clive can use. For now, avoid its fiery slash combo, especially since each attack has wider arcs. It also unleashes a new attack, Incinerate, which burns the ground in an area in front. You’ll see the telltale cracks beforehand, so Phoenix Shift and get behind the Shadow quickly.
Another new attack is Hellfire, but this isn’t like Ifrit. The Shadow will stand in the middle and hover before causing multiple eruptions around it. While in its vicinity, Clive is slowed, so move away while dodging any subsequent attacks, and keep launching ranged attacks and counter shots. Eventually, it will unleash an explosion around it, so even more reason to get away.
Next, the Infernal Shadow will use a mix of augmented attacks, like Crimson Rush, to quickly charge along the ground and Hammer and Anvil for a massive fiery attack from above. With about 20 percent health left, Clive will finally accept the truth and gain Limit Break. Your health will slowly recover during it, so feel free to go ham on the Shadow since your attacks deal more damage. Take care to avoid its Eruption and Fira.
How to Beat Infernal Eikon (as Ifrit)
This is more of a series of Cinematic Clashes. Easy enough and very cool. Complete it to defeat the Infernal Shadow.
How to Beat Imperial Cannonier
The Imperial Cannonier is a chunky boss with a massive cannon and starts the fight with Black Powder, detonating the ground in specific spots. Don’t let the cannon’s size fool you – he can capably swing it around for massive damage. The Cannonier also unleashes a short burst of flames, so avoid it and stick to his side to keep attacking.
When near death, the Cannonier will suddenly turn Akashic and gain a range of new attacks and mobility. He charges forward three times with Rocketeer and uses a blast attack that sends him flying back. Black Powder now creates a pillar of rock that detonates at its point but is still easy enough to avoid. His short flame burst is longer, so don’t stand in front if you don’t want to eat a constant stream of damage.
When below 50 percent health, Black Powder is used and detonates a few more times, leading to Hard Launch. The latter sees the Cannonier jumping up and smashing down in an explosive AoE attack, which is easily avoidable. Rook’s Gambit is once again quite good for this fight. Just stick close and respond quickly to avoid getting caught out.
How to Beat Akashic Dragon
What’s worse than Akashic soldiers? An Akashic Dragon, for one. It’ll start by spinning its body to attack, hitting twice with its wing and tail, flying up to throw a fireball or striking with a single wing. Targeting its head is key, and using Phoenix Shift to teleport up to it in the air is useful. While in mid-air, you can use Wicked Wheel and Deadly Embrace to inflict some stagger damage. Just beware when it somersaults and attacks with its tail.
The Akashic Dragon also unleashes a laser, with the affected area exploding after some time. So while dodging it, move away from the area in question and attack it from the side. Eventually, it will fly and soar to the end of the bridge to cast cauterize. This is a breath attack that sweeps from side to side slowly. If it starts from the right, move to the left and vice versa to have it pass by without taking damage.
The same attacks from before will follow, but when the Akashic Dragon is on its last legs, it’ll cast Dragon Dance. It flies up, unleashes multiple fireballs in a row and then fires a sweeping laser that explodes and a straight laser before landing with a spinning attack. Cauterize may be used from the side of the bridge before it goes down, but the same principle follows – if it starts from your right, move to the left and vice versa.
How to Beat Typhon
The fight with Typhon sees Clive battling several Revenants and then Specters (with expanding magic circles on the ground). After the latter dies, Wraiths will spawn while Typhon fires a vertical laser on the ground, with the area exploding after some time, followed by the same expanding magic circles. If you have Aero Blast, it can be very good at crowd-controlling enemies while you take them out using other Skills. Scarlet Cyclone and Flames of Rebirth are also good.
Once Typhon removes Ramuh’s staff, it’ll unleash another laser in a Cinematic Evasion. After a short scene, Clive becomes Ifrit. You have more abilities this time around, including Fireball Burst. If you haven’t mastered Magic Burst for the more generous timing window, press Triangle at the end of a melee combo. It’ll still deal decent damage.
Typhon’s attacks start pretty tame, from a single slash attack to double arm slashes and a slow charging strike. Evade these and hold Circle to Sprint and to close the distance. Get comfortable with Sprint and how it maneuvers – you’re gonna need it later.
Eventually, Typhon will unleash Unending Clamor, creating a large area under Ifrit that will explode after some time. Use Sprint to escape quickly but be careful when attacking since it follows up by firing multiple magic projectiles at close range (and tracking your movement, so you can’t just go around and attack). Typhon may also shoot magic projectiles from his sides in two streams and then move his arms together. Evade to the side through one of these streams to dodge the attack entirely.
How to Beat Typhon the Transgressor
Typhon is seemingly disposed of until he calls upon multiple copies that converge into a single being with four arms called Typhon the Transgressor.
Typhon will start by teleporting and firing several finger beams – they have a brief charge-up time, so evade just before they go off. Unending Clamor is now three massive magic circles instead of one, so use Sprint and dodge to get out of range. Along with the charging attack, Typhon swipes three times in a combo and swings all four arms for two consecutive heavy attacks. Thankfully, its overhead strike is still the same.
The big new attack is Demon Wall, where Typhon will create a quickly moving wall. You must Sprint towards the gap to avoid taking damage. It doesn’t hurt that much, but try not to take too many hits from it, especially since Demon Wall is conjured multiple times in a row. To better avoid it, stay a reasonable distance from Typhon for more room to Sprint around.
Once again, watch out for magic projectiles when getting close after the attack. Even if you dodge them, they’ll change direction and home in on you. Typhon also uses sweeping attacks that create expanding energy waves, so dodge accordingly. Lest you thought that was the end, it then unleashes Catacecaumene, where various energy pillars continually emerge from the ground, and quickly follows up with Unending Clamor.
When Typhon is low on health, you’ll have a series of Cinematic Clashes and a Cinematic Evasion to close the fight.
How to Beat Republican War Panther
Yes, this is a little underwhelming given the epic encounter with Typhon, but underestimate the Republican War Panther at your peril. If nothing else, look at it as a way to test Ramuh’s abilities. The War Panther attacks with its paws and hind legs, the latter in a spinning motion. Be careful not to use Blind Justice when it’s close since it can easily interrupt the attack.
At about 50 percent health, it unleashes Savage, a series of quick strikes. They’re easy enough to avoid, but if you want to finish the fight, throw out an Aero Blast to quickly deplete its Will gauge and take it down for good.
How to Beat Knight of the Lasting Dark
At this point, the Dragoons are more like Elite enemies. The Knight of the Lasting Dark uses the same moves as the Blinding Dawn. There’s no Mirage Dive to worry about, but several smaller enemies will periodically flood. Save your AoE attacks like Scarlet Cyclone, Ignition, and Pile Drive for them, and the Ultimates and single-target damage for the Knight.
How to Beat Akashic Morbol
The Akashic Morbol is much like the regular Morbol but with a few new attacks. Its poison breath lasts slightly longer, and it can attack with both tendrils. It will also dig its tendrils into the ground and surround itself with them, smacking Clive wherever he may be. If its Will gauge is half or fully depleted, it won’t be staggered until the tendrils recede.
On losing half its health, the Akashic Morbol will burrow underground and rise to cast Acid Rain, spewing poison projectiles that leave puddles causing damage over time. It will then go into Wild Rage, rampaging around the arena. The puddles are easy enough to avoid, but be careful when dodging the Morbol’s charges since it’s easy to end up in the former. The Morbol leaps into the air for a big slam at the end of its charges, so avoid and resume the assault.
How to Beat Flame Lizard
Another reskin of sorts, this time of Fafnir of the North, the Flame Lizard likes to jump and slam down on its back more often, especially when it’s on fire. Once again, target its head for the most damage, and be careful when it uses Incense to augment its attacks with fire.
After losing 50 percent of its health, the Flame Lizard initiates Overdrive. It fires two lasers – one straight and the other sweeping – followed by claw swipes and a leap into the air for a spinning slam resulting in a giant explosion. But it’s not over yet, as it fires another sweeping laser you must dodge through to avoid. It will resume hopping around and slamming on its back while using a longer side roll than Fafnir, so beware.
How to Beat Liquid Flame
Liquid Flame starts with several stomps and punches that explode. It can also quickly reposition to strike or cast Firaga from a distance. Fiery Impact has more recovery time than its other attacks, so use that opportunity to deal stagger damage. Be careful when it casts Eructation, since it will generate a fiery AoE.
At about 66 percent remaining health, it activates Swelter, further shrinking the arena you can fight. After Shiva’s assistance, Liquid Flame will transform into a wyvern that breathes a stream of fire while moving forward and Coeurls that dash forward.
At about 30 percent remaining HP, it activates Eleventh Hour, transforming into multiple Coeurls that dash forward, one by one, and then four wyverns who converge on the center with their flame breaths. It then reappears in its human form and explodes in a giant AoE. While you could exit the area as it charges, it’s easier to dodge at the right moment.
It will still transform into a Wyvern that explodes on charging you and a Coerul that dashes forward before ending with Fiery Impact (sometimes mixing things up). Use ranged magic while countering to continue depleting its Will gauge throughout all this and eventually take it down.
How to Beat Coeurl
Your first real fight with a Coerul is nothing like Liquid Flame. It has two massive antennae on either side, which it uses as whips to attack. They have significant range, so take care when counter-attacking after a dodge since a returning strike could nail you. Given the electric nature of the antennae, it can also launch projectiles from afar.
When it’s down to 50 percent HP, the Coeurl initiates Electrocharge, generating multiple electric strikes in the area. You need to deal damage while it’s charging, so unleash all your single-target and damage-focused Skills. After it’s knocked down (but not staggered), it jumps up, sinks its antennae into the ground and creates a chain lightning net before continuing to attack. Get away from the net and strike while avoiding its whip-like attacks.
The Coeurl will initiate one final attack on its last legs – Wild Charge, where it becomes supercharged and summons several lighting strikes down while leaping about and dealing AoE damage. You should be able to slay it in the middle of this, so stay mobile and keep attacking.
How to Beat Hugo Kupka
It’s finally time for your showdown with Hugo Kupka, Titan’s Dominant. He’ll semi-prime and rush forward with both arms encased in stone. Kupka relies on fist strikes but also moves pretty quickly. He can parry Clive back and rush forward in a tackle. As such, it can take time to deplete his Will gauge, so use Aero Blast and Rook’s Gambit to make things easier. Gouge is also usable, though given Kupka’s speed, it’s better to avoid getting locked in the animation.
After a Cinematic Evasion, you and Kupka will fall through the floor into some ruins. He’ll semi-prime again and burrow underground before causing a giant fist to emerge where Clive is standing. There’s a generous amount of time to get out of the casting circle and follow up on attacking. Two other attacks to watch out for is Weight of the Land, where Kupka causes rocks to explode in select casting circles, and Landslide, which travels in a straight line.
Beware of Stripmine, who he attacks in a large area in front – dodge and get behind to avoid any damage. Kupka also continuously stomps the ground, sending shockwaves in an expanding circle. Time your dodge up close to avoid each strike, or dodge through the waves and unleash a counter-attack with ranged magic.
Upon dropping below 50 percent health, Kupka will use Torment, first leaping forward with both arms, then smashing the ground to explode several rocks around you. He’ll follow up with several swinging hooks and launching two spinning fists at you, then fires them together. It doesn’t stop there, as he launches overhead strikes with his fist and semi-primes further, growing in size and unleashing Earthen Fury.
Escape the casting circle ASAP to evade all the stone pillars summoned around Kupka. He’ll become winded, which is your chance to strike and deal stagger damage. Though he uses a standard punch combo upon recovering, he’ll add a double-armed smash at the end, so be careful.
With about 10 percent health left, Kupka uses Force of the Land, causing several rock crystals to emerge from the ground. There’s no way to get out of its range, so dodge at the right time. Also, be careful of Earthen Fist, a thunderclap-style attack with his fists and Upheaval, an AoE attack around Kupka.
How to Beat Orcish Warlord
After the smash-mouth-style battle with Kupka, the Orcish Warlord feels more like a palate cleanser. Don’t let its giant club fool you, as it can fire projectiles from it while delivering heavy hits and smashes. The Warlord can also teleport and attempt to fire at range, so turn around as soon as it disappears. If it teleports next to you, get ready to dodge its melee strike.
Since you’ll have Titan’s Skills, you can use Titan Block to intercept the melee strikes and counter-attacks. Windup is also very good for single-target damage.
How to Beat the Undertaker
No, not that Undertaker. This hulking boss fires concentrated beams (hilariously called Spirits Within) from its chest, but it’s easy enough to get behind it. Beware its charges, especially at the end when it suddenly turns to clip you.
Once it loses half its health, it unleashes Exhume, placing both hands on the ground and creating multiple magic eruptions. It attacks normally afterwards but can leap into the air to stomp down, creating a shockwave. Nevertheless, it’s easy enough to take down.
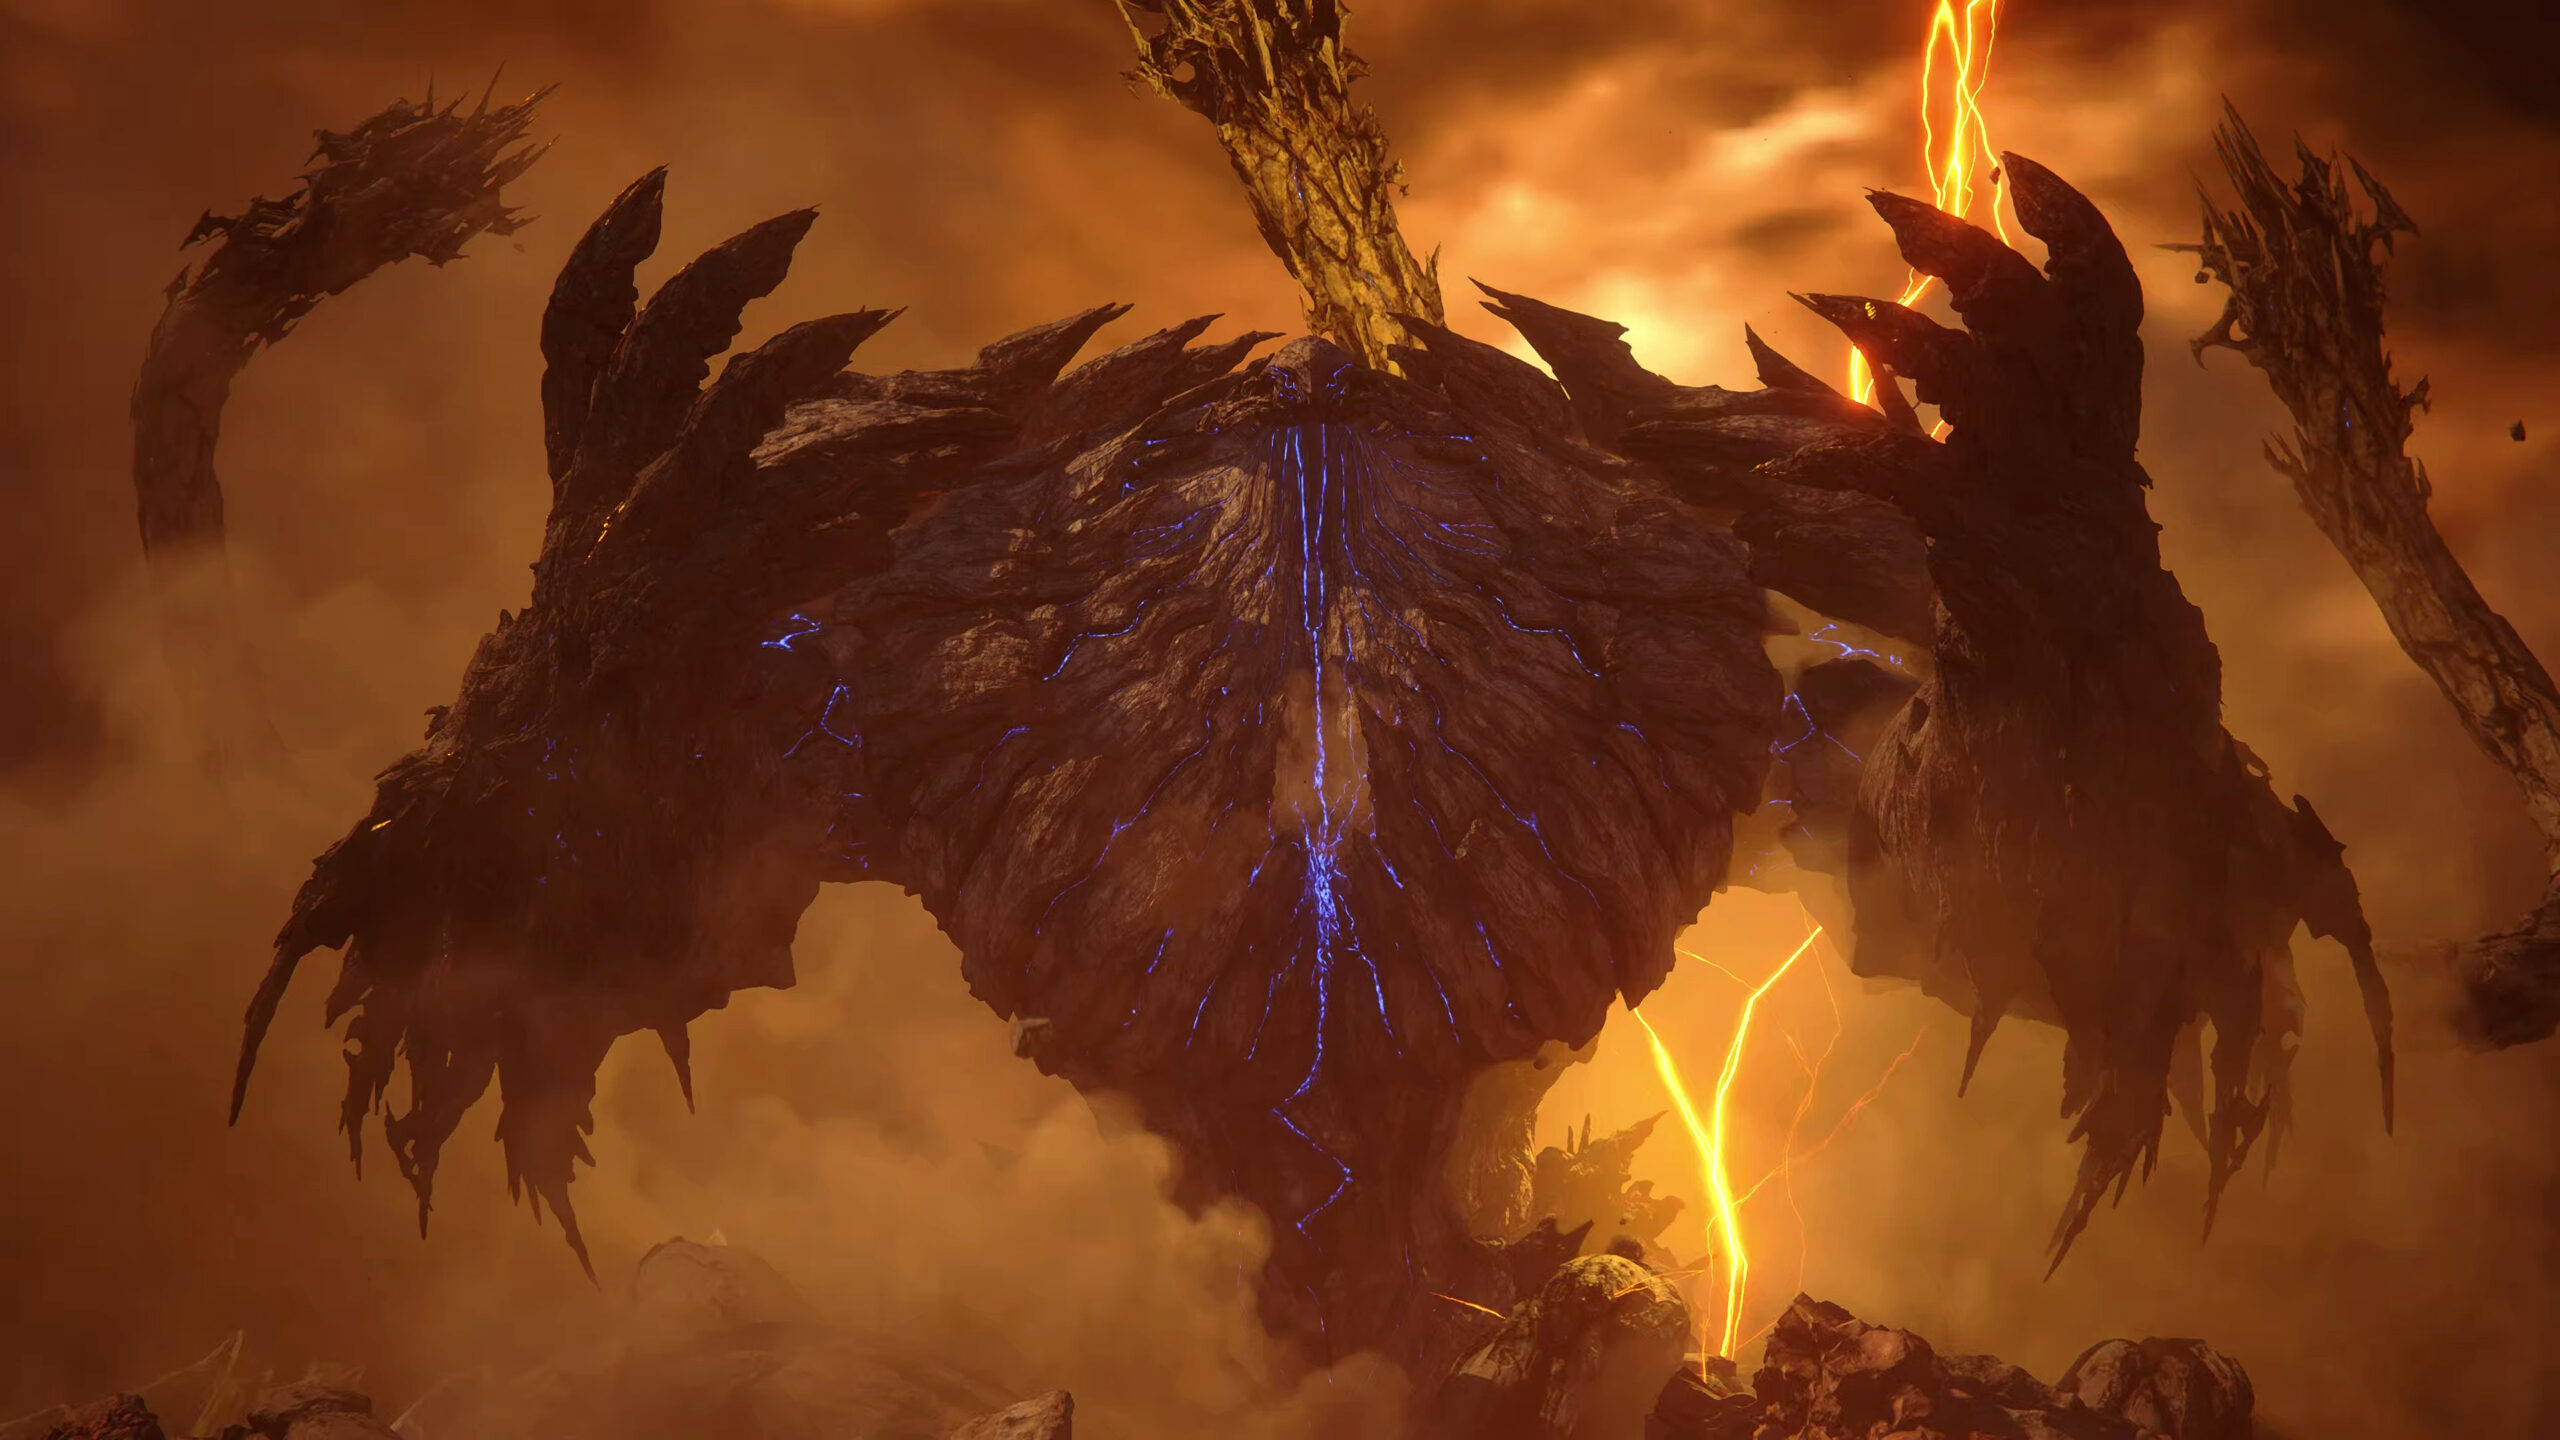
How to Beat Titan
Ready for one of the best fights in the entire game? Clive takes on Kupka again, but this time as Ifrit versus Titan. The latter starts by jumping up and smashing down, creating an explosion of rocks. He’ll also punch and sweep across the ground, causing rocks to blow up, generate massive explosions with Voice of the Land (use Sprint to get out of harm’s way) and casually tear up the earth and fling it at you.
After losing half its health, Titan will leap out of range and toss rocks from afar. Ifrit then learns Brimstone, a barrier-like ability which renders it invulnerable. Releasing it at the right time triggers a damaging explosion, though taking a hit during the charging will cause it to detonate prematurely.
Titan hefts a massive rock at Ifrit, so use Brimstone to destroy it. It then leaps back into the fray, adding a powerful charge and Earthshaker, sending a destructive wave in a straight line. Use Brimstone during this to avoid damage while dealing enough back.
With a smidge of health left, you engage in a Cinematic Evasion and Clash before finally besting Titan.
How to Beat Titan Lost
But it’s not over yet. Titan grows to a massive size, becoming Titan Lost and wielding more destructive potential. Ifrit will start this phase by auto-running – using Fireball to destroy the incoming boulders while moving around any oncoming obstacles.
Upon climbing up a stone tendril, you’re beset by rock crystals emerging in front. Dodge them, and when the tendril crumbles, you move to the next, repeat the same process, firing at any boulders. After a Cinematic Evasion, you have a Clash with a stone tendril. Overcome it to send it right at Titan, dealing damage and lopping off an arm.
What follows is a more traditional big boss fight. Titan Lost will attack with its remaining arm, and you must concentrate damage on it. You’ll see an indicator on the ground for when an attack will land, so make sure to dodge and attack the arm before Titan can retract it. Of course, be careful of the massive swipe – there’s no ground indicator for that, so dodge through it or use Brimstone. When the giant fist slams down, watch out for the ensuing shockwave since it can knock you into the air.
After Titan Lost is staggered and recovers, there’s another Cinematic Evasion. The next phase sees the tendrils tossing stones at you while the melee attacks resume. You also have to deal with Granite Rain, which sends several rocks into the air that start raining from the sky. After the second stagger and Cinematic Evasion, another stone tendril slams down, sending shockwaves. Pay attention to massive swipe since it can return for a backhand.
Following the third stagger and a Cinematic Clash, Titan’s other arm is weak but not destroyed. Perform another Cinematic Clash to unleash Hellfire to destroy it, then another to wield a stone tendril as a weapon. You’ll be free-falling during this, so aim and fire at any boulders sent at you. As you get closer, another stone tendril emerges – shoot it but prioritize any boulders that get close. Charged shots do wonders here.
One final Cinematic Clash and perhaps the biggest finish to a fight yet, and Titan Lost is vanquished.
How to Beat Titan (Final Round)
But it’s still not over! As Ifrit plummets, Titan’s original form falls with him, and the two battle in mid-air. Since you’re free-falling, you can only really attack or evade. Dodge Titan’s attacks, counter with melee strikes and dodge the rocks he throws to counter with ranged magic.
When his health drops by 50 percent, he’ll use Stone’s Throw – which can be destroyed with Brimstone or dodged – and Earthshaker, creating rock spikes on one of the walls (which can also be evaded). Some more Cinematic Evasions, Strikes and Clashes later and Titan is done. For really real, this time.
How to Beat White Dragon
You might think the White Dragon is a reskin of the Akashic Dragon, but alas, no. It fires Ice projectiles (on the ground and in mid-air), which linger briefly and become massive shards, and fires homing shots. It will swipe with its wing and tail, creating ice shards on the ground, but that can be evaded or blocked.
Make sure to Titan Block when it attacks with its head – since that part takes additional damage, the counterattacks are ideal. Be careful when it rears back and presses down on its front limbs since it unleashes a powerful burst of ice around it.
When it drops below 50 percent health, it casts Emanation, which creates several ice crystals in the sky. Lasers start emitting from them, sweeping horizontally and vertically, so get ready to dodge like crazy. The crystals will surge together and then detonate in an AoE, so leave the casting circle as soon as you see them coming together. The White Dragon follows up with a breath attack that also creates an AoE, which turns into ice shards erupting from the ground, so get ready to move again.
With about 20 percent health left, it uses Dragon Dance, firing two lasers from crystals, numerous bullet hell-style projectiles and homing shots. Two more lasers are fired at the end, which sweep towards you before erupting in hexagonal energy waves, followed by the dragon slamming down with an ice attack (yes, seriously). It should be near death by now, so go to town once it’s staggered.
How to Beat Necrophobe
Necrophobe seems like a more grounded foe, with some little satellite buddies. Then it starts zipping around before running it down mid. Avoid the charge, and beware of its slice and magic projectiles. Once again, Titan Block works wonders here. There’s little downtime for its attack, so keep blocking and countering, then pile on the damage when it’s staggered.
In an interesting change of pace, it will activate its big ability before dropping below 50 percent health. The Necrophobe casts Eternal Dissonance, seemingly fusing its satellite minions within itself. It then charges with thunder, unleashes fire projectiles in six directions, and slices twice with an ice blade before casting Blizzaga in a straight line.
Once “dark energies” start to swirl, you’ll want to damage the Necrophobe while it remains stationary and casts magic. One Titan Windup and the Phoenix’s Rising Flames should chunk most of its bar. After getting staggered and recovering with about 15 percent health left, it will start using powerful magic, casting Blizzaga twice, slicing multiple times with its ice sword and so on. Pile on the damage, and it should go down soon enough.
How to Beat Bahamut
The battle with Bahamut is arguably even more epic than Titan, starting with a Cinematic Strike and mid-air fight. After a Cinematic Evasion, you control Ifrit as Bahamut charges forward to hit you. It’ll take to the air often for spinning charges before activating Aura Burst, exploding in an area around it. After dealing more damage, Bahamut will pin Ifrit down and get ready to fire.
Phoenix intervenes, and you learn Spitflare, a concentrated beam of fire. Bahamut will use Quintessence to unleash several orbs – use Spitflare to destroy or dodge them (though they’ll track you). Beware Baahmut’s beam attack and wing strikes. It will slam down, creating a shockwave before using Aura Burst again. Brimstone can protect you, but you must time it properly for decent damage.
When Bahamut is staggered, unleash Spitflare for immense damage. After losing about 40 percent health, it will fly out of reach, and you’ll embody the Phoenix. It’s much like the beginning of the game, but you can now hold Circle to lock on to targets and unleash Volley. Move the cursor around to lock on multiple times while dodging Bahamut’s beams. Volley can also destroy projectiles, so focus on those when multiple are present.
After taking some damage, Bahamut will unleash Megaflare, firing multiple projectiles, so you need to dodge. Eventually, Phoenix starts pursuing Bahamut, and the latter spawns satellites that fire lasers. Lock on and destroy them or pepper them with Fireball, though make sure to avoid Bahamut’s lasers. As the fight progresses, it’ll Cast Megaflare again and unleash tons of projectiles before creating more satellites.
Eventually, Bahamut will create six satellites that circle it and charge up for its next attack. Use Fireball to destroy the satellites while avoiding Megaflare and its beams. After dealing more damage, you’ll shift to Ifrit, though Phoenix continues attacks from above. You’ll both team up for a double Spitflare, and then one losing more health, Bahamut will start raining projectiles from above. When it starts charging Teraflare, take shelter in Phoenix’s ward and complete the Cinematic Clash.
Bahamut will cast Triple Coil, which is essentially an explosive ranged attack. Dodge it and keep up the pressure. After it’s nearly defeated, enter a Cinematic Clash or two to break its barrier and win.
How to Beat Bahamut (Round 2)
Bahamut powers up due to the Mothercrystal and takes to the planet’s orbit. Phoenix and Ifrit combine to create Ifrit Risen and fly to space to fight him. Execute the Cinematic Strike for several quick hits. The fight starts in earnest, and you can use Lightspeed by pressing X. This allows for quickly getting close to Bahamut.
The rest of your attacks and counterattacks are also enhanced, including Spitflare, now Supernova. Bahamut’s Aura Burst has a larger range, so try dodging instead of escaping. It can also charge at you suddenly, so avoid colliding mid-Lightspeed.
Once it’s down to nearly half health, it will summon several orbs that lock on and fire lasers. Complete the Cinematic Evasion to avoid them and continue the battle. Bahamut will use Radiance next, generating several rotating beams of light around it. Move forward and dodge through them while continuing to attack. It will then create satellites that fire beams while charging and firing Gigaflare, so evade them all.
Avoid its subsequent sweeping beams and another round of being locked on by multiple lasers (which you must dodge manually this time). Bahamut’s final trick on low health is Celestial Foundry, which makes a wall of massive lasers fire out. If knocked back, use Lightspeed to get back up close again. Eventually, Bahamut is defeated, but it will recover and start casting Zettaflare. Complete the Cinematic Clash to end the fight at last.
How to Beat Sleipnir
Barnabas’ commander has a penchant for teleporting around, but his slices and thrusts are routine. He will cast a Dark spell that slowly builds under Clive’s feet and explodes after some time while also throwing magic projectiles, so dodge accordingly.
When his health is close to half, Sleipnir teleports behind Clive. After some strikes, he’ll teleport in front and summon Gungnir before firing a beam (which must be dodged in a Cinematic Evasion). Gungnir is pretty potent, unleashing massive slashes with a strong range. Some strikes can also generate energy waves that travel through straight lines, so dodge through the attack.
Eventually, Sleipnir will use the same beam-style stab, so move to the side or behind him. At less than 50 percent health remaining, he’ll use Dead Man’s Bier, causing Gungnir-like Dark projectiles to rain from the sky all around you before sending two massive spears down, which create shockwaves on impact. Sleipnir will end the attack by slashing down and sending Dark vertical waves in multiple directions.
He’ll also use Ratatoskr, which also summons some spear-like projectiles from the sky but not as many. He’ll use Creeping Darkness on his last legs, creating multiple Dark magic orbs that slowly move towards you.
How to Beat Barnabas
Your first real fight with Barnabas sees him summoning Odin’s sword and attacking with regular sweeping and vertical slashes. He’ll also unleash The Lord’s Measure, which activates several dimensional slices near you, and use both hands for a massive vertical slice. Watch out for his multi-slash unsheath attack, which he can use after teleporting a short distance behind you.
With 30 percent health gone, Barnabas readies Iron Flash. Deal damage to deplete the purple meter while avoiding The Lord’s Measure (dodge the closest slash when it activates near you) and the spear Gungnir, which creates an explosion and generates a continually damaging field for a period.
Unfortunately, despite how much damage is dealt, Barnabas will unleash Iron Flash and end the battle in his favor.
How to Beat Soul Taker
Remember the Undertaker fought earlier? The Soul Taker is essentially that, except you’re even stronger than before. Stagger it, activate Limit Break and then use Ultimate Skills like Gigaflare, Flames of Rebirth and Judgment Bolt, and it slowly disintegrates into nothingness.
How to Beat the Control Node
The Control Node is one of the stranger enemies encountered thus far. It’s essentially a floating ball, but don’t be fooled. Upon activating a node, it can unleash a beam or open up and fire multiple projectiles at you. Sometimes, it’ll barrel right into you or emit an electric discharge around itself.
Upon receiving a decent chunk of damage, the Control Node will activate Short Circuit, where all its nodes become activated and start firing beams. Most are above, and below it, so they’re easy enough to avoid. When it drops below 50 percent health (a classic), the Control Node will start charging its cells. Deal damage to stop it, but beware when it periodically slams into the ground, emitting electricity on impact.
Aside from opening and slamming shut in an electric attack, and sweeping with a single beam, the rest of the fight should be over quickly.
How to Beat Aurum Giant
You won’t have any downtime after the Control Node falls as the Aurum Giant enters the fray. It’s more aggressive than the Iron Giant, leaving flames on the ground with its shield projectile while stomping and slashing relentlessly. It also charges its blade with magic when casting Golden Section, increasing its range and damage.
Upon losing half its health, its vertical slashes will unleash energy waves, and it’ll use Aetherial Assault Cannon, causing magic to rain from the skies in designated spots. Nevertheless, the Aurum Giant should be easy to dispatch if you continually deal stagger damage and don’t get caught out.
How to Beat Barnabas (Round 2)
Barbanas starts the fight by slashing down with Odin’s sword, sending a vertical energy wave forward. Up close, he’ll unleash several horizontal slashes and stabbing thrusts before teleporting and unsheathing for multiple slices in a single motion. The latter doesn’t have an extensive range; make sure you dodge continuously to avoid getting hit.
Fairly early on, Barnabas uses The Lord’s Measure. Avoid it before it’s fully activated and dodge his follow-up attacks. He also throws the spear Gungnir as a regular attack, so dodge that and stay outside the damaging field.
After losing about 30 percent of his health, Barnabas transforms into Odin. After a Cinematic Strike, the battle resumes with both characters in human form. Barnabas will unleash Blinding Steel, charging up as a horizontal cut is visible in front. Get behind him immediately to avoid the massive beam attack. The rest of this phase is normal, though Barnabas can leap up after a few melee strikes and slam down for a huge vertical slash.
Eventually, he’ll activate a stronger version of the Lord’s Measure, which causes dimensional slices to appear everywhere. It advances as a wave, so dodge forward from the slash near you when it activates.
After getting staggered, Barnabas becomes Odin again, and Clive activates Ifrit. After a Cinematic Clash, the two battle in human form again, with Barnabas becoming powered up. He’ll start gathering darkness, which means you must attack but won’t remain stationary, continually slashing and moving around. Avoid his slashes and stabs, and beware when he teleports since Blinding Steel is coming.
Barnabas will also use his unsheath-style multi-slash and Gungnir, both powered up. Upon dropping below 50 percent health, he’ll use Quieting and semi-priming, taking on a more Odin-like appearance. He then casts Great Divide – if the raised sword didn’t clue you in, you must dodge to the side to avoid the massive vertical slice. It’s followed by a sweeping horizontal attack and the All-Wielder, a vertical slash that transitions into a massive beam.
With about 10 percent health left, Barnabas turns into Odin, who towers in front of Clive. He’ll use a massive sweeping attack, thrust and then another sweep before finishing with an overhead swing. Use ranged magic during this and save your cooldowns.
Upon returning to a semi-primed state, he’ll then use Circle of Malius, summoning a second blade and using a buzzsaw slash that travels vertically before flying out and returning to slice horizontally, Beyblade-style, and ending with thrusting both blades into the ground for an explosive strike. Though this is the end, Barnabas will still use the Lord’s Measure and Blinding Steel, so stay on your guard.
How to Beat Behemoth
It wouldn’t be a Final Fantasy without Behemoth. Several of its attacks, from the tail whip and claw swipes to the spinning attack and charge, will look familiar to long-time fans (or Monster Hunter World players). When it’s close to losing half its health, it will summon Ecliptic Meteor, triggering a Cinematic Clash.
Behemoth will then use Maelstrom, conjuring an enormous tornado at your current position. Move away from him first so that it won’t interfere when you’re attacking. If it touches you, the damage taken is pretty significant, so have some High Potions or Elixirs on standby. Upon losing half its health, Behemoth will summon regular Comets to your position, which trigger shockwaves on impact, so beware.
When its health drops to about 15 percent, it will use Meteor, causing meteors to quickly fall from the sky, leaving fiery areas for a brief time. It follows up with Comet and Maelstrom, and it can be easy to die. With no health left, Behemoth will use Meteor again but follow up with Extinction, causing another giant meteor to fall in an area. Move out of there as soon as possible, and then watch it die.
How to Beat Ultima
Your first battle with Ultima starts, and it unleashes Neutron Flare, multiple lasers that twist around the arena. Along with a slashing attack, it uses Graviga to pull you in before following up with a flaming slash. Mark of the Storm sees Ultima throwing a lightning spear (followed by a lightning strike). It can also slam down with an ice attack.
When it’s lost 40 percent health, Ultima charges up and then uses Event Horizon, creating a black hole that keeps drawing you in while it continues attacking. It’ll keep using its slashes and then initiate Ricochet, firing a projectile that bounces around. Note Graviga since it will now follow you before exploding and drawing you in, which is annoying when trying to avoid Neutron Flare’s lasers.
After falling below half health, it activates Deliverance and slices with two massive flaming swords. Following multiple slashes, it ends with an explosive attack. It will then use Frostbolt, causing lightning strikes and falling ice shards. While unleashing more slashes, Ultima will fire a massive laser. It won’t let up after that before using Eternal Darkness, where it fires a row of lasers, one after the other.
How to Beat Ultima Prime
The initial fight with Ultima Prime sees Ifrit, Bahamut and Phoenix fighting together to overcome Ultima’s Eikon form. It’s a series of Cinematic Strikes, Evasions and a massive Clash.
How to Beat Ultima (Round 2)
The second fight with Ultima sees Clive alone, and the former has new attacks. He’ll throw projectiles out, charge at you and swipe multiple times. Flare sees Ultima teleport away and throw out spiraling flame orbs that eventually explode. He’ll also use a Jump-like ability, landing with a small AoE explosion.
After losing about 33 percent of his health, Ultima changes the stage and unleashes even more bombastic attacks, swiping the ground and causing a massive explosion. He still teleports and attacks with melee strikes, but these have a much larger range and deal more damage.
Ultima will also cast, well, Ultima, an expanding sphere of magic – dodge towards it to avoid any damage. You should beware when he creates a circle of magic under him – other circles will start appearing, and massive blades will emerge from them, so create some distance as soon as the attack starts.
Other attacks include flying around and firing projectiles, and Smite, a beam fired after he teleports. He also uses a attack, where a large crystal appears, firing beams in multiple directions. Stand between two beams by checking the indicators on the ground to avoid any damage.
Upon losing 50 percent of health, Ultima casts Meteor, raining down meteors in the area, which leave burning areas that expand, creating shockwaves.
How to Beat Ultima Risen
Clive becomes Ifrit Risen, and it’s time for the penultimate battle. Ultima Risen will use similar melee attacks, though he can end combos with a double slash that explodes after a period. Smite is still the same – a teleport leading to a massive beam – but he can cast Anistrophe and do this same attack three times in a row.
After the first stagger, Ultima Risen uses The Rapture, creating a massive explosion that travels outwards. The best way to avoid this is by using Wildfire and sprinting back as far as possible. After the attack ends, use Lightspeed to get back up in Ultima’s face, though be careful as he can charge forward.
Dodge forward when he sends out multiple projectiles since they’ll spiral outwards, and dodge through the spinning beams he emits with Stellar Xyston. Watch out for Aureola, a shockwave followed by different projectiles that attack from every direction. Create some distance and dodge accordingly to avoid them.
When his health drops below 50 percent, he begins “Unlocking Purgatorium.” Multiple shockwaves are created during this, so use Wildfire and dodge to avoid them while closing in with Lightspeed. Be careful when up close since Ultima Risen fires energy orbs outwards and uses Stellar Xyston. When the message “Purgatorium in…” appears, don’t panic – you’ll have 40 seconds to deplete his bar.
Eventually, the sphere around Ultima Risen contracts, and he’ll unleash lots of smaller projectiles, then use Stellar Xyston when you’re close and unleashing energy orbs. Avoid them as they emerge, one by one, and keep attacking.
When its health is low, it uses Pulsar, firing six lasers in various directions, orienting them in different ways. It also uses Dimachairos, a sweeping beam similar to Smite.
How to Beat Ultimalius
Ultima isn’t done yet and takes on one final form, Ultimalius, to battle Clive. Many abilities call back to the different Eikons, like Fulmen and Fulgur, which summons down lightning in multiple areas that explode afterwards. Ultimalius will keep attacking during this, so dodge and reposition accordingly. He also uses the magic circle with several smaller circles with blades that emerge from beneath when you’re close.
Divine Embrace is similar to Deadly Embrace and grabs Clive. Dodge before you even see the words for the attack appear onscreen, and beware of multiple claws slamming down, followed by one giant claw, when he uses Euroclydon. Cataclysm sees him slamming a fist down, creating a rippling series of rock attacks like Titan. After the initial explosion in the center, dodge into it to avoid the outer rings.
Eventually, Ultimalius will sprout claws, and Clive will do the same, resulting in a Cinematic Clash. Some more Clashes follow, and the fight resumes. Next, he casts Exaflare, one sweeping beam after another that causes the area affected to explode (just be careful when up close); Boreal Rhapsody, tons of falling ice shards which are easy enough to dodge; and Severance, equivalent to The Lord’s Measure but with the slashes activating much quicker.
These same attacks and the slash that causes the area affected by it to explode will continue. When Ultimalius drops below 50 percent HP, another Cinematic Clash, then an Evasion, and another two Clashes occur before the battle continues.
You’re nearing the home stretch when Ultimalius activates Limit Break, followed by multiple slashes that explode, Meteor, the blade-conjuring circles, Smite, and smaller projectiles as he flies around. Eventually, he uses Empyrosis, which creates an area of fire around him that erupts into a pillar which expands outwards. Ashes to Ashes sees him sending out homing projectiles a la Phoenix before diving at Clive and creating an explosion on impact.
If that weren’t enough, Ultimalius creates his version of Hellfire. The giant ball explodes on impact and generates multiple eruptions afterwards in the arena while he continues attacking, unleashing Ashes to Ashes, Flare and so on.
After hitting 10 percent health, another Cinematic Clash occurs, and you’ll have an opportunity to wail on Ultimalius while he stands defenseless. One final Cinematic Clash, and he’s beaten. Congratulations.’
How to Beat S-Rank Notorious Marks
While the Notorious Marks or Hunt Board targets are all optional, only a few would qualify as proper threats. They are the S-Ranks and present some of the toughest challenges in the game. Here’s how to go about defeating them. For details on unlocking the Hunt Board, head here.
How to Beat Gorgimera
An S-Rank Chimera, Gorgimera starts with Delta Attack, creating three magic beams that gradually converge and explode in an area. Use this opportunity to build some stagger damage (Diamond Dust is good here), and get ready to dodge its next attack, where it lays out several ice crystals with whirling blades in front or calls down lightning around it and sprays jets of fire. It can also fly up and charge, swiping with its claws.
After dropping below half health, Gorgimera unleashes Delta Force, concentrating the magic beams in three separate spaces. These are easily avoidable, but it also uses a different “Voice” for each head. The Dragon’s Voice casts lightning in several spots around the monster, while the Ram’s Voice casts a giant ice attack beneath it. Gorgimera is one of the easier S-Rank Notorious Marks, so there shouldn’t be too much trouble disposing of it.
How to Beat Behemoth King
Though not the highest-level S-Rank Notorious Mark, it’s still no pushover. It starts with Four Horsemen, calling down meteors to either side that cause shockwaves. While using the same physical attacks as Behemoth, Behemoth King casts lightning in multiple spots. Beware of Maelstrom, especially since it casts Four Horsemen while the tornado is active (this time calling down four meteors with shockwaves on impact).
When close to 50 percent health, Behemoth King uses Reign of Fire, causing tons of meteors to fall with expanding fiery areas that can knock you back. Beware that it can cast multiple spells and use physical attacks as they go off, so be ready.
With some health left, it triggers Apocalypse, reigning down meteors big and small. If you still have an Ultimate left, get underneath the monster and use it. Unlike regular Behemoth, if its health is low enough, it’ll die rather than stay alive until the attack is finished.
How to Beat Pandemonium
At first glance, Pandemonium looks like the Orcish Warlord from the story. However, instead of small projectiles, this S-Rank Notorious Mark casts Sanguine Rite, sending a massive ball of energy at Clive that explodes in a wide range. It also teleports and casts magic that appears right at your location, so be prepared to dodge when it starts the casting motion, but don’t ignore the smaller projectiles it fires from the front or its weapon swings.
Pandemonium also has Rictus of Horror, a massive energy beam, but stays stationary during the cast, letting you get some free damage. It also tends to gather energy and then release it in an explosion around it, so dodge at the last second.
Upon dropping below 50 percent health, Sanguine Rite conjures multiple energy balls that fall in the area, followed by smaller magic casts on the ground. Pandemonium will teleport and unleash Rictus of Horror again, so keep moving.
How to Beat Atlas
As an S-Rank Notorious Mark, Atlas is very much akin to the Aurum Giant. The difference is that it will cast Celestial Sphere, calling down multiple magic strikes in a circle as it attempts to stomp you. Evade twice to avoid the stomp and bypass the spell (and maybe one more time, in case there’s another cast).
The Atlas will also attack with its sword and shield. It also hops back and fires magic in a straight line from its shield that leaves a burning trail, but it also casts Celestial Sphere beforehand to give you less room to dodge. Be especially careful of its overhead sword strikes since they also fire energy waves.
Suffice it to say that you’ll want your big damage Ultimates on standby once it’s staggered. Activate Limit Break and then use Gigaflare, Judgment Bolt and Flames of Rebirth for massive damage. Since it’s likely lost more than half its health, Atlas will use Golden Section, increasing its sword’s damage and range, before unleashing Sword Dance, which sweeps across the battlefield.
Be careful when it casts Celestial Sphere and Sword Dance at the same time since this deals immense damage.
How to Beat Svarog
You fought a White Dragon, so why not a Red Dragon? That’s Svarog in a nutshell. As one of five S-Rank Notorious Marks, Svarog starts the fight with Blazing Legion, creating multiple fire orbs and firing a vertical laser that explodes in the area it touches.
If caught in this, say goodbye to 75 percent of your health. It will cast it again before using Red Dawn, causing several eruptions, then firing a sweeping laser that explodes afterwards and charging with its mouth full of fire. Otherwise, beware of the usual spin attack, swipes and mid-air flaming projectiles.
Unfortunately, when losing a bit of its health, it uses Embroil, calling down a flaming projectile and igniting certain spots. Other flaming projectiles fall, but the spots can also flare up. It then charges forward in a spinning attack because life is pain.
Once half its health is gone, it uses Dragon Dance, similar to the Akashic Dragon’s, but with much faster firing projectiles, damage and a quick spinning attack. When it uses Embroil, the ignited spots will also erupt, which is even more fun. It may also mix Blazing Legion and Red Dawn. Bring your highest damaging abilities and ensure they’re maxed out.
Final Fantasy 16 is available for PS5 – check out our official review here and why it’s so great. If you need tips on farming Ability Points to upgrade and Master Eikonic Skills, check out our guide. You can also learn more about all the best weapons, accessories and more while discovering the best Eikonic Skills.


