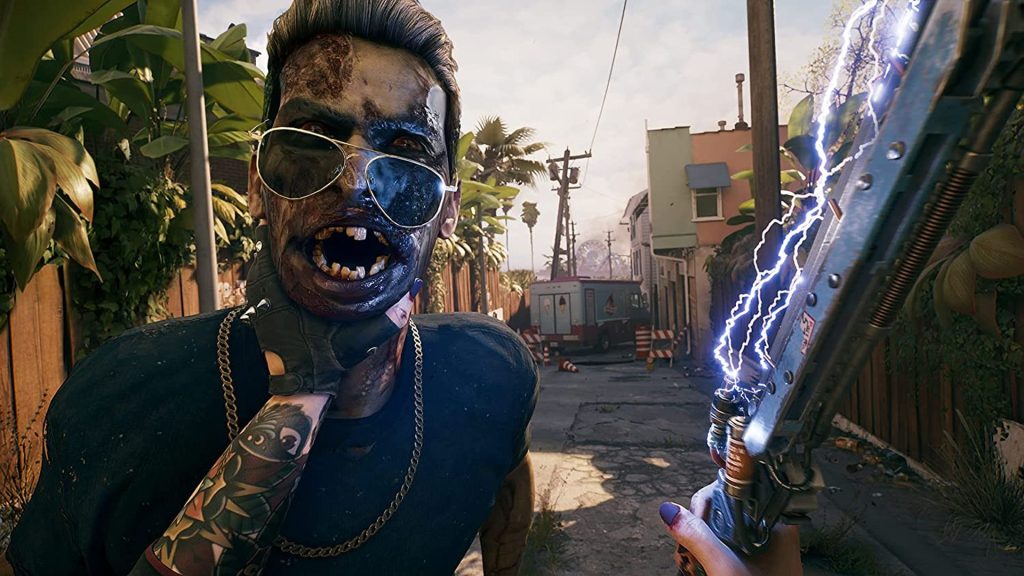
Dambuster Studios’ Dead Island 2 is a linear game with a story that takes about 15 to 20 hours to complete. Of course, there is side content and collectibles, and a fairly hefty post-game awaits. For those looking for full Trophy/Achievement completion, Los Angeles will keep you busy for a good long time. There are 45 Achievements/Trophies (with an extra Trophy exclusive to PS4 and PS5), and they’re all easy to get. Without further ado, let’s dive in.
How to Unlock All Trophies/Achievements
Who Do You Voodoo?
Exclusive to PS4 and PS5, this Trophy is awarded for collecting every single Trophy.
Welcome To Hell-A
Awarded upon surviving the initial plane crash in the opening, meeting with Emma and then venturing to her home, which serves as your first shelter and completes the main quest, “Bel-Air Brawl.”
Hotel California
This Trophy/Achievement unlocks upon reaching Halperin Hotel and contacting Dr Reed in the main quest, “Call the Cavalry.” You’ll need to defeat Becki the Bride first, so come prepared.
Personal Assistant Personally Assisted
Michael is in trouble, and you’ll need to rescue him in the main quest, “Michael Anders and the Holy Grail.” Defeat Alesis Hernandez to receive this Trophy/Achievement.
Git Gutte!
Sam B from the first Dead Island returns, and is thankfully not relegated to a cameo. Work together and obtain some “firepower” in the main quest, “Justifiable Zombicide” to unlock this.
Friends Like These
Meet Lola Konradt in the main quest, “The Red Mist” to unlock this.
Dr Reed, I Presume?
After surviving Venice Beach and its horrors, travel to Serling Hotel and rendezvous with Dr Reed in the main quest, “The Final Gauntlet.” This Trophy/Achievement should then unlock.
But Doctor, I Am Butcho
What could be scarier than clowns or zombies? Zombie clowns, of course. You’ll need to take one down in the main quest, “Boardwalking Dead,” and then give Dr Reed a blood sample for this Trophy/Achievement.
Can’t Handle the Truth
As it turns out, being immune and having Fury Mode to unleash zombie-style rage doesn’t make you human. This Achievement/Trophy is unlocked after completing the main quest, “The Search for Truth.”
Like Riding a Bike
You’re out for some revenge, but first, you must find Patton in the main quest, “Rage Quit” and ask him to fly a chopper to Hollywood Boulevard and eventually out of Los Angeles. Do that, and this Achievement/Trophy is yours.
A Patton Emerges
Venturing through Hollywood Boulevard means traveling through its zombie-infested Metro system in the main quest, “The End of the Line.” Survive that to unlock this Trophy/Achievement.
Our True Nature
You more or less ensured the survival of the others but are hanging back in Los Angeles for various reasons. As you give up on being human, this Trophy/Achievement unlocks, and the story is complete.
Go, Bobcats!
After finishing the main story and the side quest, “The Rav-Ages of Caustic-X,” go to The Pier and meet Hana. She’ll ask you to go to Monarch Studios and search for Bozzy. Once there, go to Stage 5 and slay the zombies present, then speak to Bozzy. Use the mortars to take down the zombies, and speak to him again to finish this side quest.
Next, go to The Pier and meet with Dez near the CDC camp. There will be an explosion – follow the marker to it and take down the ensuring undead. Speak to Dez, and kill some more zombies as she throws explosives. Speak to her again and search for the Quartermaster’s records by following the marker. You’ll then have to go to the main CDC dome and kill the zombies inside. Go back and speak to Dez again to finish this side quest and unlock this Achievement/Trophy.
Internet Famous
Amanda Styles is an influencer caught up in viral video-making, and the zombie apocalypse has provided the perfect material. You must complete three of her side quests to earn this Trophy/Achievement.
The first requires completing the main quest, “Call the Cavalry.” You’ll hear Amanda yelling – go to the GOAT Pen villa in Bel-Air, Alpine Drive, and venture to the roof. Your first task is to go to the marker, turn on the music and attract some zombies. You now have to kick them off, which is done with Jump Kicks or pressing R3 for regular kicks. Amanda will give a new objective, which involves Maiming (read: dismembering) 12 limbs from zombies, so make sure you have a sword handy.
Next, Amanda will ask you to burn six zombies. Either use a weapon with a Fire mod or kick them into the fire on the roof. The zombies must succumb to fire damage for this to count. Now defeat the remaining zombies and speak to Amanda to finish the first side quest, “#Clickbait.”
The next side quest is in The Pier and requires finishing the main story. First, power the dodgems to help Amanda escape. Next, kill 16 zombies with electricity, either with the weapon mod or the nearby cables.
Follow Amanda when she runs away and speak to her near the Ferris Wheel. Kill 12 zombies by destroying their heads with headshots or finishers when they’re on the ground.
Follow Amanda to the wrecked octopus attraction and kick 14 zombies off. Kill the remaining zombies and speak to Amanda again to finish the side quest, “Like And Follow!”
The third and final side quest starts in Hollywood Boulevard and is essentially a gauntlet of Apex Zombies. Amanda is behind the stage and first wants you to turn on the cameras. Now go to the front and take down the two zombies, then the unique zombies, Claritee and Bijou. Next, take out Amar, a burning zombie, and Sir Treble, a Slobber. You’ll then face Eddie, a Butcher, and Hoffman, a Slobber.
Amanda is bitten, but you’ll first need to kill two more named zombies, Grace and Nick. Amana will then turn into a zombie and must be killed. Pick up the note she drops and go to her laptop for the download, finishing off the “Going Viral” side ques, and earning this Achievement/Trophy.
Make it So
After finishing the “Going Viral” side quest, meet Sebastian on Hollywood Boulevard. Go to the Old Dynasty Chinese Theater to find Sarah. You’ll need to kill some zombies, talk to her and venture into the Metro. You’ll need to find three fuse boxes and destroy them to progress. Once you’ve got the Space Fox spotlight filter, return to Sarah. Some more zombies will appear – take them out and install the spotlight filter. Speak to Sarah again and then return to Sebastian to complete the “Beacon of Hope” side quest and earn the Trophy/Achievement.
Making Your Mark
You’ll get this Trophy/Achievement for completing ten non-Story Quests.
Rising Star
Unlocked by finishing 20 non-Story Quests.
LA Influential
Lest you thought it would be awarded upon completing 30 non-Story Quests, this Trophy/Achievement unlocks after finishing 40. While there are only 33 side quests, there are also 15 Lost and Found Quests, which count as non-Story Quests. Some are only available after the story, and the Lost and Found Quests require exploring a district to find the item needed for starting it.
Ooh, Shiny!
Awarded upon receiving your first Legendary Weapon. Legendary Weapons are overpowered and have unique perks for culling hordes of zombies. You can get Emma’s Wrath, a Legendary Hammer that explodes after countering or stomping a zombie, by finishing the story. Other Legendary Weapons are as follows:
- Bodycount – It’s obtained from the “[Redacted]” Lost and Found quest. Before going inside the military base on Venice Beach, enter the building to the left. There’s a unique zombie named Lt. Ford – kill it to get a note. Exit the building and go left, through the chain fence with the sign, “Monica 2 Perimeter Standby.” Keep going straight until you see a landing craft on the beach. There will be a cargo container numbered “75.” Climb up it and then cross over to the next container. Drop through the roof and kill another zombie to get another note. Exit the container and go right – look for a sign that says “Evac and Processing Embarkation Points.” Pass through the entrance to the end, take the right, and then the left. Go to the very end and activate the lever to open the gate. Once done, there should be another container in front numbered “58.” It will open and contain a three Riot Police zombies. Take them down, and pick up the recording. Exit the container and go right to a shutter with a button. Activate the switch and go straight through to the back of the building. Exit and go left until you see a shipping container that says “66.” Deactivate the generator near container “67” to open 66, kill another zombie and then open the container marked “Priority Asset” for the Bodycount. It’s an assault rifle that inflicts the Bleed status on a zombie and others nearby and deals obscene damage.
- Big Shot – Drops late in the story, but can also be received as a reward for finishing the side quest, “It’s Not Your Fault.” The firearm’s perk is Boomstick, where rounds trigger explosions on hit and Traumatize enemies.
- Party Starter – Okay, but hear me out – Brass Knuckles with blowtorches attached. If that sounds like a fun time, complete the “Drunk and Disorderly” Lost and Found quest. You’ll need to get a note from a zombie from Serling Hotel on Ocean’s Avenue, which leads to two locations in Venice Beach – Gang Green and Roses Tattoo Parlor – with special zombies. You’ll then have to travel to Santa Monica Pier to Pier Grill and kill another special zombie. Once done, you can return to Serling Hotel and open the white SUV in the parking lot to receive the Party Starter. Its main perk is Spitting Fire, which grants moderate Fire resistance and ignites nearby foes when knocking down a zombie with a Heavy Attack.
- Blood Rage – Obtained from the Lost and Found quest, “Fool’s Gold.” Go to the Lifeguard HQ in Santa Monica Pier. When venturing to the main building, go to a locker in a garage, but first, you need another note near the Ferris Wheel. Look for an ice cream shop near it – it’s on a bench. Next, go to the boardwalk and look for a yogurt shop. Explore the alleyway to its left for another note. Now return to the Lifeguard HQ and kill the zombies to the side. Excavate the chest, and the Blood Rage is yours. Puncture Wound is its perk, inflicting more critical damage and Bleed damage on successive critical hits, which can stack.
- Brutalizer – You get this from the Body Art series of side quests. Check out the entire series below since they’re required to earn a different Trophy. The Brutalizer is a powerful sharp weapon that deals more limb damage and weakens an enemy after you land some critical hits. Hitting the weakened enemy also regenerates stamina.
- The One – It’s obtained from the Beacon of Hope side quest (check the steps below). Its special perk, Headhunter, will create a Forceful explosion on decapitating zombies. You’ll also regain health and stamina in the process. Recommend for all The Highlander role-players.
- Krakatoa – You get this Legendary Axe from the Lost and Found Missing Person quest to find Steve (check out the steps below). Its unique perk is Reaper, where hitting an Ignited zombie will prime the weapon. Heavy Attacks will then inflict more Fire and Limb damage. You can have multiple stacks of this effect.
Gore Horse
Awarded for completing Body Art, the side quest chain for Francesca. It’s a seven-part quest in Beverly Hills after you finish the side mission, “The Ballad of Rikky Rex,” and the main quest, “The Giant-Slayer.” You essentially need to collect zombie parts for her (which only start dropping after finishing, “The Giant-Slayer,” so keep that in mind). Here are all the parts for each side quest:
- Body Art: The Visionary – Requires 10 Infected Flesh. Just kill some regular Zombies for this.
- Body Art: Heft – Requires five Oversized Arm Bones, which you get from zombies.
- Body Art: Moist – Requires five Chthonic Ichor, which drops from Slobbers.
- Body Art: Uproar – Requires five Infected Spines, obtained from Screamers.
- Body Art: Vigor – You must complete the main quest, “Blood Drive,” to unlock this. Requires three Blade Arms, which you can get from Butchers.
- Body Art: Dread – You need to finish the main quest, “Hollywood Ending” to unlock this. You must then get three Mutated Hearts from Mutators.
- Body Art: The Unveiling – Francesca unveils her horrific masterpiece. Check around the back of the garage of your base to see and then speak to her. The Trophy/Achievement unlocks, and you also receive the Brutalizer.
Zombologist
The Zompedia is your guide to every single Zombie type in Los Angeles. To unlock this Trophy/Achievement, you’ll need to kill one of every single type. There are 20 Common types and 11 Apex types. You’ll find Shamblers, Walkers and Runners in just about every location. Here are where you can find the other Common Zombies:
- Burning Runners – Located in Venice Beach, just behind the military base.
- Spiky Runners – Located in the building with the fast travel point in The Pier and outside Halperin Hotel in the parking area.
- Firefighter Runners – Also found in The Metro.
- Shocking Runners – Found in The Metro.
- Hazmat Runners – Present during the final boss fight but also found in Hollywood Boulevard and The Pier.
- Incendiary Walkers – Also located in Venice Beach near the military base.
- Insect Swarm Walkers – Found in Bel-Air near the headquarters.
- Grenadier Walkers – You can also find these zombies near Venice Beach’s military base. Alternatively, check Beverly Hills.
- Burning Walkers – Go to The Metro and check near the trainwrecks to find them.
- Caustic-X Walkers – Go to Brentwood Sewers, where the Slobbers usually hang out, or Ocean Avenue to find them.
- Riot Gear Walkers – Go to The Pier and look for a crashed helicopter to find these Walker variants.
- Shocking Walkers – Located in Bel-Air on Alpine Drive.
- Firefighter Walkers – Found in Ocean Avenue near the mall and The Metro, but you’ll need to progress past the room with a Fast Travel spot to find them.
- Hazmat Walkers – Like their peers, these are also found in The Pier and Hollywood Boulevard.
- Hydration Walkers – Found in Ocean Avenue just before the lab.
- Spiky Walkers – Located near the Slobbers’ hot spot in Beverly Hill and in central Ocean Avenue inside of a building.
- EAT Couriers – Found in The Metro and Brentwood Sewers.
Here’s where to locate all the Apex Zombies.
- Butchers – Found in the Butchers’ hot spots in The Metro and The Pier.
- Vicious Butchers – Found on Hollywood Boulevard close to the Metro/
- Voltaic Screamers – Found in The Pier at the arcade.
- Screamers – Found in Beverly Hills at the Screams’ hot spot.
- Bursters – Found in the Bursters’ hot spot in Beverly Hills.
- Putrefied Slobbers – You can find these in Beverly Hills at a Slobbers’ hotspot in the North East or occasionally in Halperin Hotel’s parking area.
- Firestorm Slobbers – Go to The Metro to find these hot-head Slobbers.
- Mutators – In The Metro, check the Mutators’ hot spot to find them.
- Slobbers – Also found in Beverly Hills at the Slobbers’ hot spot.
On Safari
There are all kinds of Challenges in Dead Island 2 broken up into different categories – Blueprint, Zombie, Weapon, Combat, Survivor and Exploration – and tiers.
Unlocking this Trophy/Achievement requires completing the first tier of the Zombie Challenges, which requires slaying a set number of each Zombie type. Here are all the Tier 1 Zombies Challenge requirements:
- Zombie Hunter – Complete one other Zombie Challenge in this category.
- A New P.B. – Kill 50 Runners.
- Backdraft – Kill 10 Firefighter Zombies.
- Boom and Doom – Kill 10 Explosive Zombies.
- Burst at the Seams – Defeat 10 Bursters.
- Butcher Butcher – Kill 10 Butchers.
- Change Is Constant – Kill 10 Mutators.
- Cleaning House – Kill 50 Common Zombies.
- Crust of the Crop – Kill 50 Shamblers
- Gastric Bypass – Kill 10 Slobbers
- Heartburn Relief – Kill 10 Firestorm Slobbers
- Leech Removal – Kill 10 Putrefied Slobbers
- Not the Bees!! – Kill 10 Insect Swarm Walkers
- Quiet in the Neighborhood – Kill 10 Screamers
- Sharp-Witted – Kill 10 Spiky Zombies
- Shockingly Loud – Kill 10 Voltaic Screamers
- Smells Like BBQ – Kill 10 Burning Zombies
- Those Who Melt It – Kill 10 Caustic-X Walkers or Putrefied Slobbers
- Top Zompedia Contributor – Fully update 1 Zompedia entry. See the Zombologist
- Trophy/Achievement for more details.
- Turtle Soup – Kill 10 Riot Gear Walkers
- Walk on By – Kill 50 Walkers
- Zap, Crackle, And Pop – Kill 10 Shocking zombies
Variety is the Spice of Death
Finish Tier 1 of all the Weapon Challenges to unlock this. Here are all the Weapon Challenges and their first-tier requirements:
- Weapons Expert – Complete one other Challenge in this category.
- Batter Up! – Using curveballs, kill 50 zombies.
- Crack Shot – Use rifles to kill 50 zombies.
- Gunslinger – Use handguns to kill 50 zombies.
- Legendary – Obtain a Legendary Weapon. You can do this by following our tips above to find them or completing the main story to receive Emma’s Wrath.
- Shotgun Shogun – Use shotguns to kill 50 zombies.
- Slice and Dice – Use Maiming weapons (like the katana or axe) to kill 50 zombies.
- Surgeon General – Use Headhunter weapons (dagger, gold club) to kill 50 zombies.
- Swing Away – Use Bulldozer weapons (baseball bat, sledgehammer) to kill 50 zombies.
- Think Fast – Use Frenzy weapons (brass knuckles, hunting knife) to kill 50 zombies.
Zombicidal Maniac
To unlock this, simply complete Tier 1 of all Combat Challenges. Their requirements are as follows:
- Serial Killer – Complete five other Combat Challenges.
- Blood Will Have Blood – Use bleed damage to slay 50 zombies.
- Broken Bodies – Maim 50 zombies, so essentially slice off 50 limbs.
- Cooling Off – Use water (like nearby canisters) to inflict the Soggy status on 25 zombies.
- Dangerous DNA – While at max Autophage, kill 25 zombies. Check the “Down With the Sickness” Trophy/Achievement for more details on achieving max Autophage.
- Dinnertime’s Over – Interrupt five Butchers while they feed. First, damage a Butcher enough until they run away. They’ll start eating other corpses for health – simply interrupt and kill them.
- Dissolving Problems – Use Caustic damage to kill 50 zombies. Mod weapons to deal Caustic damage or equip the Spitting Cobra Skill, and use it in Fury Mode to inflict Caustic damage.
- Electrifying Personality – Use Shock damage to kill 50 zombies.
- Ferocious Firestarter – Use Fire damage to kill 50 zombies.
- Finish Them – Execute 25 zombies with finishers.
- Furious Fighter – Use Fury Mode to kill 50 zombies.
- Hazards Pay – Use environmental hazards to kill ten zombies.
- Headshot Aficionado – Kill 25 zombies with head blows. Whether it’s a headshot or a weapon hit, the final blow must be to the head.
- Hey, Catch! – Use explosive zombies to kill five zombies. Watch for zombies with explosives on their vests (the Grenadier Walkers). Shoot the explosive and they’ll blow up, killing other zombies.
- Impressive Aim – Hit a zombie over 35 meters away with a thrown melee weapon.
- Live Long and Propser – Without dying, kill 25 zombies.
- Ninja – With one Shuriken toss, dismember three zombies. Look for some zombies moving towards you in a straight line, aim and throw the shuriken to dismember them all. Skills that increase curveball damage, max Autophage level and fighting similar-level zombies should make this easier.
- No Time to Grow – Before it mutates, kill one Mutator. Check the Trophy/Achievement, “Not Even My Final Form,” for tips on doing this.
- Perfection – Execute 25 perfect defenses. Once again, check “I Got a Zombie Army, and You Can’t Harm Me” for tips on doing this.
- Pushovers – Knockdown 25 zombies.
- Shut Up – While a Screamer is screaming, interrupt them with attacks. Do this five times to complete this Challenge tier.
- Speed Freak – Score 10 multi-kills. Explosives are the best, so use curveballs that rely on explosive damage.
- Splash Zone – Use melee attacks to kill five Slobbers.
- Trick Kick – With one jump kick, knock down three zombies. Just make sure there’s a relatively large crowd of zombies and press X/A to jump and then R3/Right Stick to jump kick.
- Zombie Space Program – Use weapons like Sledgehammers and perform Heavy attacks to launch 25 zombies.
Survival Skills
Unlocked by completing the first tier of every Survivor Challenge. Here are all their requirements:
- Survival Skills – Complete one other Challenge in this category.
- Hollywood Rich List – Earn one million cash. This doesn’t mean you must earn that amount in one go. So you can essentially buy weapons and sell them back to vendors. If you can, wait until you hit the level cap and receive Superior weapons, which sell for $10K. Sell and buy those repeatedly, and you should have this completed.
- Mod Maker – Use five mods on weapons at workbenches.
- Reduce, Reuse, Recycle – Recycle ten weapons (by holding R3/Right Stick in your inventory on the item in question) for parts.
- Repo Man – After the main quest, “The Giant-Slayer,” zombie parts will drop. Collect 50 of them for this challenge.
- Resourceful – Collect crafting 100 parts. Parts can drop from zombies, recycling gear, completing quests and challenges, etc. Just keep doing what you’re doing, and this should complete by itself.
- Revival Act – In co-op revive another Slayer one time.
- Scavenger – Loot 100 containers.
- Staying Alive – Use 10 Med Kits. These drop from enemies, but you can also buy and craft them.
- The Perks of Being A Zombie Slayer – Craft five perks for weapons.
Smorgasbord
Unlocked by completing the first tier of every Exploration Challenge. Here are their requirements:
- Well-Traveled – Finish one other Challenge in this category.
- Private Eye – Complete three Lost and Found Missing Person quests.
- Road Trip – Go to every district in the game, which is done naturally throughout the story.
- Safe Cracker – Unlock five Lockboxes.
- The Heart of the Cards – Collect five Skill Cards.
- Well-Read – Finish five journal collections.
- Zombie Pirate – Complete one Lost and Found Weapon quest.
Sharpest Tool in the Box
Earn this Trophy/Achievement by completing five Lost and Found Quests. You can refer to the point about the Legendary Weapons tied to Lost and Found Quests for three of them and check the Missing Person Quests below for two more.
Sole Survivor
Unlocked by completing all the Lost and Found Missing Person quests. After progressing through the story enough in Ocean Avenue, you’ll discover notes for missing persons. Picking them will start the quests. Over time, new quests will spawn, and there are nine to complete. Remember: You need to keep returning to Ocean Avenue to acquire new Missing Person quests. Here’s all of them:
- Missing Person: Laura – The first Missing Person quest has you exploring the police station in Venice Beach. Shoot the fuse through the window to get inside. Look for Laura’s cell door and interact with it, then go to the opposite room to pick up two journals. Look for Police Chief Malloy to the east of the station and kill him to get the key, then open Laura’s cell. You’ll need to fight her (and Emily, who’s also inside) to complete the quest.
- Missing Person: Davis – Go to the Eastern part of Venice Beach and look for some fire and buses. Look for a journal pointing to Davis’s location in The Pier in Santa Monica. Go to the North and look for a hole with a fence – crouch through to find Davis.
- Missing Person: Jamal – Go to Halperin Hotel, and follow the red marker downstairs. It will take you to an area outside where you must collect journals from two huts, which provides a new marker to the east of the hotel with several zombies. Jamal is also here, turned into a zombie – kill him, get the key, then use it on the box in his pickup truck.
- Missing Person: Pablo – Go to Venice Beach and travel west till you find a tattoo parlor. Travel south until you find a store called “Muscle Beach Nutrition.” The entrance is blocked, so you need a circuit breaker from Venice Autos behind the shop, throw it into the fenced area and then connect it to the circuit box to open the shutters. Next, you must go to “Gang Green” to the North. Get inside while taking care of the shotgun traps and find the journal to complete this.
- Missing Person: Greg – In Ocean Avenue, follow the waypoints to a garage and crouch to get under the door. Destroy the boxes blocking the door, and press the button to open the elevator door, where you must drop down. You’ll eventually come to a garage underground where Greg is talking. Wait till he’s done and use the circuit breaker and carry it to the circuit box near the workbench at the end of the hall to open the shutter. Return to Greg and kill the zombies that attack. Once you return to Greg, he’ll run away and get attacked by a zombie, ending the quest.
- Missing Person: Shane – Go to Venice Beach and follow the objective marker south to a hut. You’ll find a journal – the next stop is a lifeguard hut 18 to the North. Kill the zombies and pick up the journal entry that drops. Go to The Pier next and then to the Lifeguard HQ – take the south exit and defeat TJ The Lifeguard. Pick up the dropped journal to finish this quest.
- Missing Person: Nadia – This quest takes you to The Metro, follow the markers to a locked door and a map. It has the locations of four digits – obtaining all of these will open the door leading to Nadia. Unfortunately, she’s turned into a Screamer, so defeat her and go inside. Pick up the journals and loot the stash to finish the quest.
- Missing Person: Steve – Go to Monarch Studios and follow the markers to Studio 3. Get the journal on the bed and then go to the kitchen to find soap, a box on the floor and a phone. Now go to Studio 7 and look for a trailer. Shoot the explosive sacks near it and go inside to find another journal. Next up, go to Beverly Hills and follow the marker to Steve. Speak to him, and he’ll ask to bring three named zombies (without killing them). These are The Villain, a Butcher; The Hero, a Fireman Zombie. All of them are around Steve’s location, so explore around. Bring them back one at a time and kill them only when Steve tells you to. Talk to him to finish the quest.
- Missing Person: Rainier – This Missing Person quest only unlocks after finishing the previous ones and the main story. Go to Ocean Avenue and travel North East to the lab. Defeat a Fire Slobber and pick up the dropped journal. Go to Hollywood Boulevard and The Metro, following the markers to a door. Kill the zombies and talk to Rainier through the door. Look for a room with a workbench, pick up the journal and go down a floor – acquire the Utility Closet Key. Go back to Rainier and let him out. Unfortunately, he’s become a Burster and dies, which finishes the quest.
Jumbo Keyring
Requires unlocking 10 Lockboxes. A Lockbox is found in main quests, side quests and Lost and Found quests. During these quests, look for a named zombie and kill them to acquire a key. Look around for the Lockbox and open it, which marks other Lockboxes on the map. You can also look out for any named zombies in the world and use their keys on Lockboxes – don’t worry about checking every nook and cranny of every area.
Bookworm
Requires you to collect 50 Journals. About 22 drop from the main quests, while 39 are from side quests and 51 from Lost and Found Quests. Complete the main story, and do any side content to complete this naturally.
Stacking the Deck
Skill Cards drop from slain foes, as quest rewards and leveling up. Unlocking this Achievement/Trophy involves collecting 30 Skill Cards. Not a tough task – play through the story, and you should have more than enough Skill Cards by the time it’s done.
Humanity Distilled
This requires equipping your first Numen Skill Card, received in the main quest, “The Search for Truth.” It can’t be missed, so play through the story to get it.
Max Headroom
Hit level 30, which is the level cap. Play through the main quest first since that will give the most XP. Afterwards, you can return to previous areas and undertake side quests, Lost and Found quests and whatnot, slaying any zombies you come across to hit the max level without any need for farming.
Down with the Sickness
Equip Autophage Skills to reach the max tier of infection. After the main quest, “The Search for Truth,” your Autophage level is displayed next to the other cards in the Skills menu with three levels. Autophage Skill Cards will likely drop (denoted by a skull) before this, and each one adds a level to the meter. Equip three Autophage Cards to unlock this Trophy/Achievement.
Anger Management
Using Fury Mode, slay 50 zombies. Fury Mode becomes available after the main quest, “The Final Gauntlet.” Once it becomes available, go to a place with enough weak zombies and press L3+R3 or LS+RS to enter Fury Mode and tear zombies apart.
This is My Weapon
To unlock this Achievement/Trophy, you must fully upgrade a Superior weapon and customize it with mods and perks in every slot. Purchase a Superior weapon from a vendor and then go to a workbench. Fill all three slots with mods – rarity doesn’t matter – to get this.
Not Even My Final Form
You get this by killing a Mutator before it transforms. Mutators are identified by their lack of shirts and transforming into hulking monsters when alerted. First, go to The Metro – there’s a Mutator Hotspot after the main story is complete. Sneak around with a rifle and locate a Mutator. Shoot its head before it fully transforms. There should be enough time to do this. If you fail, fast-travel to a nearby point and return to try again.
Hazardous Materials
The main elemental types of damage in Dead Island 2 are Caustic, Fire and Electricity. For this Trophy/Achievement, you must kill 100 zombies with any of the three. Modifying weapons at a crafting bench to deal elemental damage; setting off environmental hazards, like electrifying water; or using curveballs like Molotov Cocktails and Electric Stars will get the job done quickly.
Break a Leg
You need to maim 100 limbs to earn this Trophy/Achievement. “Maim” is just a fancier term for dismemberment. Pick up a katana or similar sharp weapon and go to town on zombies, aiming specifically for their limbs to unlock this.
Slayer Squad
You must play online with others to get this Trophy/Achievement. It involves completing five quests in co-op. From the Title Screen, press Right on the D-Pad after hitting Continue to set the lobby to Public or Friends Only. Public is for random matchmaking, and all quests apply for progression.
I Am the Resurrection
Requires reviving other players five times. It’s another co-op-only Trophy/Achievement, but also pretty easy to earn. Have the other players in your group get knocked down by a zombie and then revive. Take turns doing this, and the whole party will get the unlock.
Coup de Grâce
Kill 25 zombies with finishers. These are the Square/X button prompts that you get when a zombie is weak. You’ll earn this naturally through the story, but it’s possible to kick a zombie and eventually cause them to fall over for a finisher.
Perks of the Job
You must complete five Blueprint Challenges for this, but they won’t track until you finish the main quest, “The Giant-Slayer.” Here are all the conditions for completing them.
- Contagious – Use 100 Heavy Attacks on Zombies.
- Infectious – Cause zombies to bleed 50 times. Weapons like the Bodycount will work, but you can also attach a mod to inflict Bleed status.
- Leechblade – Use melee weapons to defeat 100 zombies.
- Shockwave – Perform 100 Knockdowns on zombies, done by draining their stamina with melee attacks, using dropkicks or pressing R3 to kick them until they drop.
- Static Charge – Electrify zombies 50 times. Using a weapon with an Electric mod or the Electric Star curveball makes this easy.
- Vampire – Once “The Giant-Slayer” main quest is complete, zombie parts will start dropping (the same needed for the Body Art side quest chain). You need 200 of them to complete this.
Donk!
This Trophy/Achievement is very straightforward. Throw a melee weapon to hit a Zombie more than 35 meters away. You can do this with any Slayer – make sure you choose a slow enough target and rely on light weapons like knives.
Apex Predator
Slay 10 Apex variant zombies to unlock this. Check the requirements for the Zombologist Trophy above for their locations.
I Got a Zombie Army, and You Can’t Harm Me
Unlocked by performing 25 Perfect Defenses. You can do this by hitting L1/LB to dodge or block before a zombie strikes. Look for weaker zombies, measure their timing, and dodge or block at the last second, then repeat.
Dead Island 2 is available for Xbox One, Xbox Series X/S, PS4, PS5 and PC. Check out our official review here. You can also check out the various boss fights and how to beat them here.


