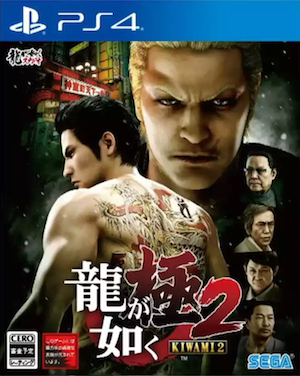
Yakuza Kiwami 2 is a remake of the original Yakuza 2 which had released back in 2006, so it’s a great time to experience the game all over again, or even for the first time. There are a lot of unique aspects in the Yakuza games, so if you would like to know any information about the game at all, this guide is here to help you out.
If you’re ready, then let’s get started!
GENERAL TIPS AND TRICKS
Don’t Ignore Your Base Stats
When you earn experience points, there will be a lot of different things vying for your attention. While it’s important to invest in new skills or heat actions, you should also remember to invest in your base stats such as defense, attack, and the rest. These stats are very important and they should be upgraded regularly unless you want to handicap yourself in the game.
Unlock The Substory Finder
There are a lot of substories in the game, but they’re quite easy to miss if you don’t know where to look. This is why it’s essential to unlock the ‘Substory Finder’ ability as soon as you can, as it will allow you to find various substories and earn rewards for completing them.
Play The Clan Creator Minigame
There are a lot of minigames in Yakuza Kiwami 2 that will be vying for your attention, but out of all them, the Clan Creator is particularly important. This is because it grants good rewards and a decent amount of experience as well. Furthermore, there is even some story content related to the minigame, so make sure you check it out.
Gain Access To Kamiyama Works
You will come across a substory called ‘A Pervy Peddler’ in the early sections of the game, and once you finish this substory, you will gain access to Kamiyama Works. This place will allow you to repair weapons, so make use of it to keep those weapons you like from breaking.
Keep Kiryu Well Equipped
While the melee combat in the game is useful by itself, you can get even more powerful by making use of equipment. You can buy equipment and you can also just pick them up from random places. Kiryu can equip three items at once, so ensure that you make use of this to get the best out of him in combat.
HOW TO FARM EXPERIENCE POINTS
Experience points are needed so as to improve your stats and also to learn useful new abilities. There are a number of ways to earn experience points including playing minigames, finishing main story missions and substories, eating food, and through combat. However, out of all of these, the best way to earn experience points is to just eat as much food as possible. In fact, there are some abilities that will ensure that you maximize the amount of experience you gain and these are: Boost EXP Gain, Boost Hunger Gauge, and Boost Digestion.
Once you get these abilities, try and get your hands on the item called AppStim RX which allows you to eat more food. With this item in hand, just go around and eat food as much as possible to earn a lot of experience points. This is the best way to farm experience points in the game.
HOW TO FARM MONEY
Initially before you get the relevant skills to farm money, you can make use of some items that will increase the amount of gold you earn from fights. The two items you should keep at hand are: Sengoku Coffee, and BOSS Light Sugar. Buy as much of these as you can but keep in mind that their effects do not stack. Once youve earned enough experience points to unlock some skills, get the ‘Law of Attraction’ skill which will make Nouveau Riche thugs randomly spawn at places and you can get about 50,000 bucks each from beating one of them. Another skill to get is ‘Token of Appreciation’ which will get you more items and money from combat.
The best way to earn cash early on in the game is to gamble but before you do so, you’ll have to get some items ready. These items are in Sotenbori Coin Lockers E3 and E4, and so you’ll have to find the required keys. You can get the E3 key just west of Don Quixote’s northern entrance, and you can get the Blackjack Amulet from the E3 Locker. What the Blackjack Amulet does is that it ensures you get nothing but Blackjacks for a short while. As for the E4 key, go to East Shofukucho Street and take a look in front of the information booth there, and you can get the Bust Amulet in the E4 Coin Locker. The Bust Amulet when active will make the dealer go bust every time for a short duration.
Now that you have the items. just activate one at a time and then max out your bets. Once one item’s effect wears off, repeat the process with the other and once that one’s used as well, just take the chips and exchange them for plates with the cashier. You can then sell these plates at the pawn shop for a lot of money. With this method, you now have a way to always earn lots of money whenever it’s needed.
ALL BOSS BATTLES
There are a number of boss battles in the game and some of these can be fairly challenging. You can find below a list of all the bosses you can find in the game along with videos that show you how to beat each of them.
Goda Ryuji
Di Scuva
Gary Buster Holmes
Goro Majima
Mysterious Foreigners
Hiroshi Hayashi
Go-Ryu Clan
Koji Shindo
Jingweon Mafia Members
Feral Tigers
Kurahashi
Goda Ryuji
Daejin Kim
Goda Ryuji (Again)
Apart from the boss fights in the main story, there are also some boss fights in Majima Goro’s story scenario. You can find each of these boss battles below.
Ryota Kawamura
Kei Ibuchi
HOW TO SELL ITEMS
Unlike normal RPGs, you can’t just sell items in the same stores where you buy stuff. To sell items in this game, you will have to go to a Pawn Shop and there are two such shops in the game. For the Kamurocho Pawn Shop, you can find it in an alley next to Nakamichi Street. As for the Sotenbori Pawn Shop, you can find it in Eastern Shofukucho.
ALL COIN LOCKER KEYS’ LOCATIONS
There are a lot of different Coin Lockers in the game and these hold some very valuable treasures. To get these rewards, you will first have to find the keys so as to be able to open the Coin Lockers. You can find below the locations of all the keys to open the Coin Lockers. You can use the images provided for reference.
Coin Locker Keys In Kamurocho
- Key No. A1: This key is available in chapter 5 and can be found in the alley just past the drinks machine. The item you get in the locker is a Switchblade.
- Key No. A2: Available at chapter 5 on the floor just outside the Bar Oasis. The locker reward for this key is Insecticide.
- Key No. A3: This key is available at chapter 5 just in the alley which goes into the empty lot. The reward you get with this key is Staminan Royale.
- Key No. A4: Available at chapter 5 and can be found behind a sign just towards the end of the road. The reward from this coin locker is a Silver Plate.
- Key No. A5: You can find the key nearby the blue vehicle in the area with stones. The reward is a Platinum Plate.
- Key No. B1: This is available at chapter 6 by completing the substory no. 16 and getting access to the secret stash. You find a Suspicious Video in this locker.
- Key No. B2: This is available at chapter 5 and you can find it just behind Serena’s in an alley. The reward is Toughness ZZ.
- Key No. B3: Available at chapter 5. Keep climbing the stairs that lead to the game shop but keep climbing up and you will then find it on the floor. The locker holds Sengoku Armor.
- Key No. B4: Available at chapter 5. You can find it just to the South of Club Sega in an alley. The reward is an iron pipe.
- Key No. B5: Available at chapter 5. Go into the alley and you can find it on the floor. The reward is a 100lb bowling ball.
- Key No. C1: You can find this during Substory No. 9 under a bench in the park. The reward is a Green Box.
- Key No. C2: Available at chapter 5. You can find it just outside the Millennium Towers at the bottom of the stairs. The reward is Staminan X.
- Key No. C3: Available at chapter 5. You can find it on the floor just outside the Chinemales. The reward is a Silver Plate.
- Key No. C4: Available at chapter 5. You can find the key next to a bike inside the park. The reward is a Bronze Plate.
- Key No. C5: This is available at chapter 5 and you can find it nearby the drinks machines on the floor. The reward is a Lamp Stand.
- Key No. D1: Available at chapter 5. You should be able to spot a standing green sign near a shop’s entrance and the key can be found there. The reward is Trips Yokan.
- Key No. D2: Available at chapter 5. It can be found behind a moped in the Champion District Alleyways’ lower left corner. The reward is a Crowbar.
- Key No. D3: Available at chapter 5. You can find the key inside the park and near the swings. It will be on the floor. The reward is Toughness Light.
- Key No. D4: Found in chapter 5. Take a right just as you enter Majima Construction and you will find the key behind the trash bags. The reward is a 10-10-1 Charm.
- Key No. D5: This can be found in chapter 8. Once you are able to get inside the Millennium Towers, just use the left entrance and go straight and you will find the key. The reward is Tauriner++.
- Key No. E1: Found in chapter 5 just outside the entrance to the Millennium Towers. The reward is a Strength Tome.
- Key No. E2: Available at chapter 5. You can find this key near the metal box in the corner of the parking lot. The reward is a Shotgun.
- Key No. E3: Found in chapter 1. You can find the key outside the Mahjong place on the floor on Tenkaichi Street. The reward is a Locker Key Watcher.
- Key No. E4: Available at chapter 5. You can find it in the small space between two buildings nearby a blue trash can. The reward is Tauriner Maximum.
- Key No. E5: Available at chapter 5. You can find it in the corner of the parking lot on the floor. The reward is Tonfa.
- Key No. F1: Available at chapter 5. You can find it in the corner of an alley behind a building. The reward is a Platinum Plate.
- Key No. F2: Available at chapter 8. Go inside the Millennium Towers and then jump down and use the escalators to get to the other side. You can find the key on the floor right above you. The reward is Staminan Royale.
- Key No. F3: Available at chapter 5. You can find it in front of the car on the floor. The reward is a Gold Plate.
- Key No. F4: Available at chapter 5. You can find it in the same alleys where you found the F1 key. The reward is a Traffic Wand.
- Key No. F5: There will be stairs at the back of the batting center. Use it to get to the roof and you will find the key there. The reward is Modded Iron.
- Key No. G1: Available at chapter 5. You can find it next to the taxi on the floor. The reward you can access with the key is a Bronze Plate.
- Key No. G2: This can be found from chapter 5 onward. You can find it in the middle of the square on the floor. The reward for it is a Rough Waistband.
- Key No. G3: This can be found from chapter 5 onward. You can find it between the last group of bikes at the end of the road. The reward is an Iron Club.
- Key No. G4: Available from chapter 5 onward. You can find it in the alley just opposite to Serena’s. The reward for this is a Silver Plate.
- Key No. G5: Available from chapter 5 onward. You can find it inside a store and you should look for the flashing one with purple banners. The reward is a Royal Joker Card.
- Key No. H1: Available from chapter 5 onward.. Just go into the hall past the coin lockers and you will be able to find the key there. The reward is Staminan XX.
- Key No. H2: Available from chapter 5 onward. You can find it on the side of the road next to a homeless person’s shelter. The reward is a Fighters Binding.
- Key No. H3: Available from chapter 5 onward. Go up the stairs into the game shop and you can find it on the 3/2 landing. The reward is a Light Belt.
- Key No. H4: Available from chapter 5 onward. You can find it nearby the taxi at the end of the road. The reward is a Toughness Z.
- Key No. H5: Available from chapter 5 onward. You can find it the North East parts of the city at the toilets. The reward is Lucky Hanafuda Card.
- Key No. I5. Available from chapter 5 onward. This key can be found on the ground near elevators. Your reward is Toughness Infinity.
- Key No. I2. Available from chapter 5 onward. This key can be found on the floor near Majima of Majima Construction. The resultant reward is a Blackjack Amulet.
- Key No. I3. This key can be found in Chapter 5, in the alleys on the floor. And you reward will be a Salt Shaker.
- Key No. I4. This key can be found after Chapter 5, past the Coin Lockers, into the hall with the Food Shop. Your reward is a Silver Plate.
- Key No. I5. This key is found only after Chapter 5, in the corner of the stone area, near the seats. Your reward is an Insulated Shirt.
- Key No. J1. This key can be found after Chapter 5, inside a store, just enter the one with lights on and purple banners and your reward will be a leather bracelet.
- Key No. J2. This key can be found only after Chapter 5, head into Majima Constructions. It’s near the stairs to the arena and your reward will be a Bust Amulet.
- Key No. J3. This key can be found only after Chapter 5. Be sure to check the floor in the walkway. The reward will be Tauriner Maximum.
- Key No. J4. This key can be found only after Chapter 5. This key can be found in the same underground area where Substory No 22: To The Dragon Palace ends. Your reward will be a Crutch.
- Key No. J5: This key can be found only after Chapter 5. Make sure to go and search inside the store with the pictures of the girls on the walls if you want the reward which is a Charm Tome. Appropriate, isn’t it?
Coin Locker Keys In Sotenbori
- Key No A1: This key can be found only after Chapter 2; go down the ramp area, under the bridge to locate it. The reward is Staminan XX.
- Key No A2: This key can be found only after Chapter 2, near the beverages machines. You reward for finding it is a Bronze Plate.
- Key No A3: This key can be found only after Chapter 2. To find it go up a small stairwell, it is upstairs near a desk. Your reward will be an Illusory Tonfa.
- Key No A4: This key can be found after Chapter 2. This key is found near the Andromeda sign, next to Cassiopeia. Your reward will be a set of Pliers.
- Key No A5: This key can be found after Chapter 2. To find it just follow the alleyway till the end. Your reward will be a Royal Joker Card.
- Key No B1: This key can be found after Chapter 2, under the bridge at the end of the walkway. Your reward for finding it will be Antique Pistols.
- Key No B2: Found after Chapter 2, this key is near the water bank, close to the restaurant. Your reward will be Trips Yokan.
- Key No B3: Found after Chapter 2, near the water bank, on the floor. Your reward will be Metal Gloves.
- Key No B4: Found after Chapter 2, on the floor below 6 small boards. Your reward will be a Black Belt.
- Key no B5: Found after Chapter 2, ascend the stairs near the games building. Your reward will be a Silver Plate.
- Key No C1: Found after Chapter 2, look carefully at the blue doormat of a doorway. Your reward will be another Silver Plate.
- Key No C2: Found after Chapter 2, look through the back part of a parking lot, near a white car. Your reward will be an Agility Tome.
- Key No C3: Found after Chapter 2, it is on the floor next to the Masked Barker. Your reward will be a Techniques Tome.
- Key No C4: Found after Chapter 2, it’s waiting for you in the middle of the road. Your reward will be Technique ZZ.
- Key No C5: Found after Chapter 2, on the ground outside the Sun Shine Club. Your reward will be a Fluted Pole.
- Key No D1: Found after Chapter 2, amongst some bikes. Your reward will be AppStim RX.
- Key No D2: Found after Chapter 2, near the water bank. Your reward will be a Sacrifice Stone.
- Key No D3: Found after Chapter 2, enter office through stairs and find the key inside. Your reward will be Toughness ZZ.
- Key No D4: Found after Chapter 2, just descend the stairs next to the big windows. Your reward will be Tauriner Maximum.
- Key No D5: Found after Chapter 2, just outside Casiopea. Your reward will be a Baseball.
- Key No E1: Found after Chapter 2, opposite the Kukuru Store. Your reward will be Staminan XX.
- Key No E2: Found after Chapter 2, halfway through the Iwao Bridge. Your reward will be AppStim Half.
- Key No E3: Found after Chapter 2, close to the G1, beside a group of planters. Your reward will be a Blackjack Amulet.
- Key No E4: Found after Chapter 2, on the ground beside a flashing sign. Your reward will be a Bust Amulet.
- Key No E5: Found after Chapter 2, in the alleyway, past the stairwell. Your reward will be a 10-10-1 charm.
- Key No F1: Found after Chapter 2, under the bridge, descend the stairs. Your reward will be an Oak Wood Katana.
- Key No F2: Found after Chapter 2, next to the elevators, inside a building. Your reward will be a Butchers Knife.
- Key No F3: Found after Chapter 2, this is another key to be found on the stairs under the bridge. Your reward will be Tauriner Maximum.
- Key No F4: Found after Chapter 2, ascend the stairs near the football goal, Your reward will be an Electric Pot.
- Key No F5: Found after Chapter 2, descend a stairwell to find it. Your reward will be Toughness ZZ.
- Key No G1: Found after Chapter 2, near some garbage bins next to the D2. Your reward will be a Gold Plate.
- Key No G2: Found after Chapter 2, just before the trash cans near the toilets. Your reward will be Staminan Spark.
- Key No G3: Found after Chapter 2, halfway through the walkway, near some seats. Your reward will be Staminan Royale.
- Key No G4: Found after Chapter 2, near the boat docking of the water banks. Your reward will be Toughness Z.
- Key No G5: Found after Chapter 2, in the bottom of the stairs by the bridge. Your reward will be a Special Police Baton.
- Key No H1: Found after Chapter 2, behind a row of shrubbery, close to the entrance. Your reward will be Staminan X.
- Key No H2: Found after Chapter 2, head towards the store and look on the ground. Your reward will be a Blood Caked Chain Mail.
- Key No H3: Found after Chapter 2, down the stairs next to the entrance to Le Miel. Your reward will be Tauriner Maximum.
- Key No H4: Found after Chapter 2, near some garbage bins by the waterside. Your reward will be a Modded Burner.
- Key No H5: Found after Chapter 2, on the ground just before the red barrier. Your reward will be Toughness ZZ.
- Key No I1: Found after Chapter 2, next to the food store and up the stairs. Your reward will be Staminan X.
- Key No I2: Found after Chapter 2, near the entrance, take the stairs and go past the F5 key. Your reward will be a Chinese Saber.
- Key No I3: Found after Chapter 2, in the middle of Club SEGA and the jewellery store. Your reward will be Toughness Light.
- Key No I4: Found after Chapter 2, look for a closed garage near the waterside. Your reward will be Toughness Infinity.
- Key No I5: Found after Chapter 2, on the ground floor of a building, near the entrance to the games area. Your reward will be a Lucky Hanafuda Card.
- Key No J1: Found after Chapter 2, bottom of stairs near some trash cans. Your reward will be a Modded Stove.
- Key No J2: Found after Chapter 2, opposite the toilets under some seats. Your reward will be a Military Grade Bulletproof Vest.
- Key No J3: Found after Chapter 2, near the rear wheel of a parked car. Your reward will be a Spirit Tome.
- Key No J4: Found after Chapter 2, if you complete Substory No 47: Stolen. Your reward will be a Platinum Plate.
- Key No J5: Found after Chapter 2, at the bottom of some stairs near a red coloured car. Your reward will be Toughness Infinity.
CLAN CREATOR GUIDE
The Clan Creator minigame is back in Yakuza Kiwami 2 (it was present in Yakuza 6) and it’s one of the more rewarding minigames for you to spend your time with. This feature will become available in the game once you reach the fifth chapter. This section will tell you all you need to know about how Clan Creator works. There is also an online component to the Clan Creator in the form of Limited Missions, and at the end of the online missions, the results for the top 10 players.
Getting a higher rating after a match will yield better rewards. The rating is dependent on things like how long it took to defeat enemies, how much money you saved, and more. In the Clan Creator, players will have to organize their troops by selecting some employees. You should make sure you select employees that are going to be useful for a particular mission before you begin a match. You can also recruit more employees and strengthen existing employees and equipment.
You will be able to recruit new employees by completing side-missions and simply by finding random NPCs around the game’s world. In a match, you will control nine characters and your goal is to defend your facilities from the enemies. You should notice where the facilities are shown on the map as this is the key to winning the game. Pay attention to enemy patterns and try and react to these with clever tactics. If an employee is losing strength, you can raise their morale by spending some money, but keep in mind that this will reduce your overall score. You will have to move your characters around the map to engage in battles and also to pick up valuable item drops here and there.
While there are some special enemies such as bosses whom you will have to fight occasionally, these are the main kinds of enemy fights you will encounter: Brawlers, Gunmen with ranged attacks, Bombers who can throw bombs, Batters who go straight for your facilities, Strongman enemies who are slow and engage in melee combat, Rocket Launchers who also go straight for equipment/ facilities but from a distance by firing rockets.
As for the kinds of employees you will have at your disposal, they are of four types: Balanced employees who has attack and defense balanced, Attack type employees who focuses on attack, Defense type employees who has greater defense, and Protection type employees who fight from a range and can also move quickly through the map. Make sure you use the unique capabilities of each of these employee types to get the best results in battle.

